| Book |
Page |
Context |
 |
 |
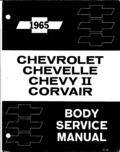
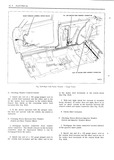
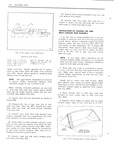
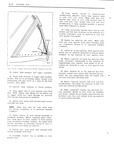
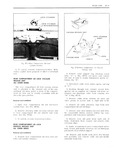
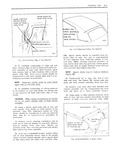
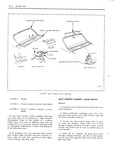
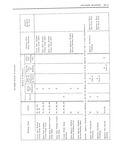
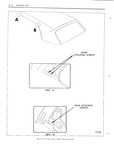
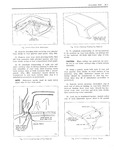
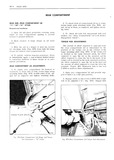
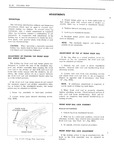
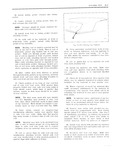
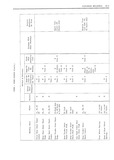
FOLDING TOP 21 21 r 1 g 2 I yy U Qt 1 w i nl V V iffiiw rw I Q I 21 ...
l1111Y 101 each trim stir bnlt zipper Lxpe ut upper edge 111 vinyl F1 21 11 4 8 I r k nylr n webbinu tw rear trim stink Fit 15 Reiiwye biacrk FLl1 |
|
 |
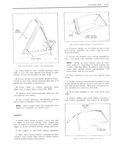
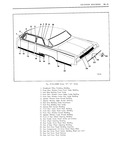
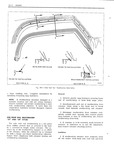
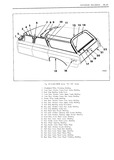
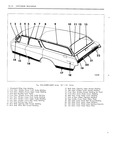
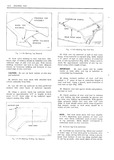
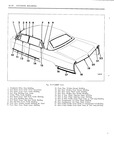
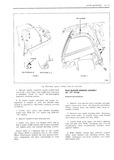
EXTERIOR MOLDINGS IK 21 1 2 3 4 5 6 7 II 4 l 1 1 rrr 6 i e F 09 2 P 8 9 21 1 11 2 12 20 13 ximm ...
Front Peak Molding 20 Rear Compartment Lid Outer Panel Molding 10 Front Door Outer Panel Lower Molding 21 Rear Compartment Lid Outer Panel Name Plate ll Front Door Outer Panel Rear Peak Molding |
|
 |
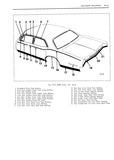
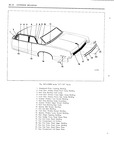
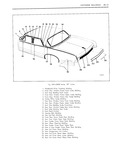
EXTERIOR MOLDINGS 2K 21 ...
rrrr V rr 7 39 I7 18 19 V T l l 9 20 21 28 22 23 V 27 24 25 26 1603 Fig 2l l2 33000 Series 55 65 Styles 1 Windshield Pillar ...
Front Scalp 20 Rear Door Outer Panel pecl Molding 4 Front Door Window Franre Upper Scalp Molding 21 Rear Door Outer Panel Lower Molding 5 Front Door lr r inda v Frame Pear Scalp Molding |
|
 |
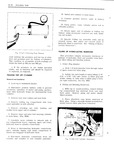
open or short circuit in the harness between the A control switch und motor connector See Fig 21 10 2 If the motor operates with the jumper wire but does not operate with the switch ...
Ubmmge wm le mg Cr 2 Insert one end of 21 12 gauge jumer wire in the switch feed terminal and the other end in one of 2 Insert one end of a 12 gauge |
|
 |
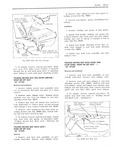
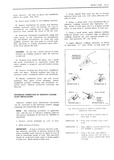
quarter arm rest founda Front Cross Over Harness this harness is tion on convertible styles See Fig 21 2 and under installed beneath the instrument panel and com the rear seat cushion ...
styles hee pletes the circuit from the right door to the left 21 4 door windows See Figure 2L1 A Rear door window harness The left and right rear door harness connects to the main |
|
 |
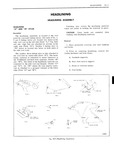
uunmr nuiir naw F 7 1jj j P 11 21 11111 1 11 11 11A1 Dm I m N 1 UP 11 Aavcnww wmv siwrr ...
21 A1A 1 nnsan w1N 011 w 11c11 |
|
 |
Four Way 2I 18 Bucket Seat Manual 2H8 I Iandle Door Outside 2DG C Handle Door Inside 21 72 Headlining 2G Catch Clips Folding Top 2138 Hinge Door Front 2DlO Cleaning Trim IA Hinge Rear ...
Moldings 13000 Series ZF4 Finishing Lace Pinchweld 2123 Moldings 23000 Series i 2K12 Folding Rear Seat 21 114 Moldings 33000 Series 21419 Folding Top Adjustments 2124 Moldings 43 44000 Serie 2K27 |
|
 |
21 20 19 1 oO A Fig 2l 10 33000 Series 27 37 Styles 1 Windshield Pillar Finishing Molding 2 Front Door Window Frame Front Scalp Molding 3 Roof Drip Molding Front Scalp 4 Front ...
Panel Peak Molding 19 Roar of Rear Wheel Opening Molding 20 Rear End Outer Panel Molding Assembly 21 Rear Conrpartrnent Lid Ourer Panel Nome Plate 22 Rear End Outer Panel Center Molding Right and Lefrl |
|
 |
21 27 22 26 W 23 24 25 UM le Fig 1l 3 l5000 16000 Series 35 45 Styles 1 Wirrdelrield Pillar Drip Molding 17 Rear Door Outer Panel Peak Molding 2 Front Door Window ...
Front Saalp 20 Rear Fender Outer Panel Lover Moldin Rear Door lMndow Frame Upper Scalp Molding 21 Rear Fender Outer Panel Name Plate 9 2 Rear Dolor lrlhnclow Frame Rear Scalp Molding 22 Rear |
|
 |
Windshield Short Method ZC3 S93 Rem Folding 2 14 Wiring Four Way Tilt Seat 21 14 Seat Wiring Four Way Tilt 2Ll4 xvtrmgi Tail Gate Window 21 10 side and Front skyngm 21212 m Wmdows |
|
 |
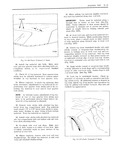
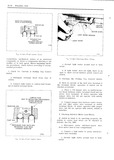
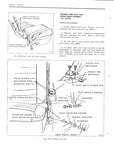
21 4 FOLDING TOP 22 Remove back curtain assembly front rear and rear quarter trim sticks 23 Remove side stay pads Stay pads are at yl tached to front root rail and front and rear ...
when step 6 of in WEBBWG MAw Ryit Ioptelnta stallation procedure is performed END OF WM STICK 21 Remove right and left nylon webbing from rear trim Stick |
|
 |
FOLDING TOP Il 21 BACK WINDOW AND EXTENSIONS ALL SERIES BACK WINDOW AND EXTENSION REp ACEMENT guide when installing top material to tl 1111 sticks INCLUDES TRANSFER OF ZIPPER TO after new back curtain ...
2i2I Iitftcitit 21 G ZI E SEEQE inner vertical edee of old top material to back b iz curtain assembly at rear trim stick location mark Shu uhm Dmcechlre is pg mlmu back curtain material |
|
 |
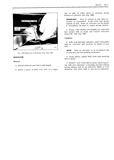
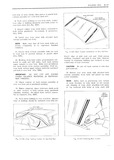
LUBRIPLATE 21 wl a F r llil I i I lll 7 i LUBRIPLATE II U nf It M i 1 t K I i7 SECTION AVA r nom snoes OF ouvoe I Ayiq ...
remove l l t c As TANK musk 000R E www V TAIL GATE HINGES Apply 21 sparing amount of dripless oil to fric STATION WAGON STYLES tional points of door hinge Work door several |
|
 |
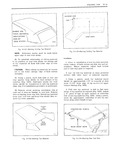
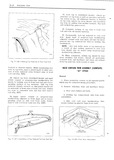
21 8 FOLDING TOP I mark the iipprnzqiniiite centerline nl new tnp 11111 1 t terinl ulrinu entire lr qinth ny I 7 FOLDING l J N row 4 ssemutv IMPORTANT Be sure rnnrk will ...
espIi nrlt 1 1 nter curtain Asseiiibly from lJI rlji line on renr roof bow 21 Ldv nut new trip msiterilil un 1emiprI ter ted 27 R H1I I P W13 U i111 l11H |
|
 |
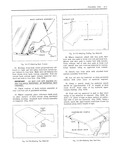
21 22 FOLDING TOP 18 Usinu nitrile cement or neoprene type weatherstrip adhesive fasten rear quarter flaps to side roof rear rails Make sure that rear w l quarter flap seam is even with forward ...
trim stick attaching bolts Et are completely driven in to represent finished 1 rendition 1 1 A 21 Check fit of top material Rear quarter trim 1 TACK5 sticks may be adjusted downward to remove |
|
 |
between upper rear edge of rear seat back to forward edge of pinch weld finishing molding is 21 1 8 1 l 1G The dimension is meas ured at approximate centerline of body 4 Excessive ...
between upper rear edge of rear seat back to forward edge of pinch weld finishing molding is 21 1 8 1 1 16 The dimension is meas ured at approximate centerline of body |
|
 |
FOLDING TOP 21 15 15 Check position of top trim at rear roof bow and at side roof rear rails With quarter flaps s i rf properly folded over rear side ...
represent fiiiighgd into top compartment well and tighten side and rear condition trim stick attaching bolts 21 Check fit of top material Rear quarter trim 25 R h k Sidi 1 0f Yilil Hips MAKE |
|
 |
111T D 111111 Ve 111i1 11 1r A 1 ml11j1 A l1jLlSt111t 11 IS O11 21 1 1 11111vr u 1 1ss 111111 r 11 11111 211111 ve11 111 11 l ETf11111 1 111111 1i111m ...
11i1j11 1111 111 111 111e 111111 111 11 1111 1 111111 As 1 xp1 1i11 1i1 111111 21 128 L1114L 1 F1 1 1111 D 1 11 W11111 1w 111111 1 P1111 |
|
 |
11bl1 I1 1 1111 1i 1111pl111g svc 1111 111 11112 1111111 p11s1 111 111 D 111 F1g 21 13 Rc1111 1v1 cable |
|
 |
FOLDING TOP 51 23 21 After desired it of top material has been ob rails and reinstall weatherstrips tained install trim sticks with attached top material into tap compartment well and tighten side 23 When |
|
 |
condition areas on side roof front rails Fasten flaps to side roof front rails See Fig 5125 21 Check fit of top material Rear quarter trim sticks may be adjusted downward to remove minor |
|
 |
Dssgmblw 2 Lay out new top material on clean protected surface with outer layer of material exposed 21 Using a pencil mark both ends of rear and rear quarter trim sticks on vinyl surface |
|
 |
lgPQ A VlgFl ll l 21 Using a pencil mark top material mark should be approximately l 2 in length at deck 16 Check contour of back curtain assembly |
|
 |
curtain when step 7 of in W 7 S 11 ti 1 e l iS1 f e 21 Temporarily tie or tape rear bow to rear side roof rails See Figure 518 Detach side stay |
|
 |
slot in drum when replac 1 Extend outboard seat belt to full length ing with new retractor 21 retaining clip that retains spring tension will be on retractor which is to be 2 Insert |
|
 |
holes on both sides of m mc S the side roof rails 2 Prior to removing hE 21 ll1lllKl L remove fol The number three listing wire is also attached to lowing hardware and trim |
|
 |
weatherstrip is being installed trim 3 T 111 1 1 1 111211 1111 21 1 1 1 S 11 1 1 end of Waiiimii ip to form 11 me joint at mn aud install attaching |
|
 |
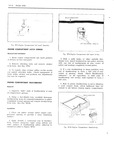
UPPER PEVPAL 4 RIGHTLOWER REVEAL A 4 l K if i k w 7 A w l 21 1 M lr it 1 J GL ASS L V V 1 jj VV L MOLDING |
|
 |
21 9 I I 7 X 5 I QI g J r J I RETAINERINSTALLED PRIOR T0Ir IsTAI I A1I0N 3 IRI PRIOR TO INSTALLATION WEATHERSTRIP INSTALLATION SECTION A A 5Ec1I0N |
|
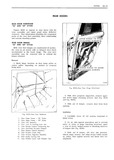 |
DOORS 4D 21 REAR DOORS REAR DOOR HARDWARE i 35 AND 69 STYLES f egg 2 Figure 4D33 is typical of rear doors with the E a ixeg trim assembly and inner panel water deflector |
|
 |
access to door outside handle attaching screws Removal 1 Depress door trim assembly at handle suffi U 21 ISETOVG mIO m i q O Oi1Bg 1lE and ciently to install tool J 7797 between handle |
|
 |
site side Of dash 9 41 3 32 Inner tluwvlded hole in up wr qt 6 21 L 32 Upper outer l10le111l i we1 atta h I tr1 h1n suiiiaee t0 11111ertlire 1ded |
|
 |
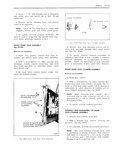
ELECTRICAL 21 11 ii I T 7 7 r T sj 7 7 mam un mmrrskcwu K I Ie T gl s II 7 7 E i Q AE VINI |
|
 |
21 |
|
 |
Rear Wheel Opening Molding 19 Rear Fender Outer Panel Name Plate 20 Tail Gate Window Reveal Molding 21 Tail Gate Outer Panel Belt Molding 22 Tail Gate Outer Panel Upper Molding 23 Tail Gate Outer |
|
 |
YCffffjjVV V l l rrrrr r V r 7 f F i J ee ir i 1 21 I i ii g P at 12 VV i r iii Vr 1 rii KEMANS |
|
 |
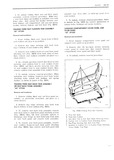
21 38 FOLDING TOP CAUTION Do not attempt to detach lift assem 5 To install manual lift assembly reverse re bly when spring is under tension or compression moval procedure Operate folding top assembly down |
|
 |
motor lead wires can be checked as i follows See Fig 2166 ipRESSURLZED FLULL SEATS BALL 21 Disconnect green switch tn moter wire PREVENTING FLUID FROM from nwtnr lead in rear compartment r ENTERING RESERVOIR |
|
 |
21 30 FOLDING TOP L CK H K W T Avucumc scnaws rz rmcuwam V l W FINISHING Aca rr mmm ROOF naman sow V V RAIL ggm fw fi sacnou |
|
 |
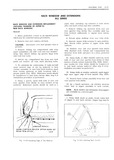
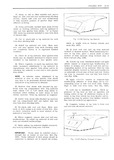
21 28 FOLDING TOP CONDITION APPARENT CAUSE CORRECTION I Sag at front to center side l Control link adjusting plate Adjust control link adjusting plate root rail joint niisaligned downward Fig 2156 2 Center side |
|
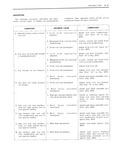 |
FOLDING TOP 21 27 DESCRIPTION The fulliwwilig prm edure describes and illus cunditi i nS7 thei1 Almarent causes and the rem i m trates various types nf folding tup misalignment mended precedure ter their |
|
 |
FOLDING TOP 21 25 7 I K HQOK euucumc sckzws nf x t 4 si L g w jj Tv PINCHVIELD i r musmnc mcs c ji CENTER Bow FRONT ROOF 7 4 V RAIL |
|
 |
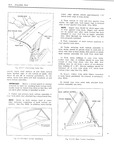
FOLDING TOP 21 23 PINCHWELD FINISHING LACE isl The upper rear pinchweld flange on the front roof PMHWELD rail assembly is covered by a one piece snap on l MCF pinchweld finishing lace |
|
 |
21 18 FOLDING TOP 2 Place new back curtain window assembly on CENTER BOW Qi clean covered work bench with interior vinyl Ek SU1 f C ol back window facing down 3 Caxefully lay removed |
|
 |
21 12 FOLDING mp K 2 r r T 2 A i 2 2 2 x E22 fj r QC ia E r QN 7 5 ity f B gy 2 W ll rrrr rrrrrrr |
|
 |
FOLDING TOP 21 11 FOLDING TOP TRIM LESS BACK CURTAIN 67 STYLES FOLDING TOP TRIM COVER r r Q 2 s r rr nemmn i in If l Place protective covers nn all exposed panels |
|
 |
material See steps 20 should be approximately 1 2 in length at deck and 21 of removal procedure seam 5 I 4 from edge of top material upper valance binding Fig H3g 9 Position |
|
 |
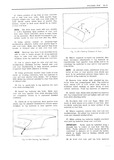
21 16 FOLDING TOP 31 Lock tmp to windshield header Check ap pearance ni trip trim as well wperatiun and lurk ing aetirwn ef trap lf additional tensiim is desired i11 tmp trim unlock |
|
 |
21 5 NOTE Dimvnsiun nut vary 1 1 After buck 54 Pkmn new buck vurtziin win l w nsseinhly nn curtain his hven r niiipiet ljc instgilhad v1 in w vez eci work bench with |
|
 |
21 |
|
 |
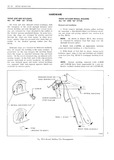
21 2 FOLDING mp 7 v Y A K5 i rf y R J FRONT ATTACHING SCREWS i Y 5 r 7 Hx 9 M 1 W X Q vasw wv REAR Armcr |
|
 |
21 24 SEATS SEAT BELTS FRONT STANDARD SEAT BELTS ALL STYLES Removal amd InsT lI i n l Remove bolt on outboard seat belt anchor plate AVVS nt rocker inner panel and lIll ULlI |
|
 |
perati i n renitive he1 head screws seruring seat cushilin trim tw seat tzushion frame f Fi 21 135 and three screws securing rear edge C uf seat cushion trim tu seat cushion frame then |
|
 |
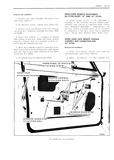
third seat Reniove rear com 1 1 T jj iY Y jii partment left side panel See 21 126 1 V VS 2 Remove seat back linkage tm compartment A 7 4 j r side |
|
 |
SEATS ZH 21 2 Remove outer linkage to se at back panel at PR G VQASHERS V SCREWS taching screws See Fig ZH29 REAR LINKAGE L jL Yw 10 SEM INNER |
|
 |
REAR END 21 7 REAR COMPARTMENT The re 1r z 1 1111p111 tment l11iI Cl1lI 111 S two IIJIYILIH 4 I 1 1 install reverse 1 1 1111 1v 1l pr1 11 e1 I111 |
|
 |
Grind down plunger disci on rod so that disc Wlu ht mm large end of imb9 21 Watertest back window immediately using a cold water spray If any waterleaks are en 16 With caulking |
|
 |
botwnti we m 3 0m d the Opemne center and one each 21 inches from centerline See 5F4 NOTE It is not necessary to clean off all of the old caulking material from the pinchweld |
|
 |
ring retainer securing regulator lift arm to SKYLIGHT WINDOWS pivot pin on window lower sash channel Fig 21 225 for 27 styles ZE24 for 11 styles I1 a waterleak develops in a cured adhesive caulked |
|
 |
21 12 REAR QUARTER HARDWARE FRONT AND SIDE SKYLIGHTS FRONT SKYLIGHT REVEAL MOLDING ALL 55 AND 65 STYLES ALL 55 AND 65 STYLES All front and side skylight reveal mniildings with |
|
 |
DOORS ED 21 3 Insert a 3 16 bolt through hole in hack plate and sector gear and install nut to bolt Dog tighten nut LOCK CYLINDER 4 Remove motor attaching bolts and remove |
|
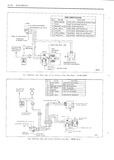 |
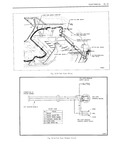
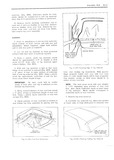
Cmum I5 RED WHITE FEED TO MOTOR IEDRILIFIIIIQIIN nIzEA E Z0 YELLOW FORWARD AND UP Fuss mock 21 LIGHT GREEN VERTICAL SOLENOID M IAN 24 LIGHT BLUE HORIZONTAL SOLENOID II H III H THIS WIRE |
|
 |
giig 8 III 5 Q II 21 QS Il gO I Ks IS r r 7 In E z IT 1 III 7 z 5 5 Q Z III IIII |
|
 |
21 16 20 I9 I7 18 l 6 08 Fig ll 6 25000 26000 Series 35 45 Styles l Windshield Pillar Drip Molding l2 Back Body Opening Upper Reveal Molding 2 Front Door Window Frame |
|
 |
Tape may extend l 4 into openings 19 Install all previously removed moldings and uS5 mb1i S 21 Use mineral spirits kerosene or equivalent to remove back window adhesive caulking material NOTE Normally minor creases |
|
 |
establish relationship nf old top innterial tm its positinn mi rear trim sticks out selvuge 21 Using zi pcimil mark beth ends U1 i q ii and end of tcp material nff flush with lower |
|
 |
vinyl surface ni new trap material See steps 20 Awii N v and 21 nt reinnval procedure Pt sitit 1 1 tmp trim en framework and center assemblv both fere and aft and side |
|
 |
from bOdY rear roof bow Using a pencil mark centerline of rear bow on tape Fig 1120 21 Lay out new top material on clean protected surface with outer layer of material exposed 25 Remove |
|
 |
careful W not to cut lower selvage edge of back curtain 1 assembly l 1 ISIS 21 Using a pencil mark both ends of rear and V EW B rear quarter trim sticks on vinyl |
|
 |
Remove tail gate window assembly l Il lni Spatwri Total Screw tl i j j ggaj 21 Disengage spring clips securing lock connect L T in1 sei I it 1 4 ing rods to remote |
|
 |
rrrr rrrr r valve assembly to cowl panel so e V Y rrrrrr I r r 21 Vrrr L L l L r rr 2 Carefully disconnect vacuum hoses from |
|
 |
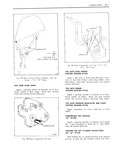
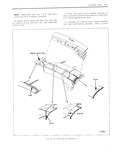
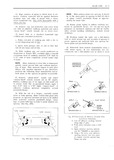
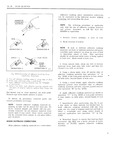
ADJUSTMENT 9 p ego 4 M No C F I X CATCH ASSEMBLY SCREWS T 9 21 Fig TH40 Fomang Seat Back Cntet left seat bark in full up position Place a support under right |
|
 |
Finion Molding 20 Rodr Compartment Lid Outer Ponol Eniolorn 10 Fronr Door Window Reveal Molding or vonl 21 Rear ol Rear Fender Outer Panel or Cornporrrnonr Lid Molding ll Front Door Outer Panel Lower Molding |
|
 |
Molding 19 Rear Fender Outer Panel Nome Plate 20 Rear ot Rear Fender Outer Panel Peak Molding 21 Rear End Outer Panel Molding 22 Rear Compartment Lid Emblem 23 Rear End Outer Panel Upper Molding |
|
 |
center of vinyl surface of new top material See steps 20 and Year mf bew 21 Ul mmoval pl Otedmel NOTE The deck seam mark will vary slightly 9 POSMOH mp trim |
|
 |
leak point and three to four inches on both sides beyond limits of leak 21 Install all previously removed parts and u g remove pmtective coverings T Ininierliately after performing step No G use NOTE |
|
 |
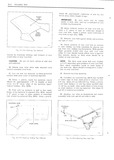
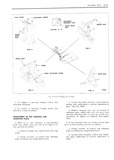
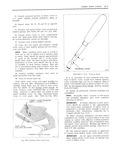
21 Fig 1F4 Rem Compurtntent Lid Hinge and Torqoe Rod Adiostment Styles Fig 4F5 Re r Compartment Lid Torque Rod Adjustments |
|
 |
21 36 FOLDING TOP 10 Install new cylinder to male hinge 11 Connect positive battery cable to battery II terminal g 4 V 12 USUTQQ DOWEI TLTISG Cylinder piston rod to A li extended position |
|
 |
FOLDING TOP 21 35 d Actuate switch to down position If If fluid is low add Delco till Hydraulic tester does not light there is an open or short Fluid GM Hydraulic Brake Fluid Super |
|
 |
FOLDING TOP 21 31 HYDRO LECTRIC SYSTEM The high pressure hydro lectric unit used in the being forced under pressure from disconnected convertible bodies consists of a 12 volt reversible lines and causing damage |
|
 |
front corners raise cemented edge of cover and using scissors or sharp knife cut radius so roof 21 Install all previously removed moldings and panel moldings cover out edge Recement fabric 3SS9mbh S cover |
|
 |
21 24 FOLDING TOP ADJUSTMENTS DESCRIPTION 3 Rotate wedge plate up or down sufficiently so that wedge plate will contact side of striker as lll I t Y V The following information outlines and illustrates |
|
 |
FOLDING TOP 21 19 bolt hole in trim sticks1 then pierce or punch biirk YYY REAR ROOF BOW curtain assr mblis for s 1ui li trim stick bolt i FOLD EXCESS 4 MAmz Ai nwzwkau |
|
 |
FOLDING TOP 21 13 material Fig 2130 RE 1 1 E l C marks for t 1l1l sticks sl1Ii nl l he translerred ti new tnp D Ll1 l lfL1 when step 8 wl inst |
|
 |
21 10 FOLDING TOP 7 j surt ar e of trim material along forward edge of frmit rl of rail Fi 2123 rrrr frrrrrrrr 49 Ulilwvli wp 1 1 UIH windshield liotider and Apply nitrile |
|
 |
eahle prwliet install cable tlirtiiugli L ptneket in t i p assembly Fig 2 I 21 T i l ing Tmp Material NOTE Welding rnd nr similar material may he bent |
|
 |
REAR QUARTER 21Z 21 RETAINER |
|
 |
water directly on caulking material while the material lf is still soft ADHESIVE CAULK NG r W7 21 Working from inside the glass run a small MATERIAL flat stick screwdriver or equivalent around |
|
 |
trim stick bolt and rear trim stick attaching bolts 8 Tack nylon webbing to rear trim stick 21 Where required remove side roof rail rear weatherstrips Re adjust top material at side roof 9 Inspect |
|
 |
21 4 C 3 wg Z U 0 0 T c ggzu |
|
 |
n00Z1 mw ml cL L gf n E gg 21 |
|
 |
forward to desired tension While maintaining ten sion on top trim place a pencil mark on outer 21 Checll 1 it of top material Rear quarter trim surface of trim material along forward edge |
|
 |
21 6 FOLDING TOP lower edge should extend approximately 1I 2 CENTER BOW below lower edge of trim sticks L V VVV V 8 Tack t 1i to rear and rear quiu |