Jeep Parts Wiki | Ford Parts Wiki
Home | Search | Browse | Marketplace | Messages | FAQ | Guest
|
Body Service Manual August 1964 |
|
Prev

 Next
Next
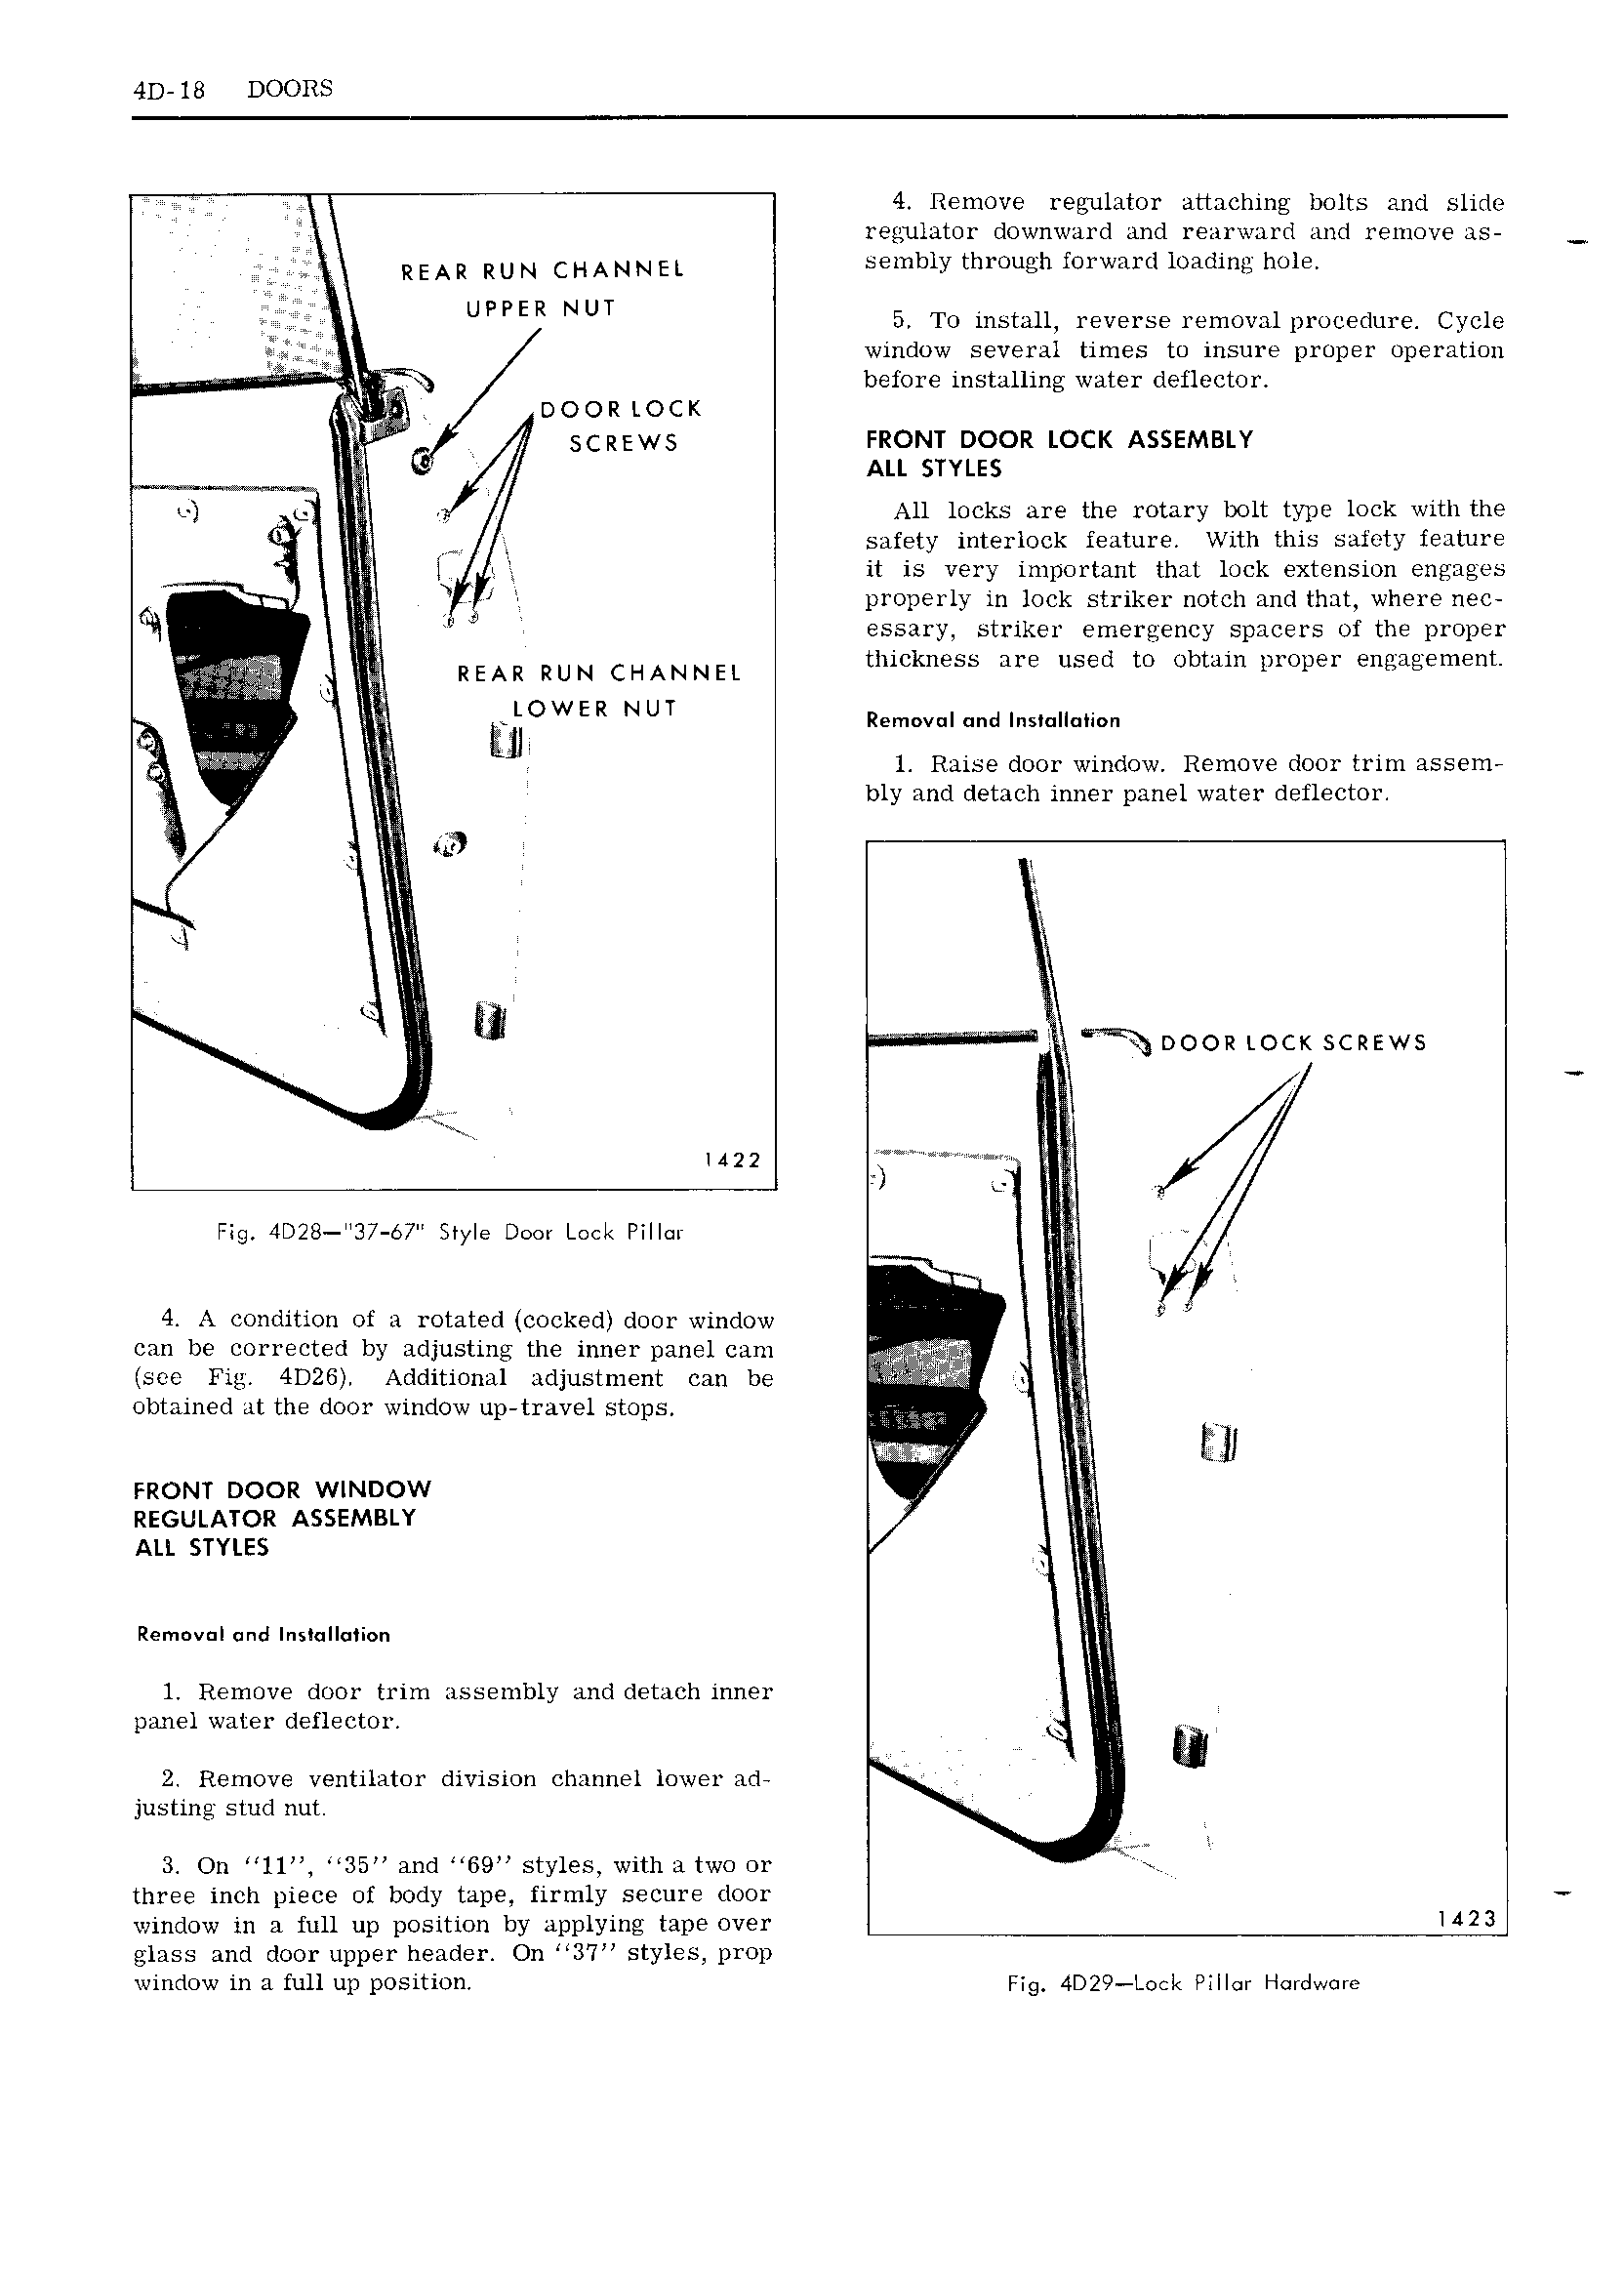
4D 18 DOORS 4 Remove regulator attaching bolts and slide regulator downward and rearward and remove as REAR RU N CHANN EL sembly through forward loading hole UPPER NUT 5 To install reverse removal procedure Cycle window several times to insure proper operation qi before installing water deflector DOOR LOCK i SCREWS FRONT DOOR LOCK ASSEMBLY it ALL STYLES ej Q l ra All locks are the rotary bolt type lock with the V v safety interlock feature With this safety feature l W it is very important that lock extension engages V N V properly in lock striker notch and that where nec l essary striker emergency spacers of the proper thickness are used to obtain proper engagement REAR RUN CHANNEL 3 2 L t UEOWER NUT nem v m1n s l a w 3 g l 1 Raise door window Remove door trim assem bly and detach inner panel water deflector 1 Q el l if V W til e e xi DOOR LOCK SCREWS 1422 r J C Fig 4D28 37 67 Style Door Lack Pillar t y 4 A condition of a rotated cocked door window 4 D can be corrected by adjusting the inner panel cam M r l j 4 see Fig 4D2G Additional adjustment can be I l y obtained at the door window up travel stops 1 Zrnwigg A V ihgr lll FRONT DOOR WINDOW jj REGULATOR ASSEMBLY ALL STYLES Removul und nrmallaoaan 1 Remove door trim assembly and detach inner l panel water deflector X la 2 Remove ventilator division channel lower ad justing stud nut 3 On 11 35 and 69 styles with a two or M three inch piece of body tape firmly secure door window in a full up position by applying tape over N2 glass and door upper header On 37 styles prop window in zi full up position Fig 4D29 Lack Pillar Hordwore

 Next
Next