Jeep Parts Wiki | Ford Parts Wiki
Home | Search | Browse | Marketplace | Messages | FAQ | Guest
|
Body Service Manual August 1964 |
|
Prev

 Next
Next
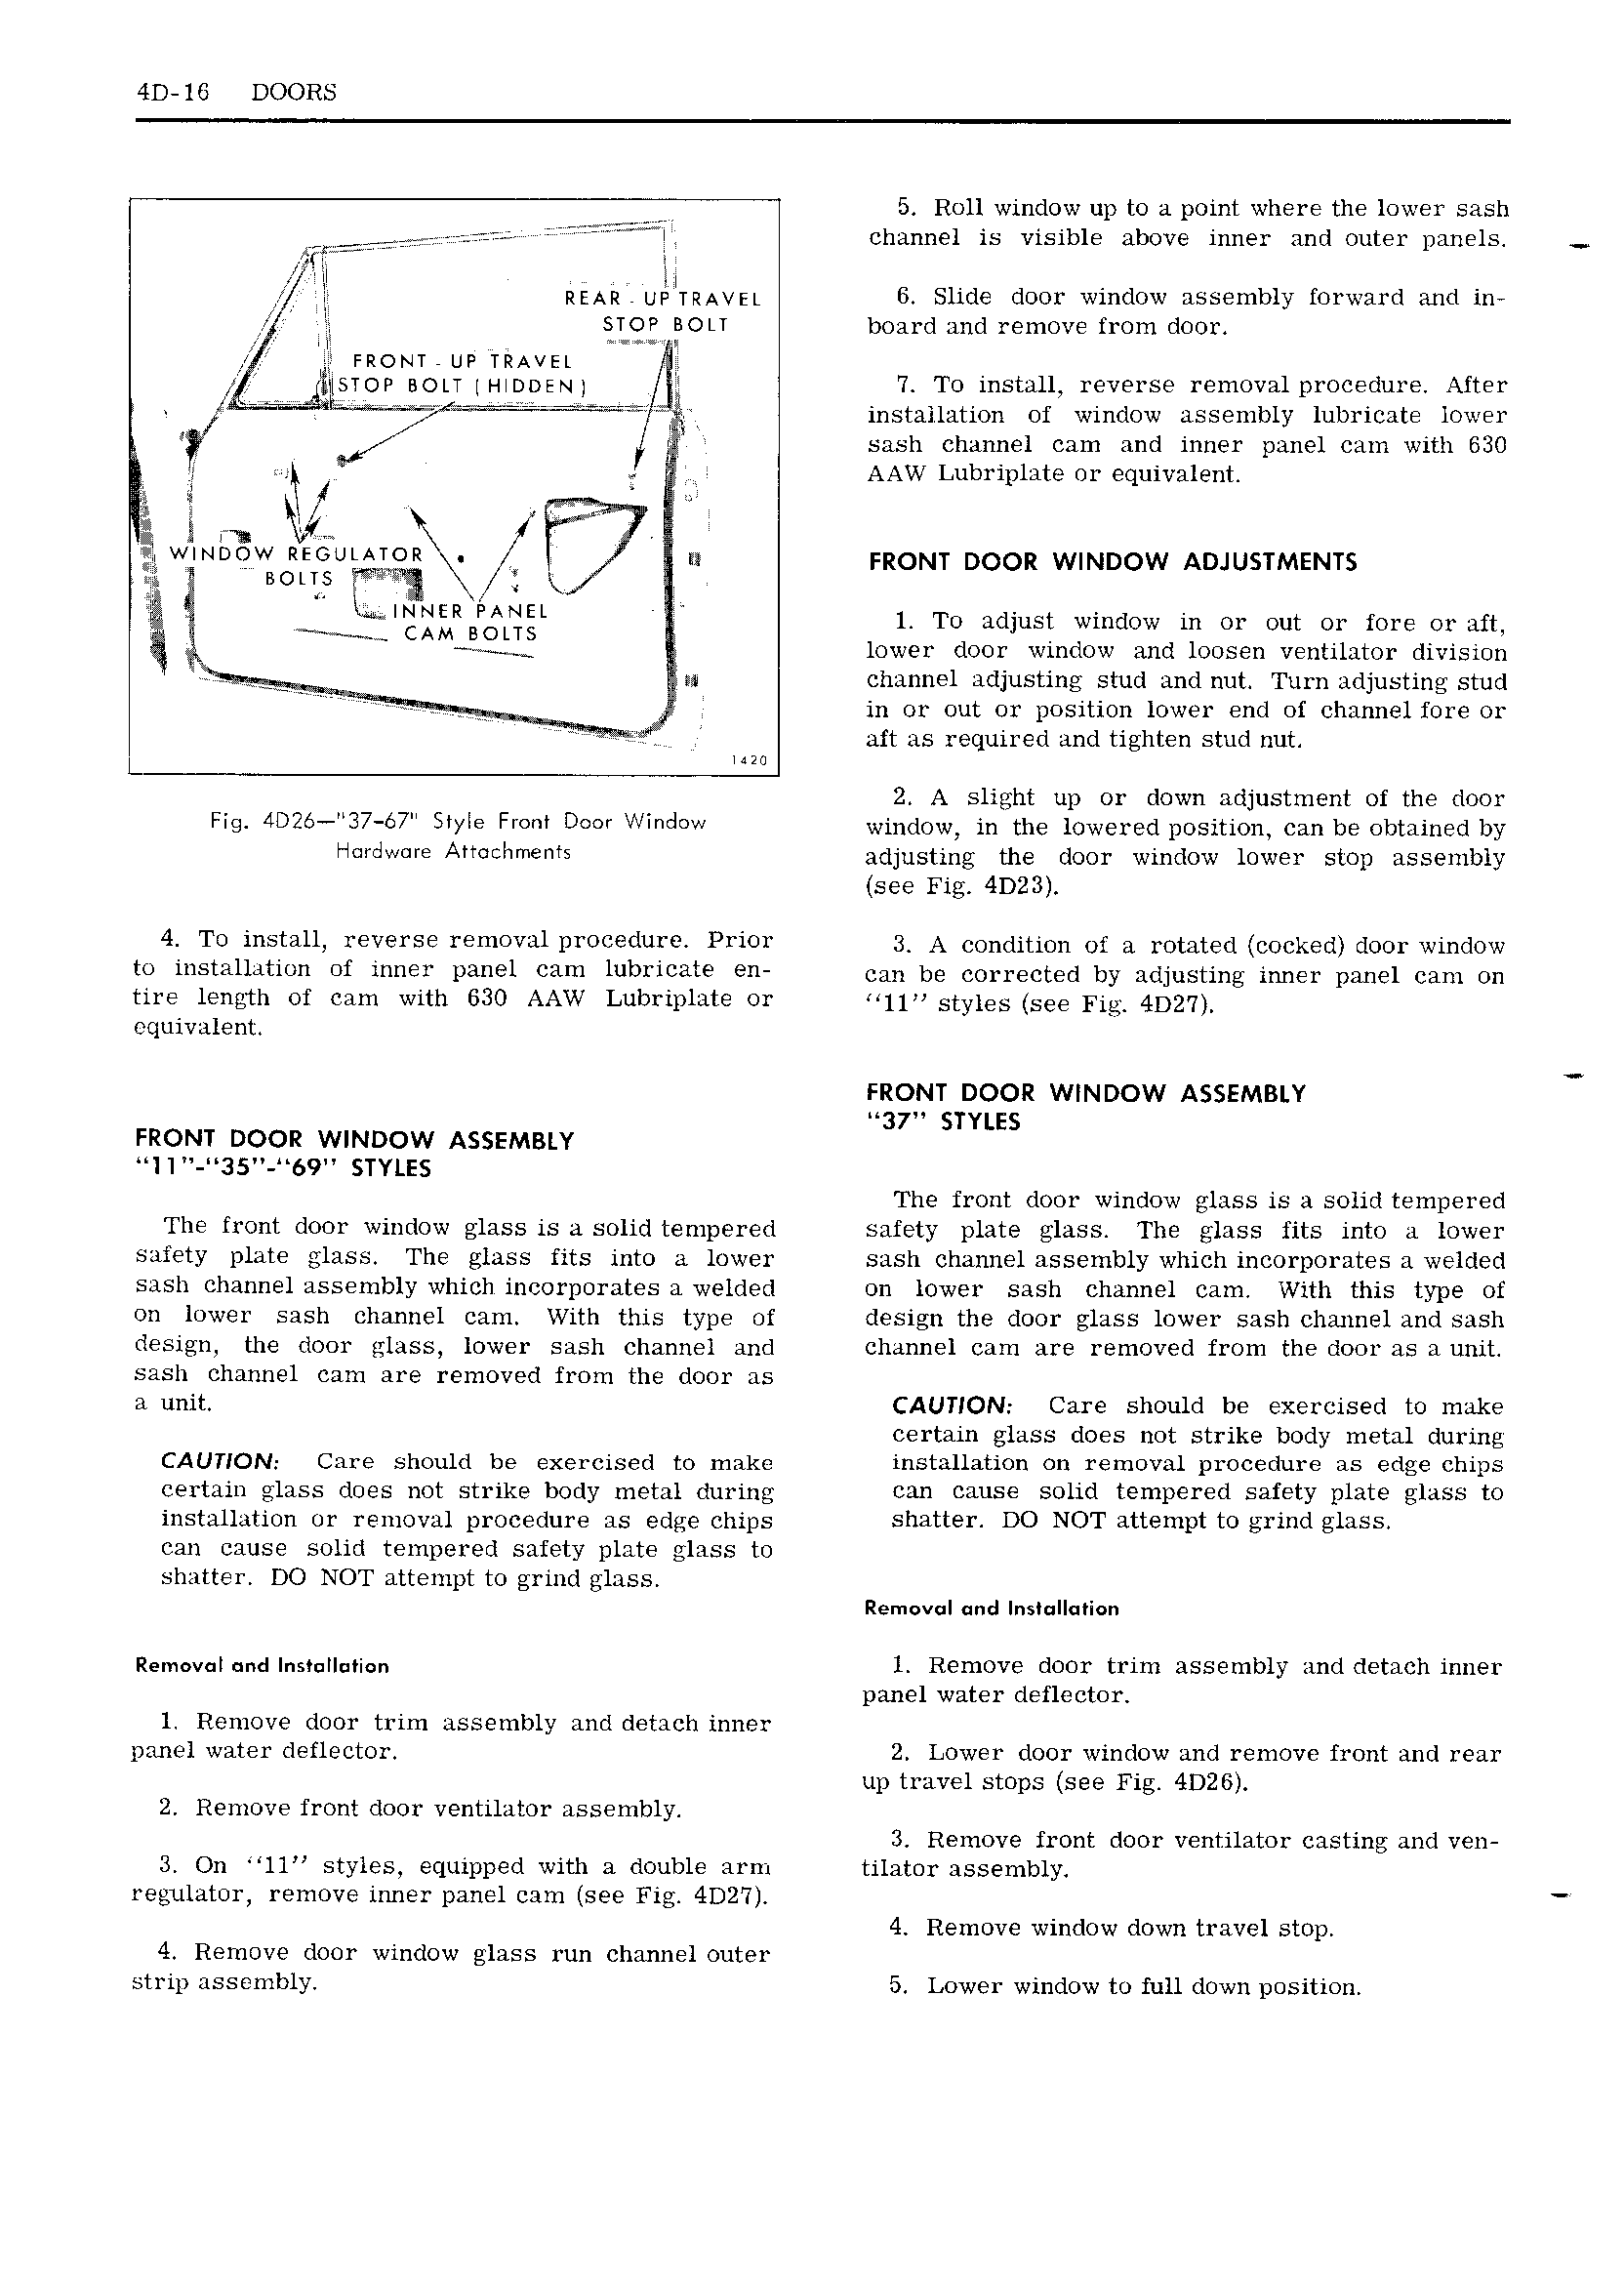
4D 16 DOORS 5 Roll window up to a point where the lower sash i fr T 2I channel is visible above inner and outer panels E REAR Ul TRA EL 6 Slide door window assembly forward and in STOP IBOLT board and remove from door J FRONT 7 UP TRAVEL f pf JEIISTOP BOLT HIDDEN 7 To install reverse removal procedure After if I f ijr3 installation of window assembly lubricate lower WP jg sash channel cam and inner panel cam with 630 J T AAW Lubriplate or equivalent g I Vi I wmoow REGULATOR if n FRONT DOOR WINDOW ADJUSTMENTS ff noir O U Q twf I tm NNER PANEL 1 To adjust window in or out or fore or aft CAM BOLTS 3 A lower door window and loosen ventilator division g wH J at channel adjusting stud and nut Turn adjusting stud ir m j in or out or position lower end of channel fore or qM aft as required and tighten stud nut 2 A slight up or down adjustment of the door Fl9 4D26 37 67 SI IE FLO Deer V l d window in the lowered position can be obtained by H dW T A I hm 5 adjusting the door window lower stop assembly see 4D23 4 To install reverse removal procedure Prior 3 A mndgtmn of n pgtgtgd ggckgd 001 window to installation of inner panel cam lubricate en can bg COI rented by adjusting inner pnnej cnn On tire length of cam with 630 AAW Lubriplate or env Sty1 S S 4 2 equivalent FRONT DOOR WINDOW ASSEMBLY 37 STYLES FRONT DOOR WINDOW ASSEMBLY l 1 35 69 STYLES The front door window glass is a solid tempered The front door window glass is a solid tempered safety plate glass The glass fits into a lower safety plate glass The glass fits into a lower sash channel assembly which incorporates awelded sash channel assembly which incorporates awelded on lower sash channel cam With this type of on lower sash channel cam With this type of design the door glass lower sash channel and sash design the door glass lower sash channel and channel cam are removed from the door as a unit sash channel cam are removed from the door as a unit CAUTION Care should be exercised to make certain glass does not strike body metal during CAUTION Care should be exercised to make installation on removal procedure as edge chips certain glass does not strike body metal during can cause solid tempered safety plate glass to installation or removal procedure as edge chips shatter DO NOT attempt to grind glass can cause solid tempered safety plate glass to shatter DO NOT attempt to grind glass Removul and lns II i n Removal md Installation l Remove door trim assembly and detach inner panel water deflector 1 Remove door trim assembly and detach inner panel water deflector 2 Lower door window and remove front and rear up travel stops see Fig 4D26 2 Remove front doo1 ventilator assembly 3 Remove front door ventilator casting and ven 3 On ll styles equipped with a double arm tilator assembly regulator remove inner panel cam see Fig 4D2 7 4 Remove window down travel stop 4 Remove door window glass run channel outer strip assembly 5 Lower window to full down position

 Next
Next