Jeep Parts Wiki | Ford Parts Wiki
Home | Search | Browse
Prev

 Next
Next
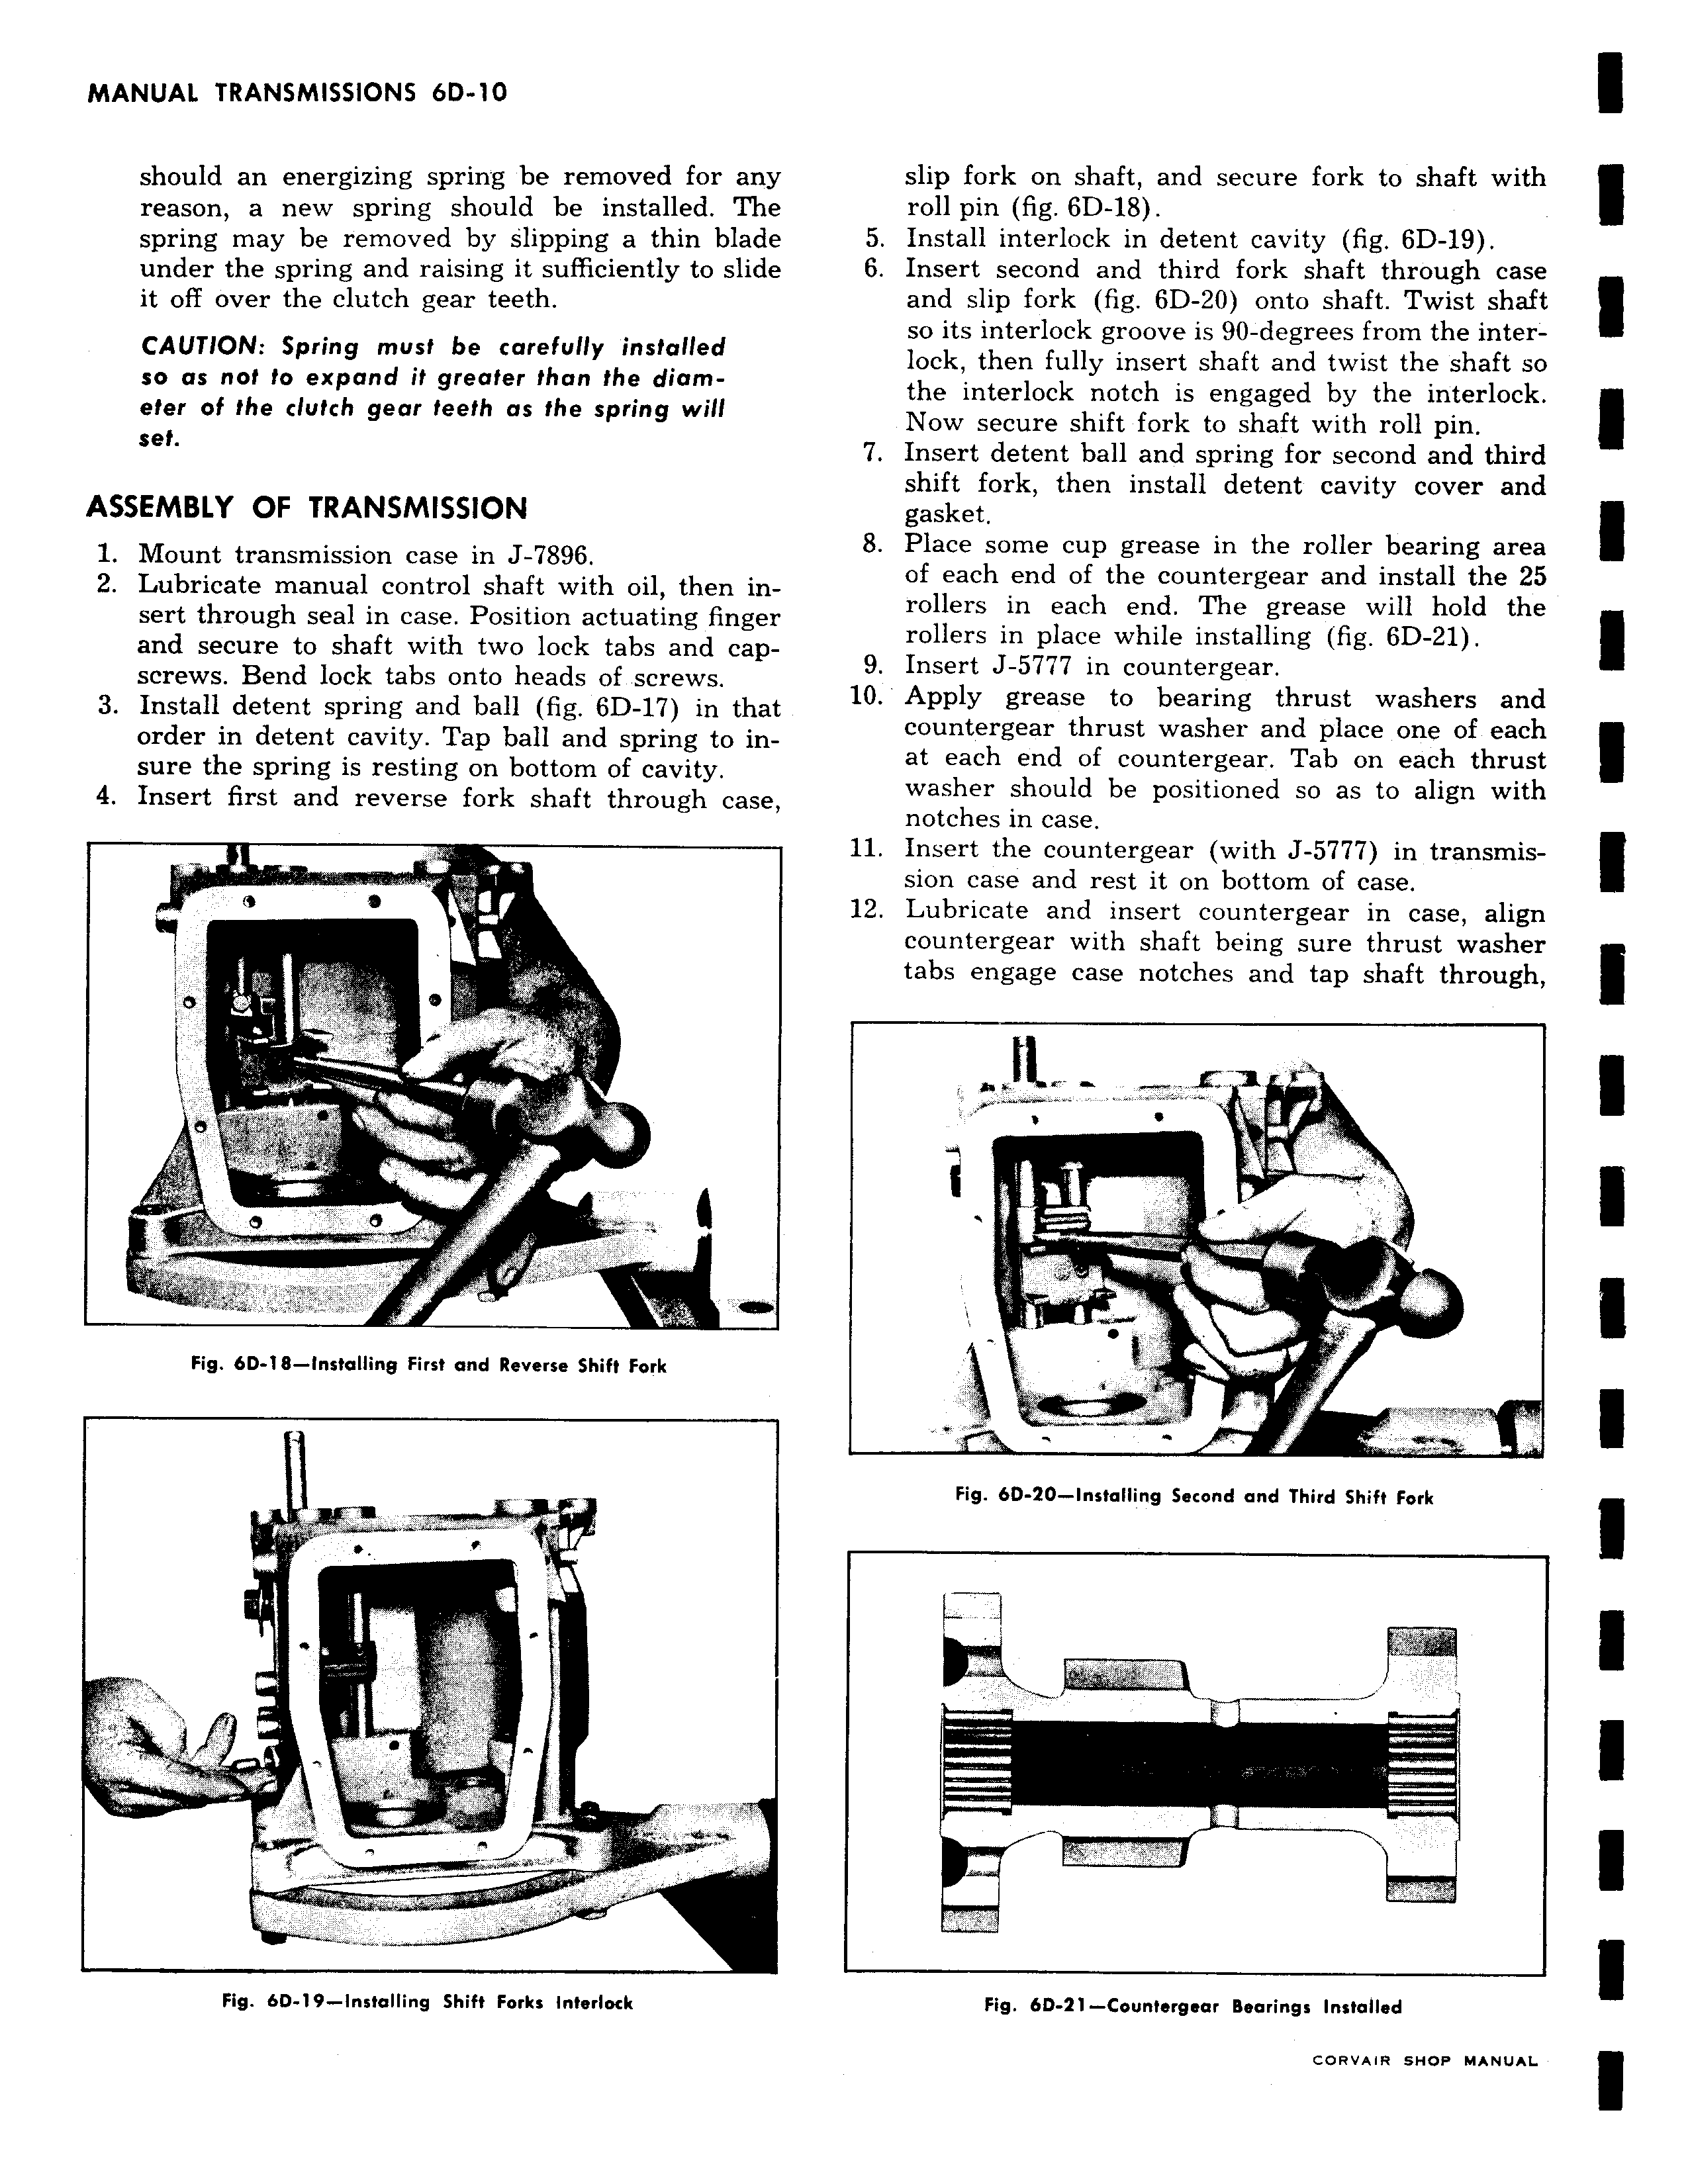
should an energizing spring be removed for any reason a new spring should be installed The spring may be removed by slipping a thin blade under the spring and raising it sufficiently to slide it off over the clutch gear teeth CAUTION Spring must be carefully installed so as not to expand it greater than the diameter of the clutch gear teeth as the spring will set ASSEMBLY OF TRANSMISSION 1 Mount transmission case in J 7896 2 Lubricate manual control shaft with oil then insert through seal in case Position actuating finger and secure to shaft with two lock tabs and capscrews Bend lock tabs onto heads of screws 3 Install detent spring and ball fig 6D 17 in that order in detent cavity Tap ball and spring to insure the spring is resting on bottom of cavity 4 Insert first and reverse fork shaft through case r t ti rtf 7F ug n 41 AIIIIIIIIII11731ILM Fig 6D 18 Installing First and Reverse Shift Fork Fig 6D 19 Installing Shift Forks Interlock slip fork on shaft and secure fork to shaft with roll pin fig 6D 18 5 Install interlock in detent cavity fig 6D 19 6 Insert second and third fork shaft through case and slip fork fig 6D 20 onto shaft Twist shaft so its interlock groove is 90 degrees from the inter lock then fully insert shaft and twist the shaft so the interlock notch is engaged by the interlock Now secure shift fork to shaft with roll pin 7 Insert detent ball and spring for second and third shift fork then install detent cavity cover and gasket 8 Place some cup grease in the roller bearing area of each end of the countergear and install the 25 rollers in each end The grease will hold the rollers in place while installing fig 6D 21 9 Insert J 5777 in countergear 10 Apply grease to bearing thrust washers and countergear thrust washer and place one of each at each end of countergear Tab on each thrust washer should be positioned so as to align with notches in case 11 Insert the countergear with J 5777 in transmission case and rest it on bottom of case 12 Lubricate and insert countergear in case align countergear with shaft being sure thrust washer tabs engage case notches and tap shaft through a s W Fig 6D 20 installing Second and Third Shift Fork i Fig 6D 21 Counfergear Bearings Installed

 Next
Next