Jeep Parts Wiki | Ford Parts Wiki
Home | Search | Browse
|
Body Service Manual August 1964 |
|
Prev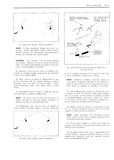
 Next
Next
1226000
1226000
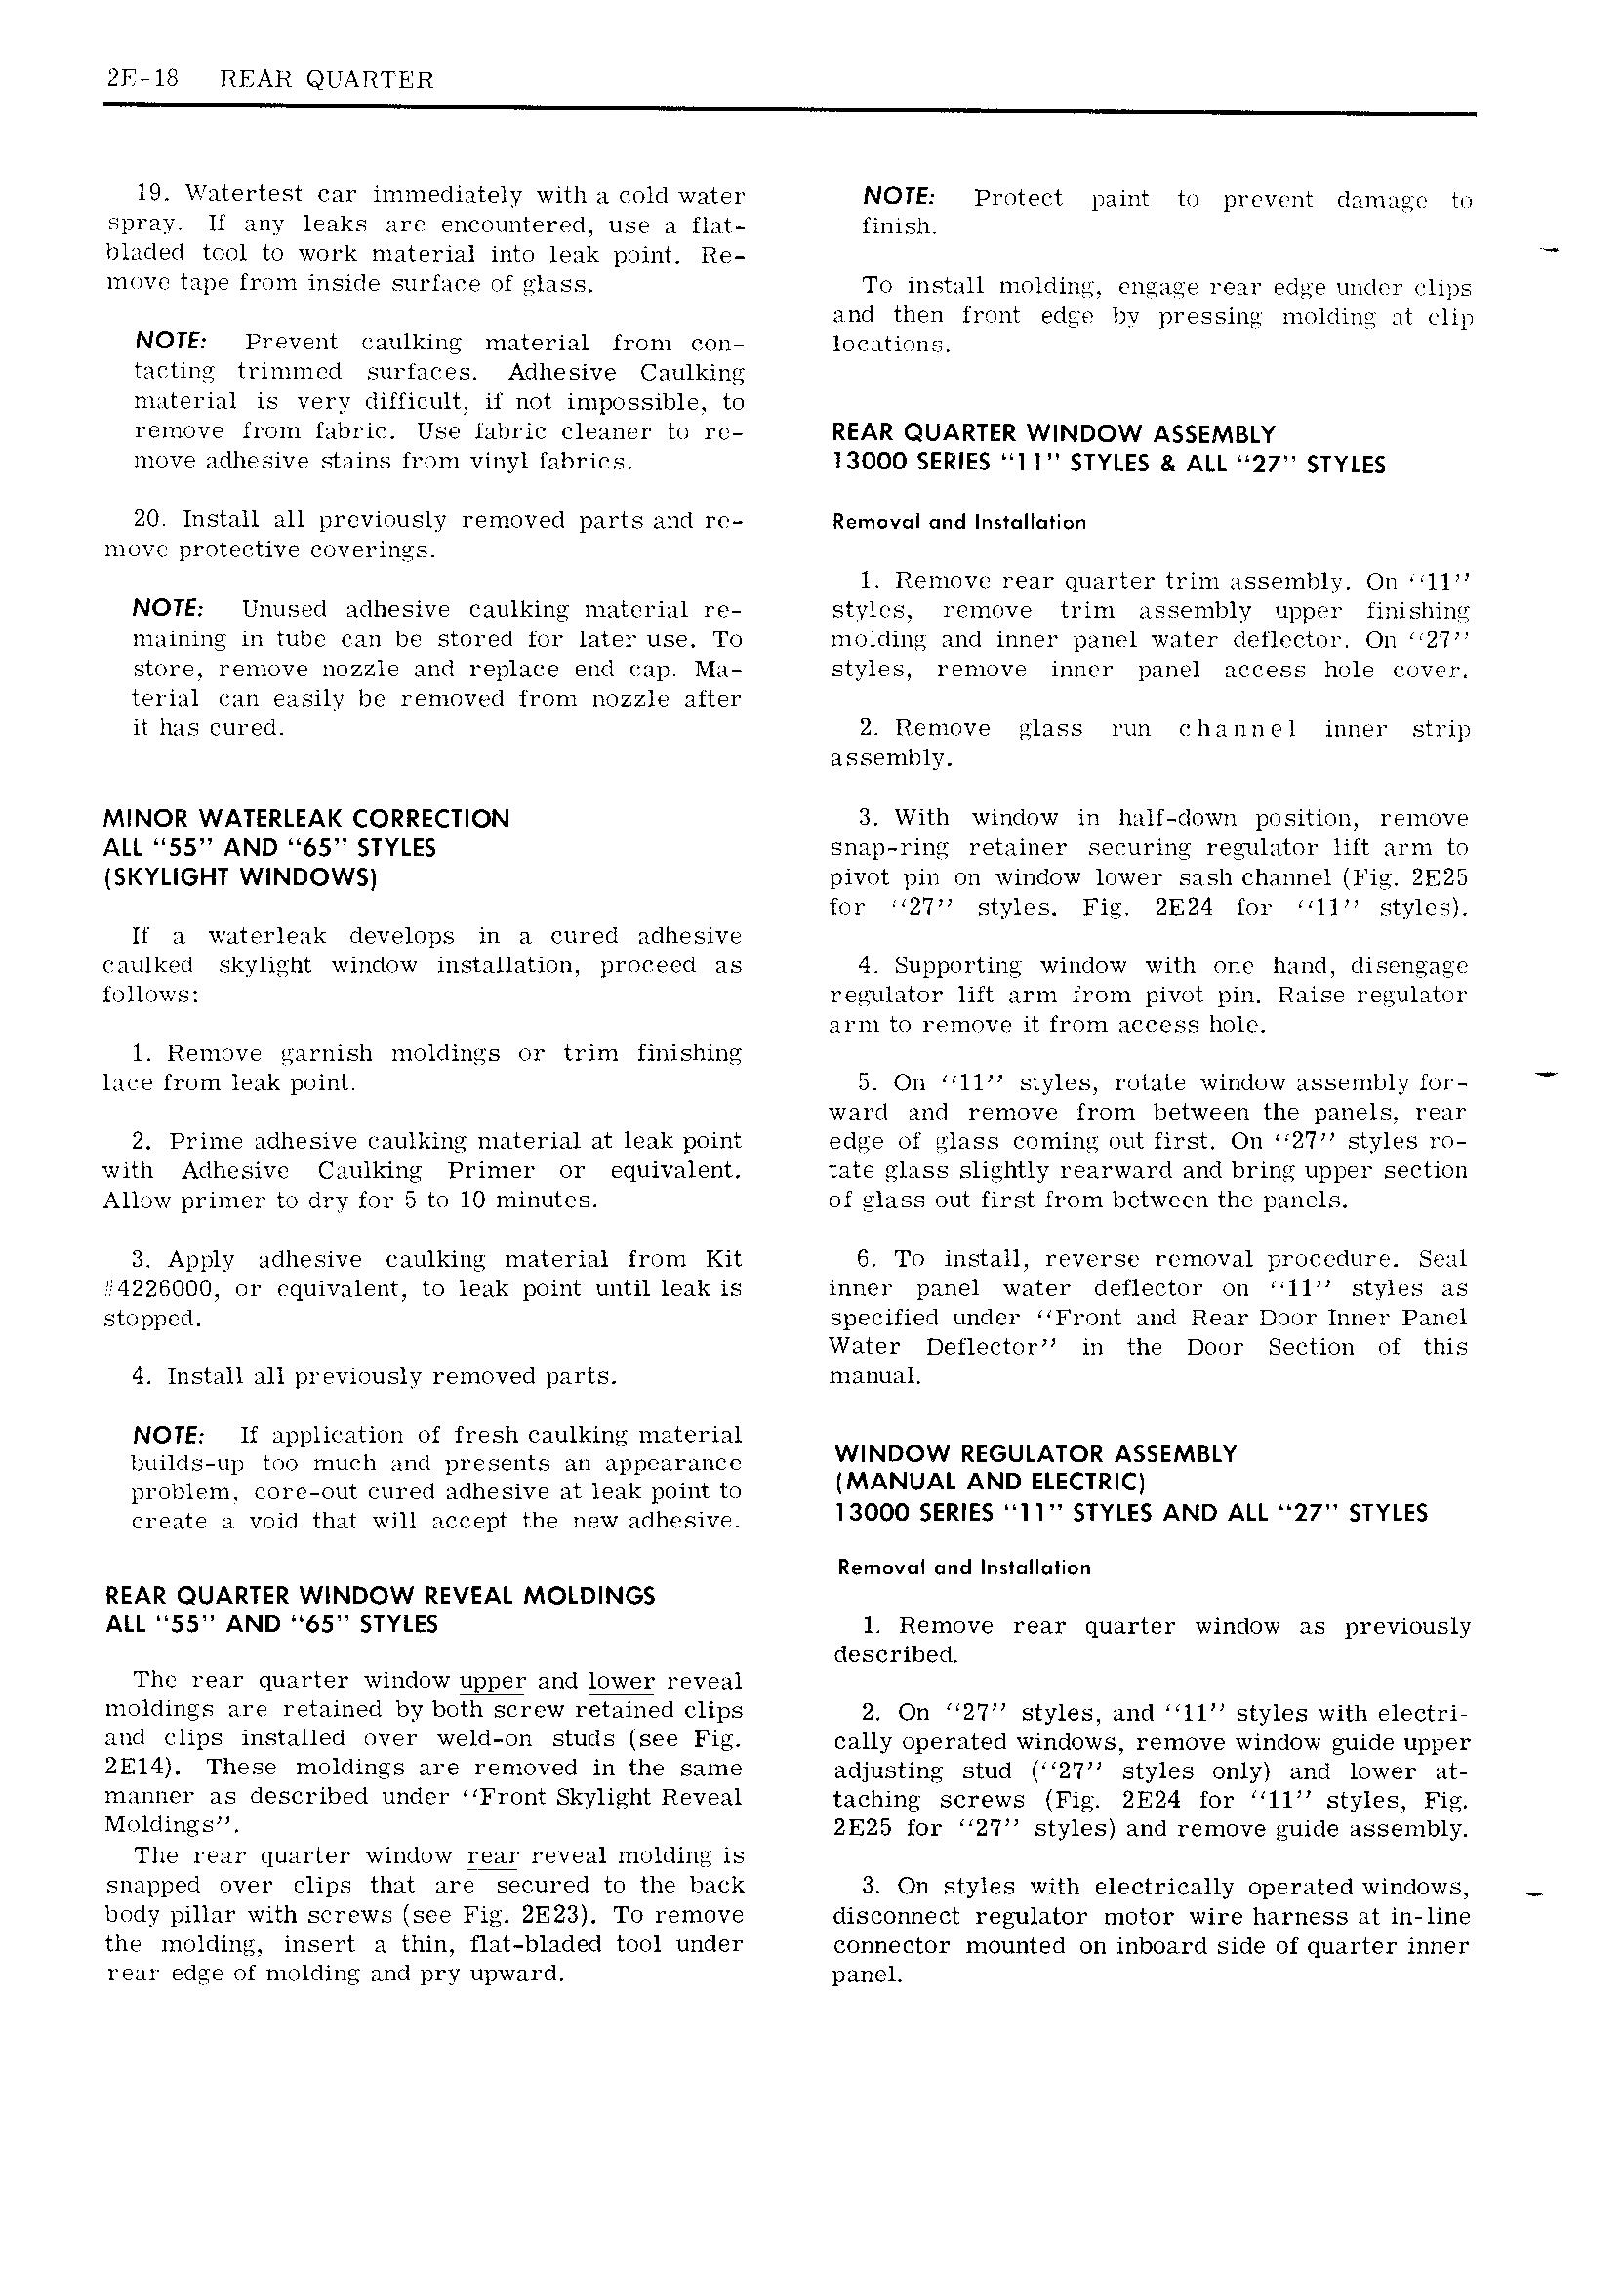
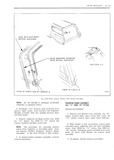
2F l8 REAR QUARTER 19 Watertest car immediately with a cold water NOTE Proteet paint to prevent damage to spray ll any leaks are encountered use a flat finish blade d tool to work material into leak point Re move tape from inside surface of glass To install molding engage rear edge under clips and then front edge by pressing molding at clip NOTE Prevent caulking material from ron locations tacting trimmed surfaces Adhesive Caulking material is very difficult if not impossible to remove from fabric Use fabric cleaner to rc REAR QUARTER WINDOW ASSEMBLY move adhesive stains from vinyl fabrics l3000 SERIES I I STYLES 8 ALL 27 STYLES 20 Install all previously removed parts and rt Rem v I r1dIns1 II ti n move proteetive coverings 1 Remove rear quarter trim assembly On ll NOTE Unused adhesive eaulking material re styles remove trim assembly upper finishing maining in tube can be stored for later use To molding and inner panel water delle ctor On 2 store remove nozzle and replace end rap Ma styles remove inn r panel aeeess hole cover terial can easily be removed from nozzle after it has eured 2 Remove glass run channel inner strip assembly MINOR WATERLEAK CORRECTION 3 With window in half down position remove ALL 55 AND 65 STYLES snap ring retainer securing regulator lift arm to SKYLIGHT WINDOWS pivot pin on window lower sash channel Fig 21 225 for 27 styles ZE24 for 11 styles I1 a waterleak develops in a cured adhesive caulked skylight window installation proceed as 4 Supporting window with one hand disengage follows regulator lift arm from pivot pin Raise regulator arm to remove it from access hole 1 Remove garnish moldings or trim finishing lace from leak point 5 On ll styles rotate window assembly for ward and remove from between the panels rear 2 Prime adhesive eaulking material at leak point edge of glass coming out first On 2 7 styles ro with Adhesive Caulking Primer or equivalent tate gilass slightly rearward and bring upper section Allow primer to dry for 5 to 10 minutes of glass out first from between the panels 3 Apply adhesive caulking material from Kit 6 To install reverse removal procedure Seal 1226000 or equivalent to leak point until leak is inncr panel water deflector on 1l styles as stopped specified under Front and Rear Door Inner Panel Water Deflector in the Door Section of this 4 Install all previously removed parts manual NOTE If application of fresh caulking material builds up too much and presents an appearance WINDOW REGULATOR ASSEMBLY problem core out cured adhesive at leak point to MANUAL AND ELECTRIC create a void that will accept the new adhesive I3O00 SERIES NIIH STYLES AND ALL M27H STYLES Removal and Ins II Ii n REAR QUARTER WINDOW REVEAL MOLDINGS Al L 55 AND 65 STYLES 1 Remove rear quarter window as previously described The rear quarter window upper and lower reveal moldings are retained by both screw retained clips 2 On 27 styles and ll styles with electri and clips installed over weld on studs see Fig cally operated windows remove window guide upper 2El4 These moldings are removed in the same adjusting stud 27 styles only and lower at manner as described under Front Skylight Reveal taching screws Fig 2E2 1 for 11 styles Moldings ZE25 for 2 7 styles and remove guide assembly The rear quarter window ry reveal molding is snapped over clips that are secured to the back 3 On styles with electrically operated windows body pillar with screws see 21523 To remove disconnect regulator motor wire harness at in line the molding insert a thin flat bladed tool under connector mounted on inboard side of quarter inner rear edge of molding and pry upward panel