Jeep Parts Wiki | Ford Parts Wiki
Home | Search | Browse | Marketplace | Messages | FAQ | Guest
|
Body Service Manual August 1964 |
|
Prev
 Next
Next
44404196
44404196
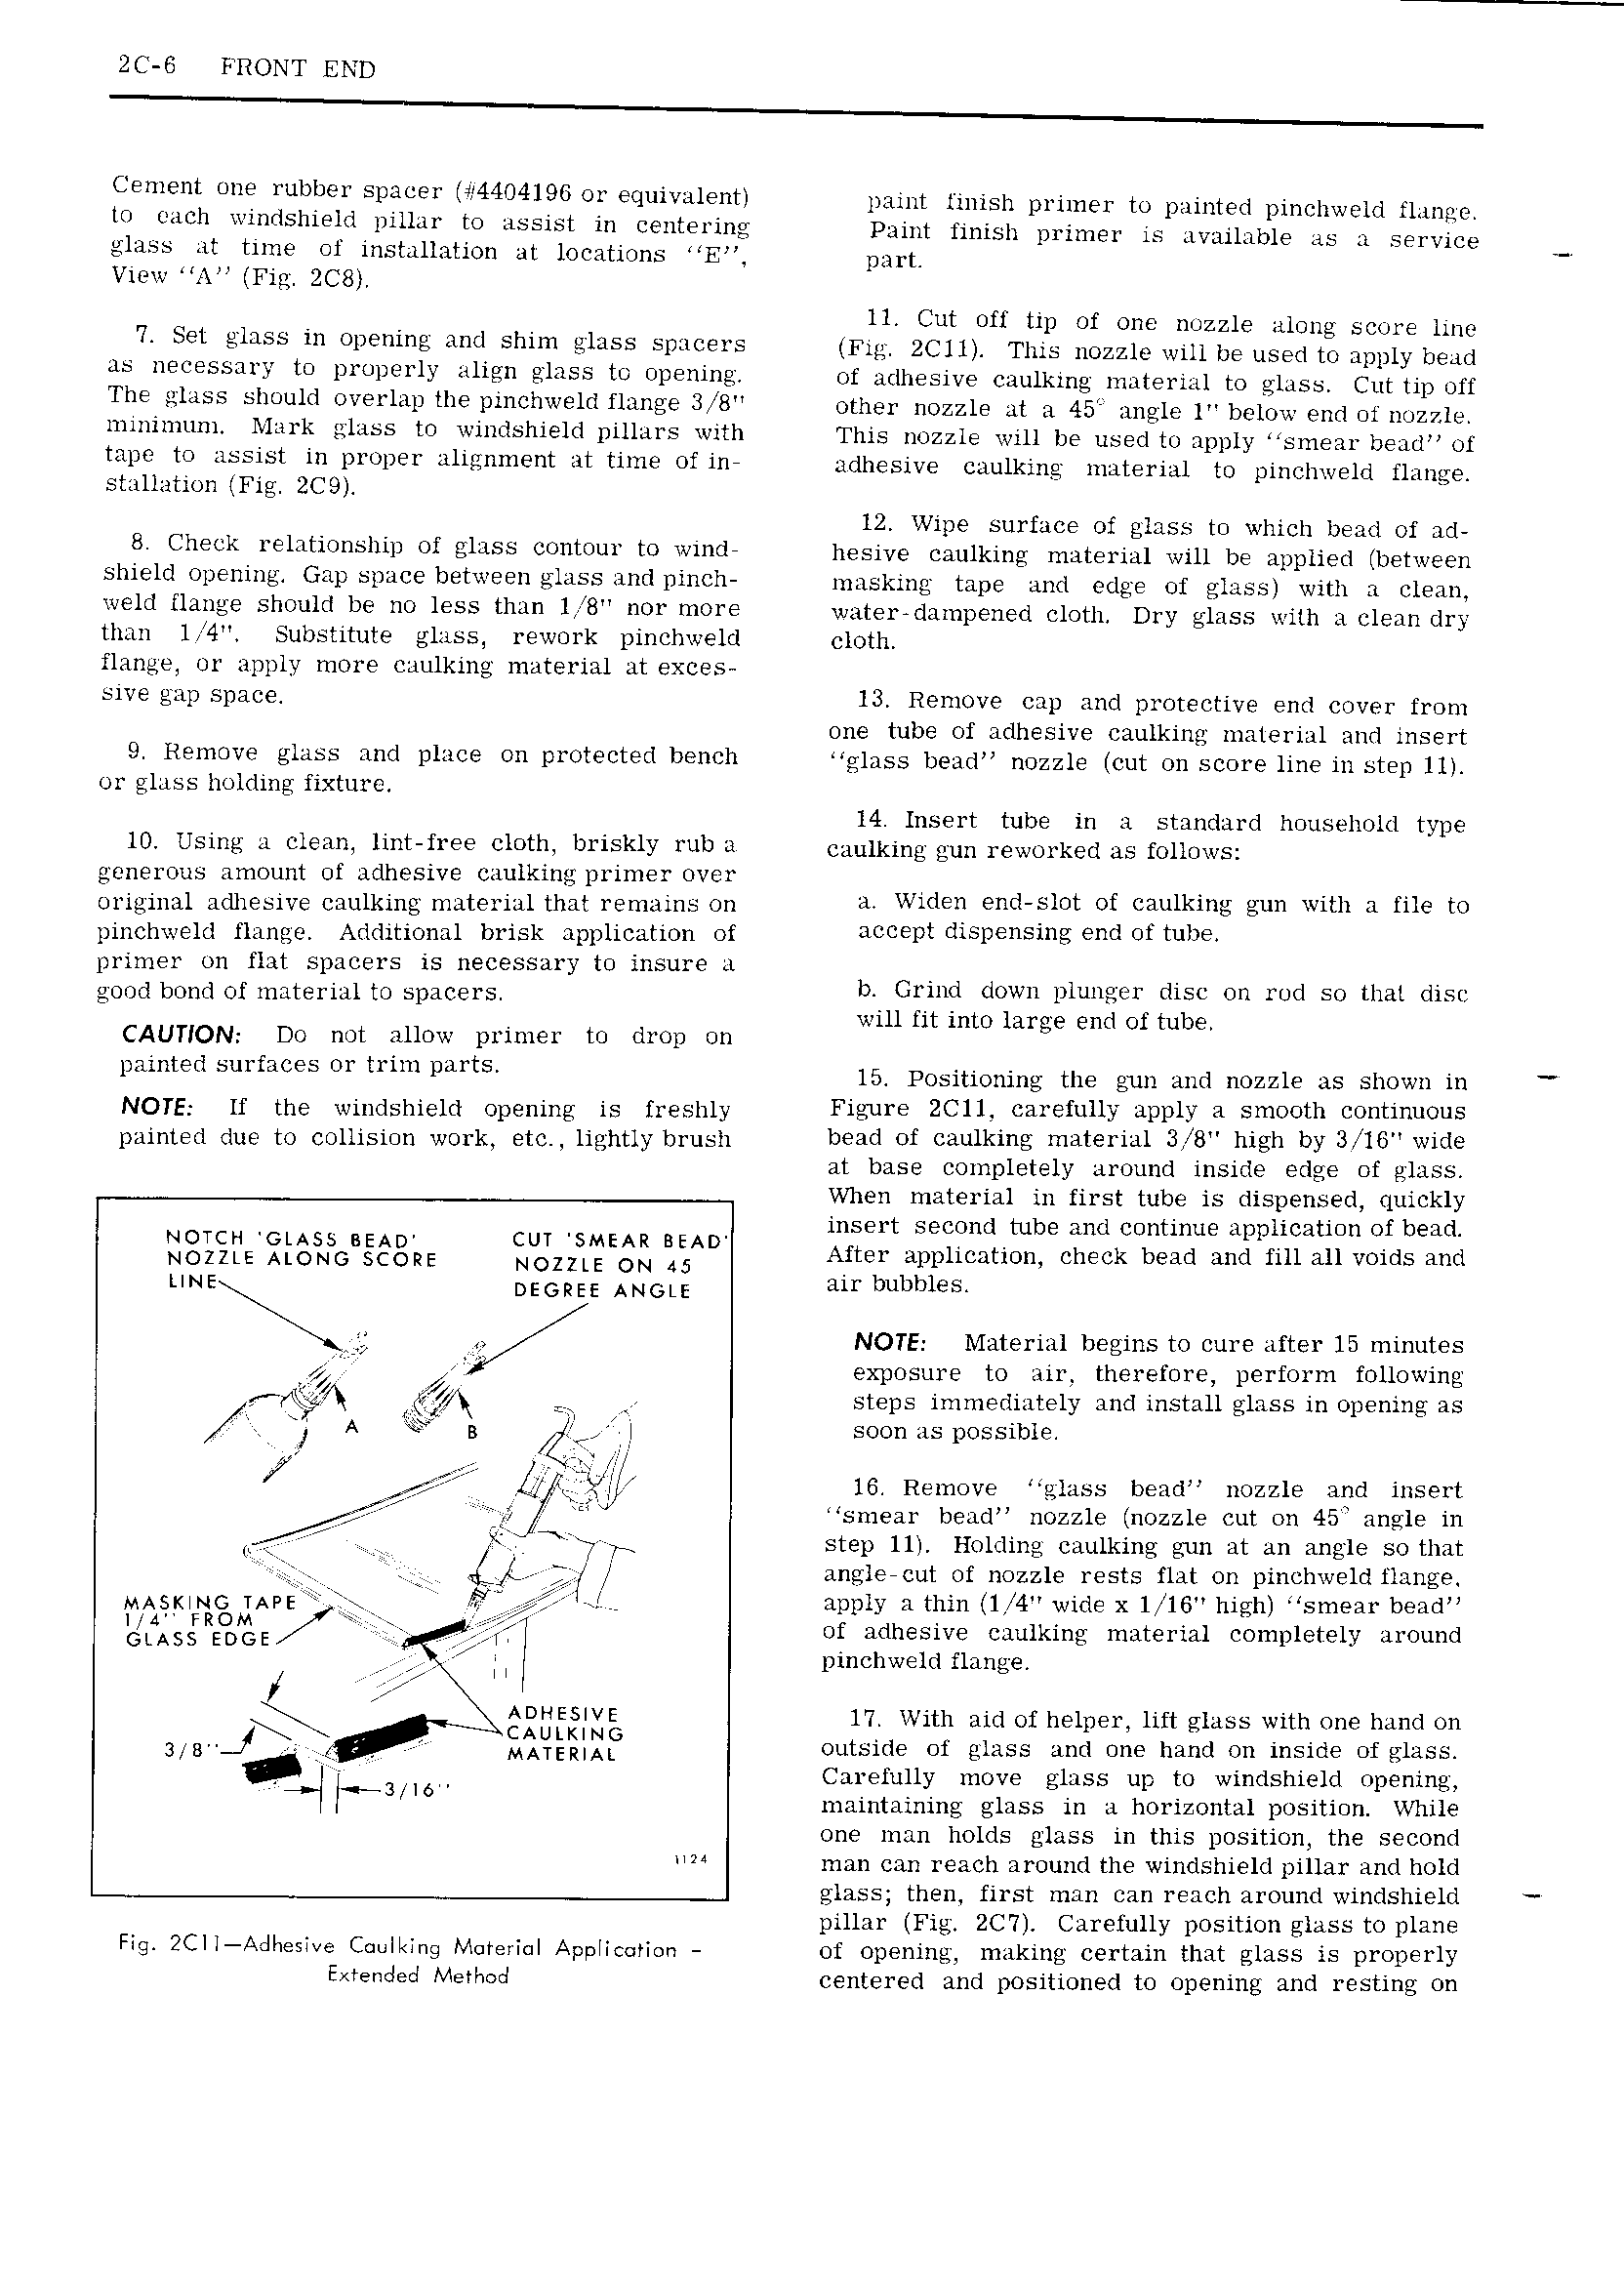
2C G FRONT END Cement one rubber spacer 44404196 or equivalent paint finish primer to painted pinchweld flange U l h lllfl5hl l l Dllldf to Ll55iSt ill C lt l lI lQ Paint finish primer is available as a service glass at time of installation at locations E p u t View A Fig 2C8 11 Cut off tip of one nozzle along score line 7 6 l 55 lll Ollelllllg Mid shim 155 5D l P1 5 Fig 2C11 This nozzle will be used to apply bead as necessary to properly align glass to opening of adhesive caulking material to glass Cut tip off The glass should overlap the pmchweld flange 3 8 other nozzle at a 45 angle lr below end or nozzle minimum Mark glass to windshield pillars with This nozzle will be used to apply smear bead of mlm to 1155lSl lll Dl UD91 11ll 1I1Hl t ill time of lH adhesive caulking material to pinchweld flange stallation Fig 2C9 12 Wipe surface of glass to which bead of ad 8 Check relationship of glass contour to wind hesjve enulkjng material will be applied bgtw g n shield opening Gap space between glass and pinch masking tape gud edge gf glass with 3 Clamp weld flange should be no less than 1 8 nor more water clampened cloth Dry glass with a clean dry than 1 4 Substitute glass rework pinchweld cloth flange or apply more caulking material at exces sive gap space 13 Remove cap and protective end cover from one tube of adhesive caulking material and insert 9 Remove glass and place on protected bench glass bead nozzle cut on score line in step 11 or glass holding fixture 14 Insert tube in a standard household type 10 Using ii clean lint free cloth briskly rub a ggulkjng gun mwgyked as fgllgwgg generous amount of adhesive caulking primer over original adhesive caulking material that remains on Wl l l 5l0t of Ciilllkillg elm with fl fil to pinchweld flange Additional brisk application of QCCEN ll5D ll5lll enclof ll b primer on flat spacers is necessary to insure a gucd bond Of LLLLLLETLLLL LO SLmC L S b Grind down plunger disc on rod so that disc 7 will fit into large end of tube CAUTION Do not allow primer to drop on lmimed Surfaces Or trim puts 15 Positioning the gun and nozzle as shown in NOTE lf the windshield opening is freshly Fl l1l ZCU l f lllY 11llPlY H 5 l00tll 9lltl llOllS painted due to collision work etc lightly brush bead of Caulking material 3 8 high by 3 l6 wide at base completely around inside edge of glass When material in first tube is dispensed quickly NOTCH GLASS BEAD CUT sMEAR BLAD insert second tube and continue application of bead NOZZLE ALONG SCORE NOZZLE ON 45 lifteglllipiilicatioxi check bead and fill all voids and time oeokee ANGLE Ur S j t NOTE Material begins to cure after 15 minutes 4 exposure to air therefore perform following li Q rg ir steps immediately and install glass in opening as A ar B soon as possible l rrxd 16 Remove glass bead nozzle and insert r E smear bead nozzle nozzle cut on 45 angle in 1 rs Ls step lll Holding caulking gun at an angle so that kk angle cut of nozzle rests flat on pinchweld flange iw gy tFr LlAPe t Y lr I apply zi thin IQ4 wide x 1 1t3 high smear bead GLASS EDGE M of adhesive caulklng material completely around pinchweld flange Q ESS xg 17 With aid of helper lift glass with one hand on 3 B t MATERIAL outside of glass and one hand on inside of glass V Carefully move glass up to windshield opening A 3 l6H maintaining glass in a horizontal position While one man holds glass in this position the second lm man can reach around the windshield pillar and hold glass then first man can reach around windshield pillar Fig 2C Carefully position glass to plane Fig 2Cll Adhestve Cdulking Mureriul Appliedridn of opening making certain that glass is properly Extended Method centered and positioned to opening and resting on