Jeep Parts Wiki | Ford Parts Wiki
Home | Search | Browse
|
Body Service Manual August 1964 |
|
Prev

 Next
Next
4226900
4226900
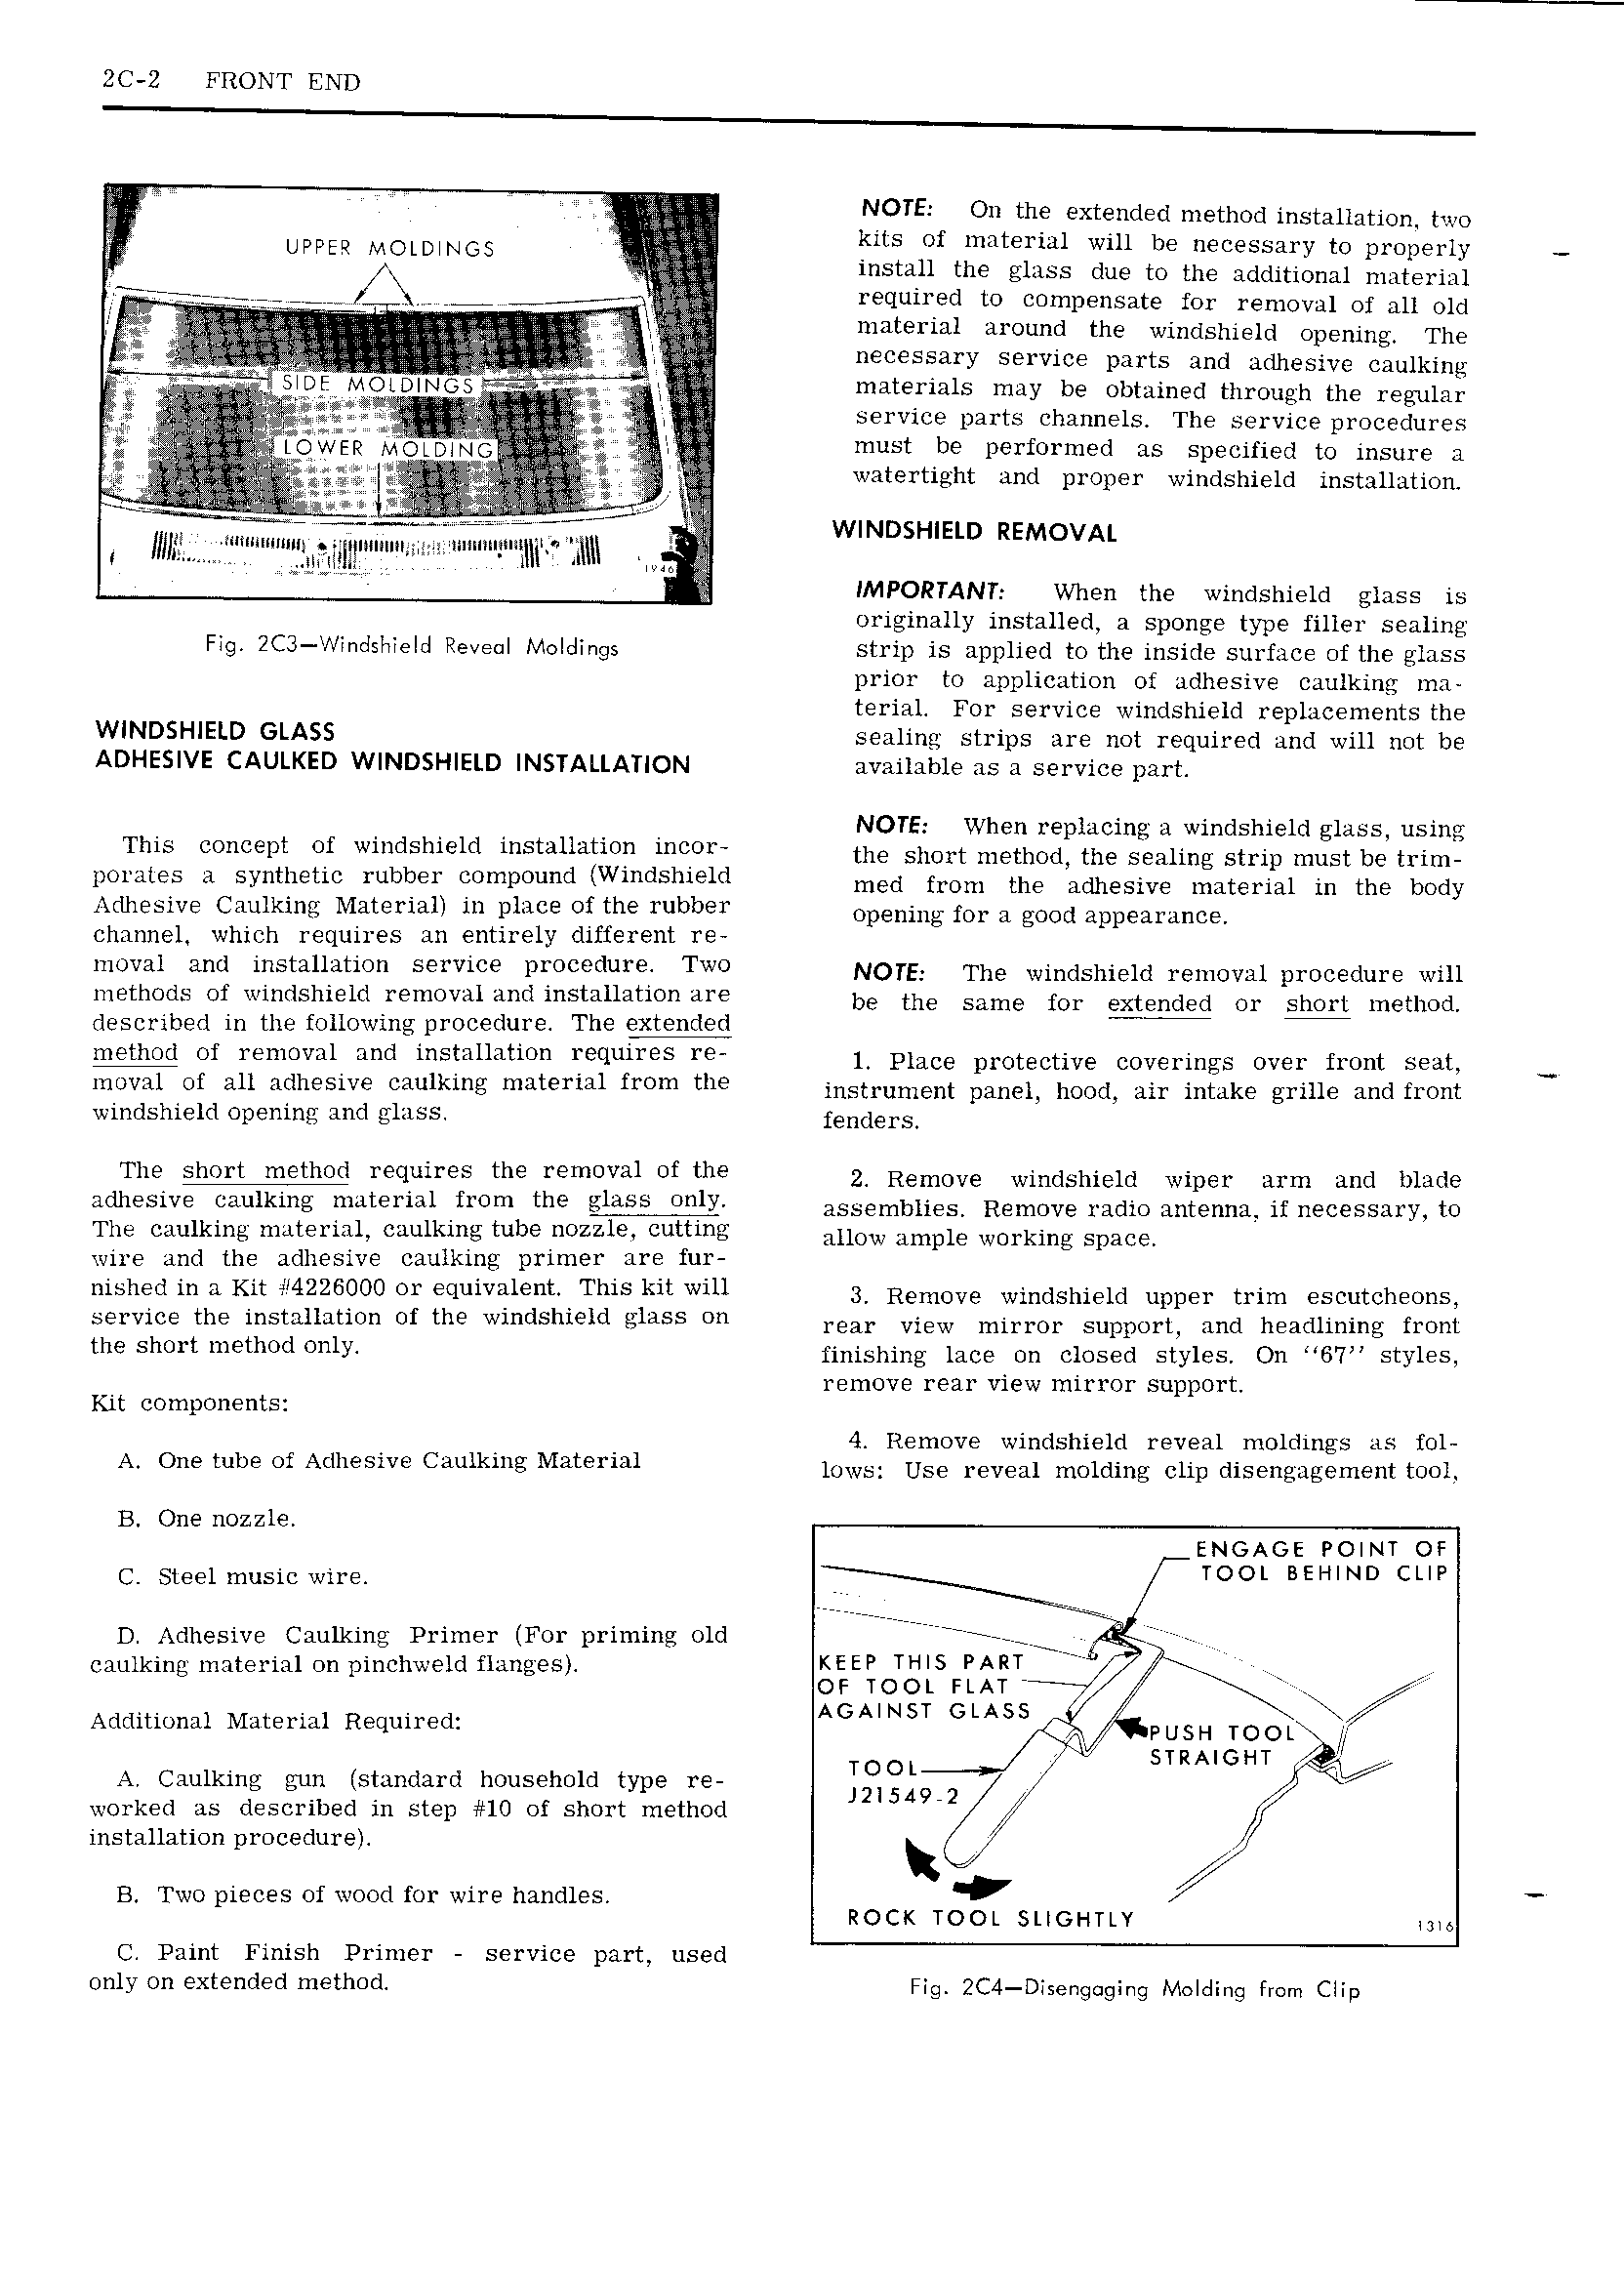
ZC 2 FRONT END NOTE On the extended method installation two UPPER MOLDWGS g lots of material will be necessary to properly n an gi install the glass due to the additional material P w so r r tx r P nl required to compensate for removal of all old ingiiiz A l z l material around the windshield opening The i V jg E i t Il C SS Yy S 1 ViC parts and adhesive caulking 4 V 1 lDE Mgnoiiggem rn ggg materials may be obtained through the regular l n 1 service parts channels The service procedures A HOWEP MQPQWG 1 must be performed as specified to insure a n I an L watertight and proper windshield installation e1 Q l f g g 3 ie WIND i n uuu telniignseiaiial l 1l g l ml SHIELD REMOVAL i 4 l Hit I IMPORTANT When the windshield glass is 7 V 4 l originally installed a sponge type filler sealing Fig 2C lNindsl ie d Reveal Moldings strip is applied to the inside surface of the glass prior to application of adhesive caulking 1na terial For service windshield replacements the WINDSHIELD GLASS sealing strips are not required and will not be ADHESIVE CAULKED WINDSHIELD INSTALLATION available as a service part NOTE When e l c z i i h ld l ie This t Gi Wi dS 1 St 9 the SimiIiieiiii 15iiielzigitggirillmi iISlZI Il TEE porates a synthetic rubber compound Windshield med from the ndnesive umterial in the body Adhesive Caulking Material in place of the rubber Opening fm 3 gow appearance channel which requires an entirely different re moval and installation service procedure Two NOTE The windshield1 1nOvn1p1 0c dun Wm methods of windshield removal and installation are be the Same for Extended O Shox method described in the following procedure The extended method of removal and installation requires re 1 PIECE nrntnctive Coverings Oven front gnat Z mnoval of all adhesiye caulking material from the lnstrnnwnt panel nOOd nu mmkn Erme and mnt windshield opening and glass f nd 1 S The short method requires the removal of the 24 Remove Windsninld Wiper arm and made adhesive caulking material from the glass only assemblies Rgmnve radii qntenna ifnecegsnm to The caulking material caulking tube nozzle cutting num ample Working Spacer wire and the adhesive caulking primer are fur mshgd in H Kit 4226900 Or 1 iv e1 r This kit will 3 Remove windshield upper trim escutcheons service the installation of the windshield glass on may View mirml Snppcrll nnd nnndnning from the Short 1r finishing lace on closed styles On 67 styles Kt t remove rear view mirror support i componen s 7 V 4 Remove windshield reveal moldings as fol A Om tube of ACIMSIVE Caulkmg Mami el lows Use reveal molding clip disengagement tool B One nozzle ENGAGE POINT OF j Steel music wi1 IIOOII BEHIND CLIP D Adhesive Caulking Primer For priming old P r Q caulking material on pinchweld flanges KEEP THIS PART II j y f OF TOOL FLAT ij 4 Additional Material Required AGAINST GLASS Q QPUSH 7 STRAIGHT g A Caulking gun standard household type re 2 I Q I worked as described in step 10 of short method i installation procedure li B Two pieces of wood for wire handles if ROCK TOOL SLIGHTLY 6 C Paint Finish Primer service part used only on extended method Fig ZC4 Disengoging Molding from Clip

 Next
Next