Jeep Parts Wiki | Ford Parts Wiki
Home | Search | Browse
|
Body Service Manual August 1964 |
|
Prev
 Next
Next
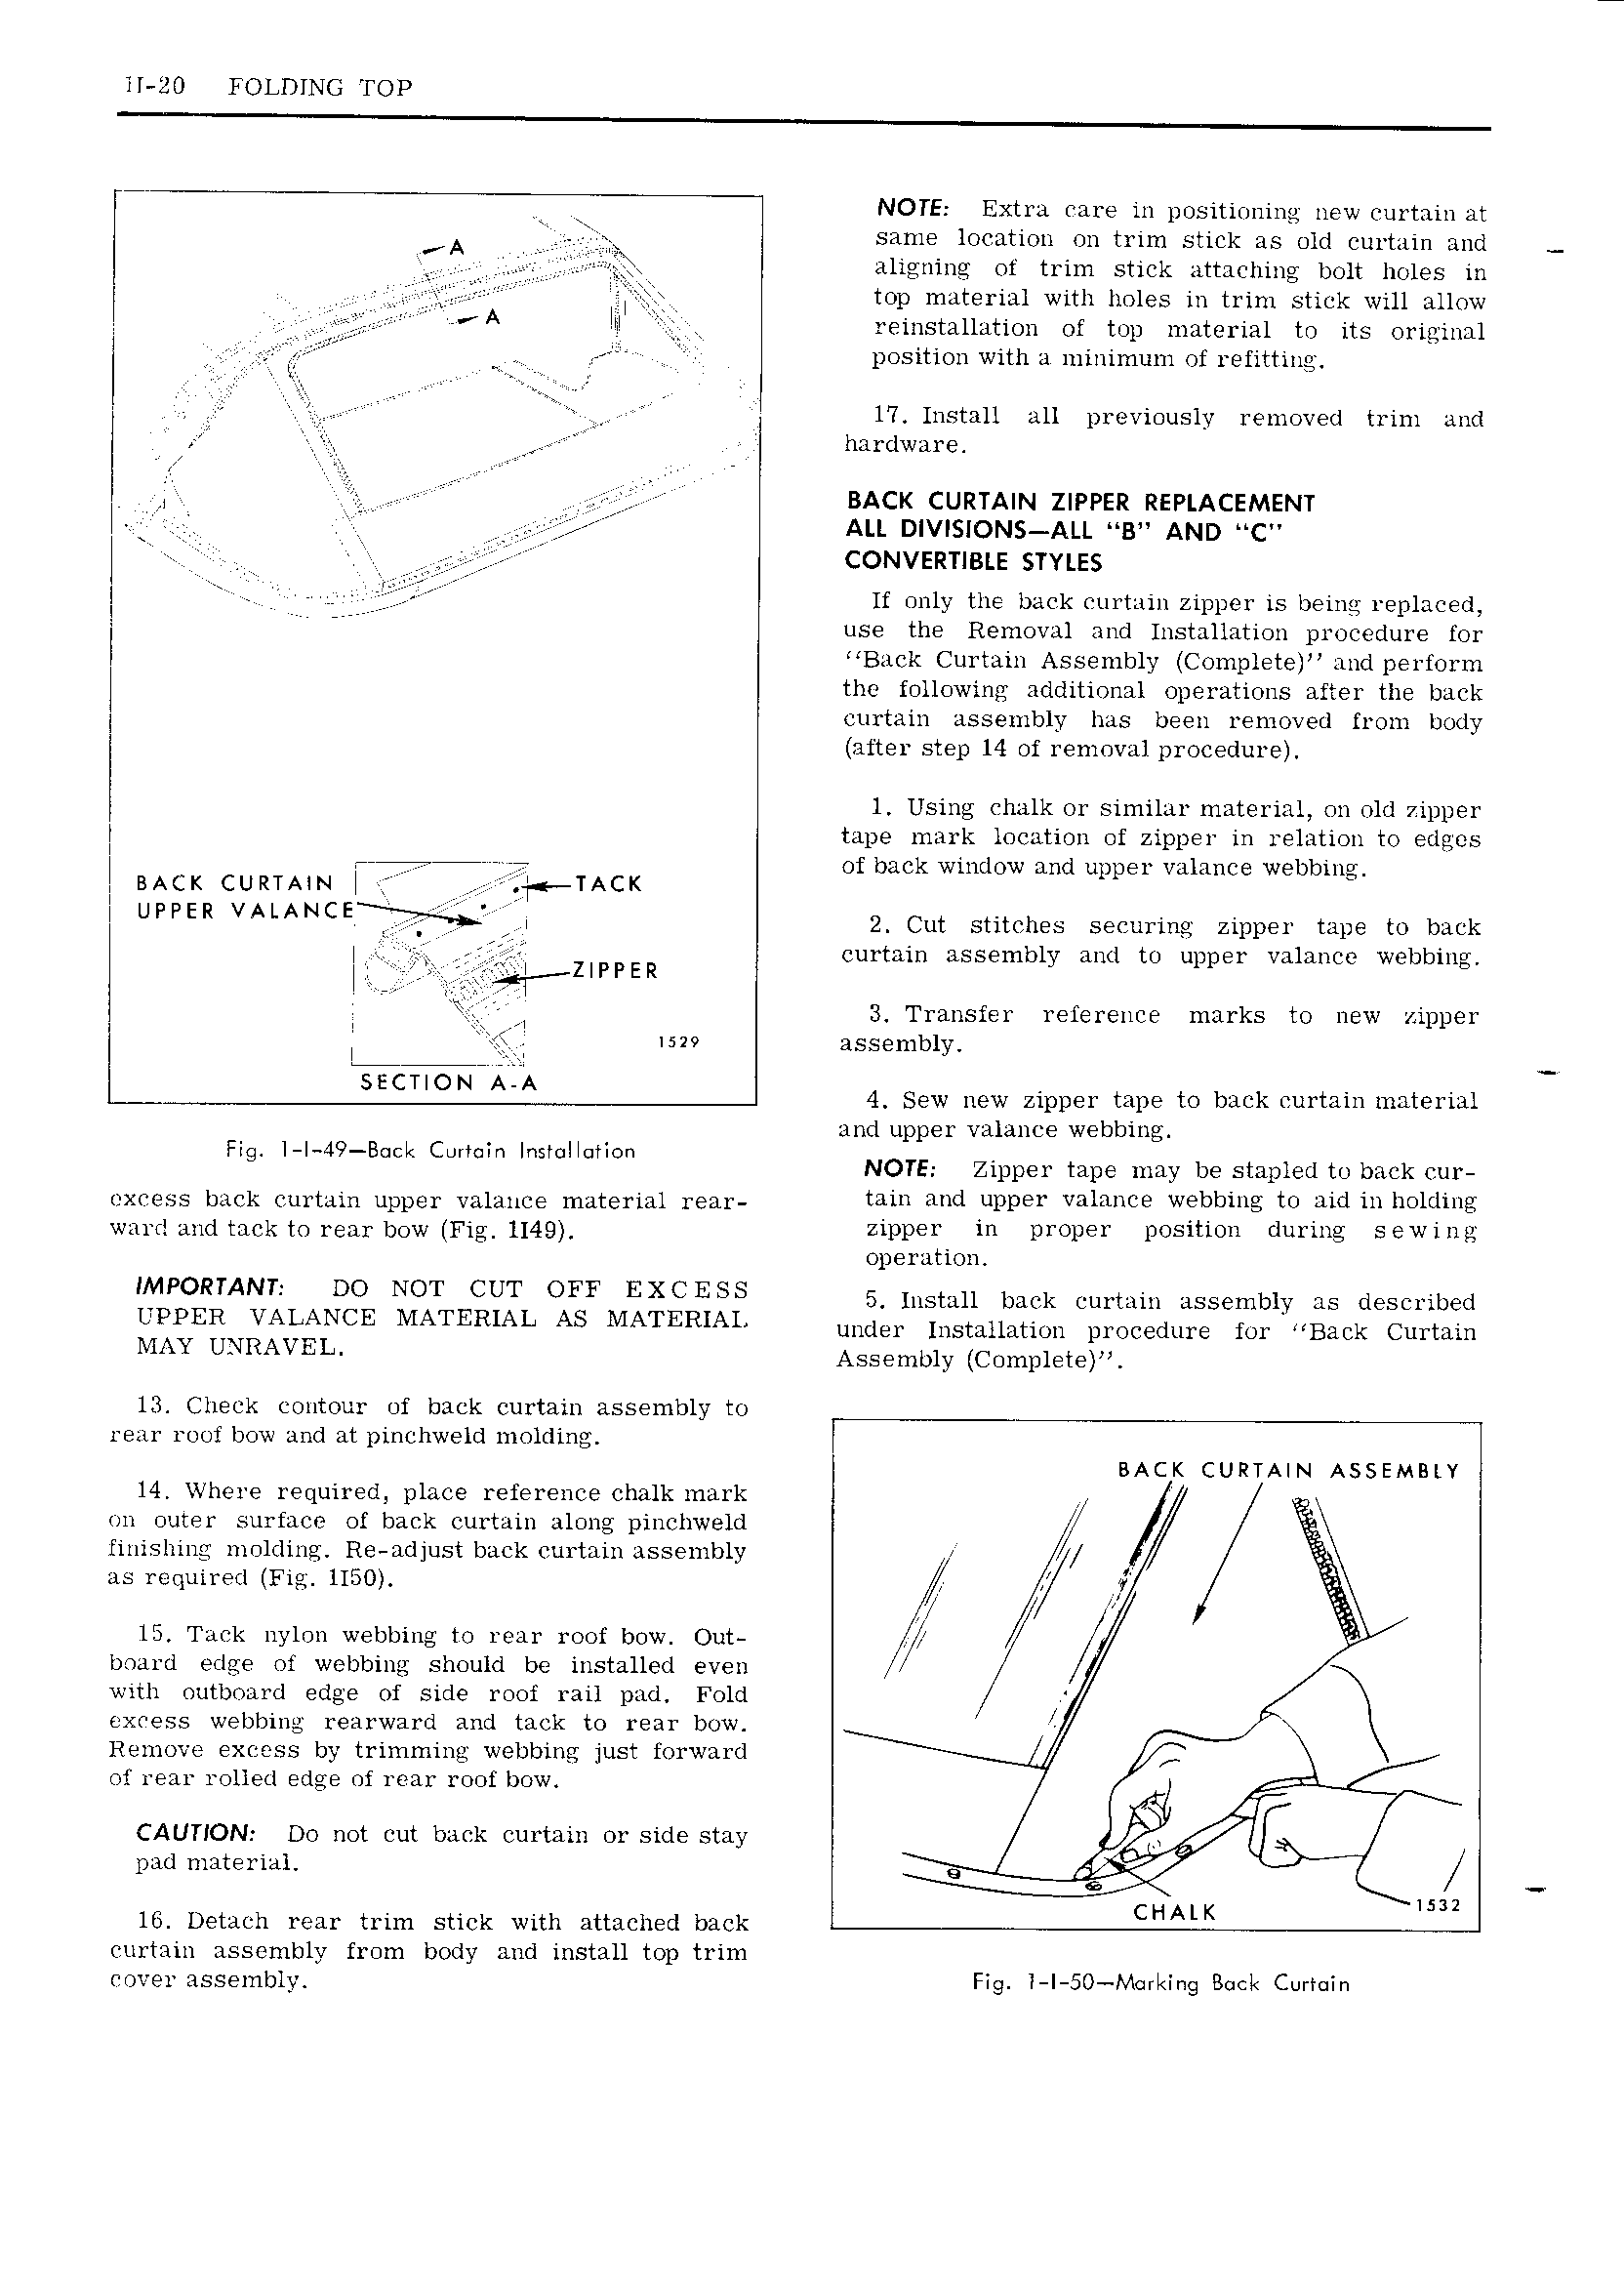
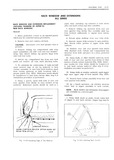
lI ZO FOLDING TOP if NOTE Extra care in positioning new curtain at A V ri same location on trim stick as old curtain and aligning of trim stick attaching bolt holes in I A top material with holes in trim stick will allow I hi 7 A III H reinstallation of top material to its original I II position with a minimum of refitting 17 Install all previously removed trim and I J hardware A BACK CURTAIN ZIPPER REPLACEMENT I ALL D V SIONS ALL B AND C I CONVERTIBLE STYLES I V If only the back curtain zipper is being replaced I TT use the Removal and Installation procedure for I Back Curtain Assembly Complete and perform I the following additional operations after the back I curtain assembly has been removed from body after step 14 of removal procedure 1 Using chalk or similar material on old zipier 7 l I tape mark location of zipper in relation to edges I e r 7 r of back window and upper valance webbing I BACK CURTAIN I I TACK I UPPER VAL NCEf T I 2 Cut stitches securing zipper tape to back I I 4 I ZIPPER curtain assembly and to upper valance webbing I I 3 Transfer reference marks to new zipper I I I I I mv assembly SECTION A A 4 Sew new zipper tape to back curtain material and upper valance webbing F I I 4 B k C I II Q GC mmm mm Ohm NOTE Zipper tape may be stapled to back cur pxwss back mmap upper valance mtemi i e n min and upper vnimwe webbing t i i 1inh 1 i e ward and tack to rear bow Fig 1I49 zipper in proper position during sewing operation IMPORTANT DO NOT CUT GEF EXCESS 5 Install back curtain assembly as described IJVPYER VATAANCE MATERIAL Ab MATERIAL under Installation procedure for Back Curtain MAX UNRAT EL Assembly Complete 13 Check contour of back curtain assembly to rear roof bow and at pinchweld molding BACK CURTAIN ASSEMBLY 14 Where required place reference chalk mark I on outer surface of back curtain along pinchweld I finishing molding Re adjust back curtain assembly M I as required Fig 1150 c xg M 15 Tack nylon webbing to rear roof bow Out I wV board edge of webbing should be installed even r wxth outboard edge of side roof rail pad Fold r excess webbing rearward and tack to rear bow xi Remove excess by trimming webbing just forward of rear rolled edge of rear roof bow CAUTION Do not cut back curtain or side stay I 1 l it 11 pu mi ein E 9 15 2 16 Detach rear trim stick with attached back CHALK curtain assembly from body and install top trim cover assembly Fig I I 50 M rI Ing Buck CurI In