Jeep Parts Wiki | Ford Parts Wiki
Home | Search | Browse
|
Body Service Manual August 1964 |
|
Prev

 Next
Next
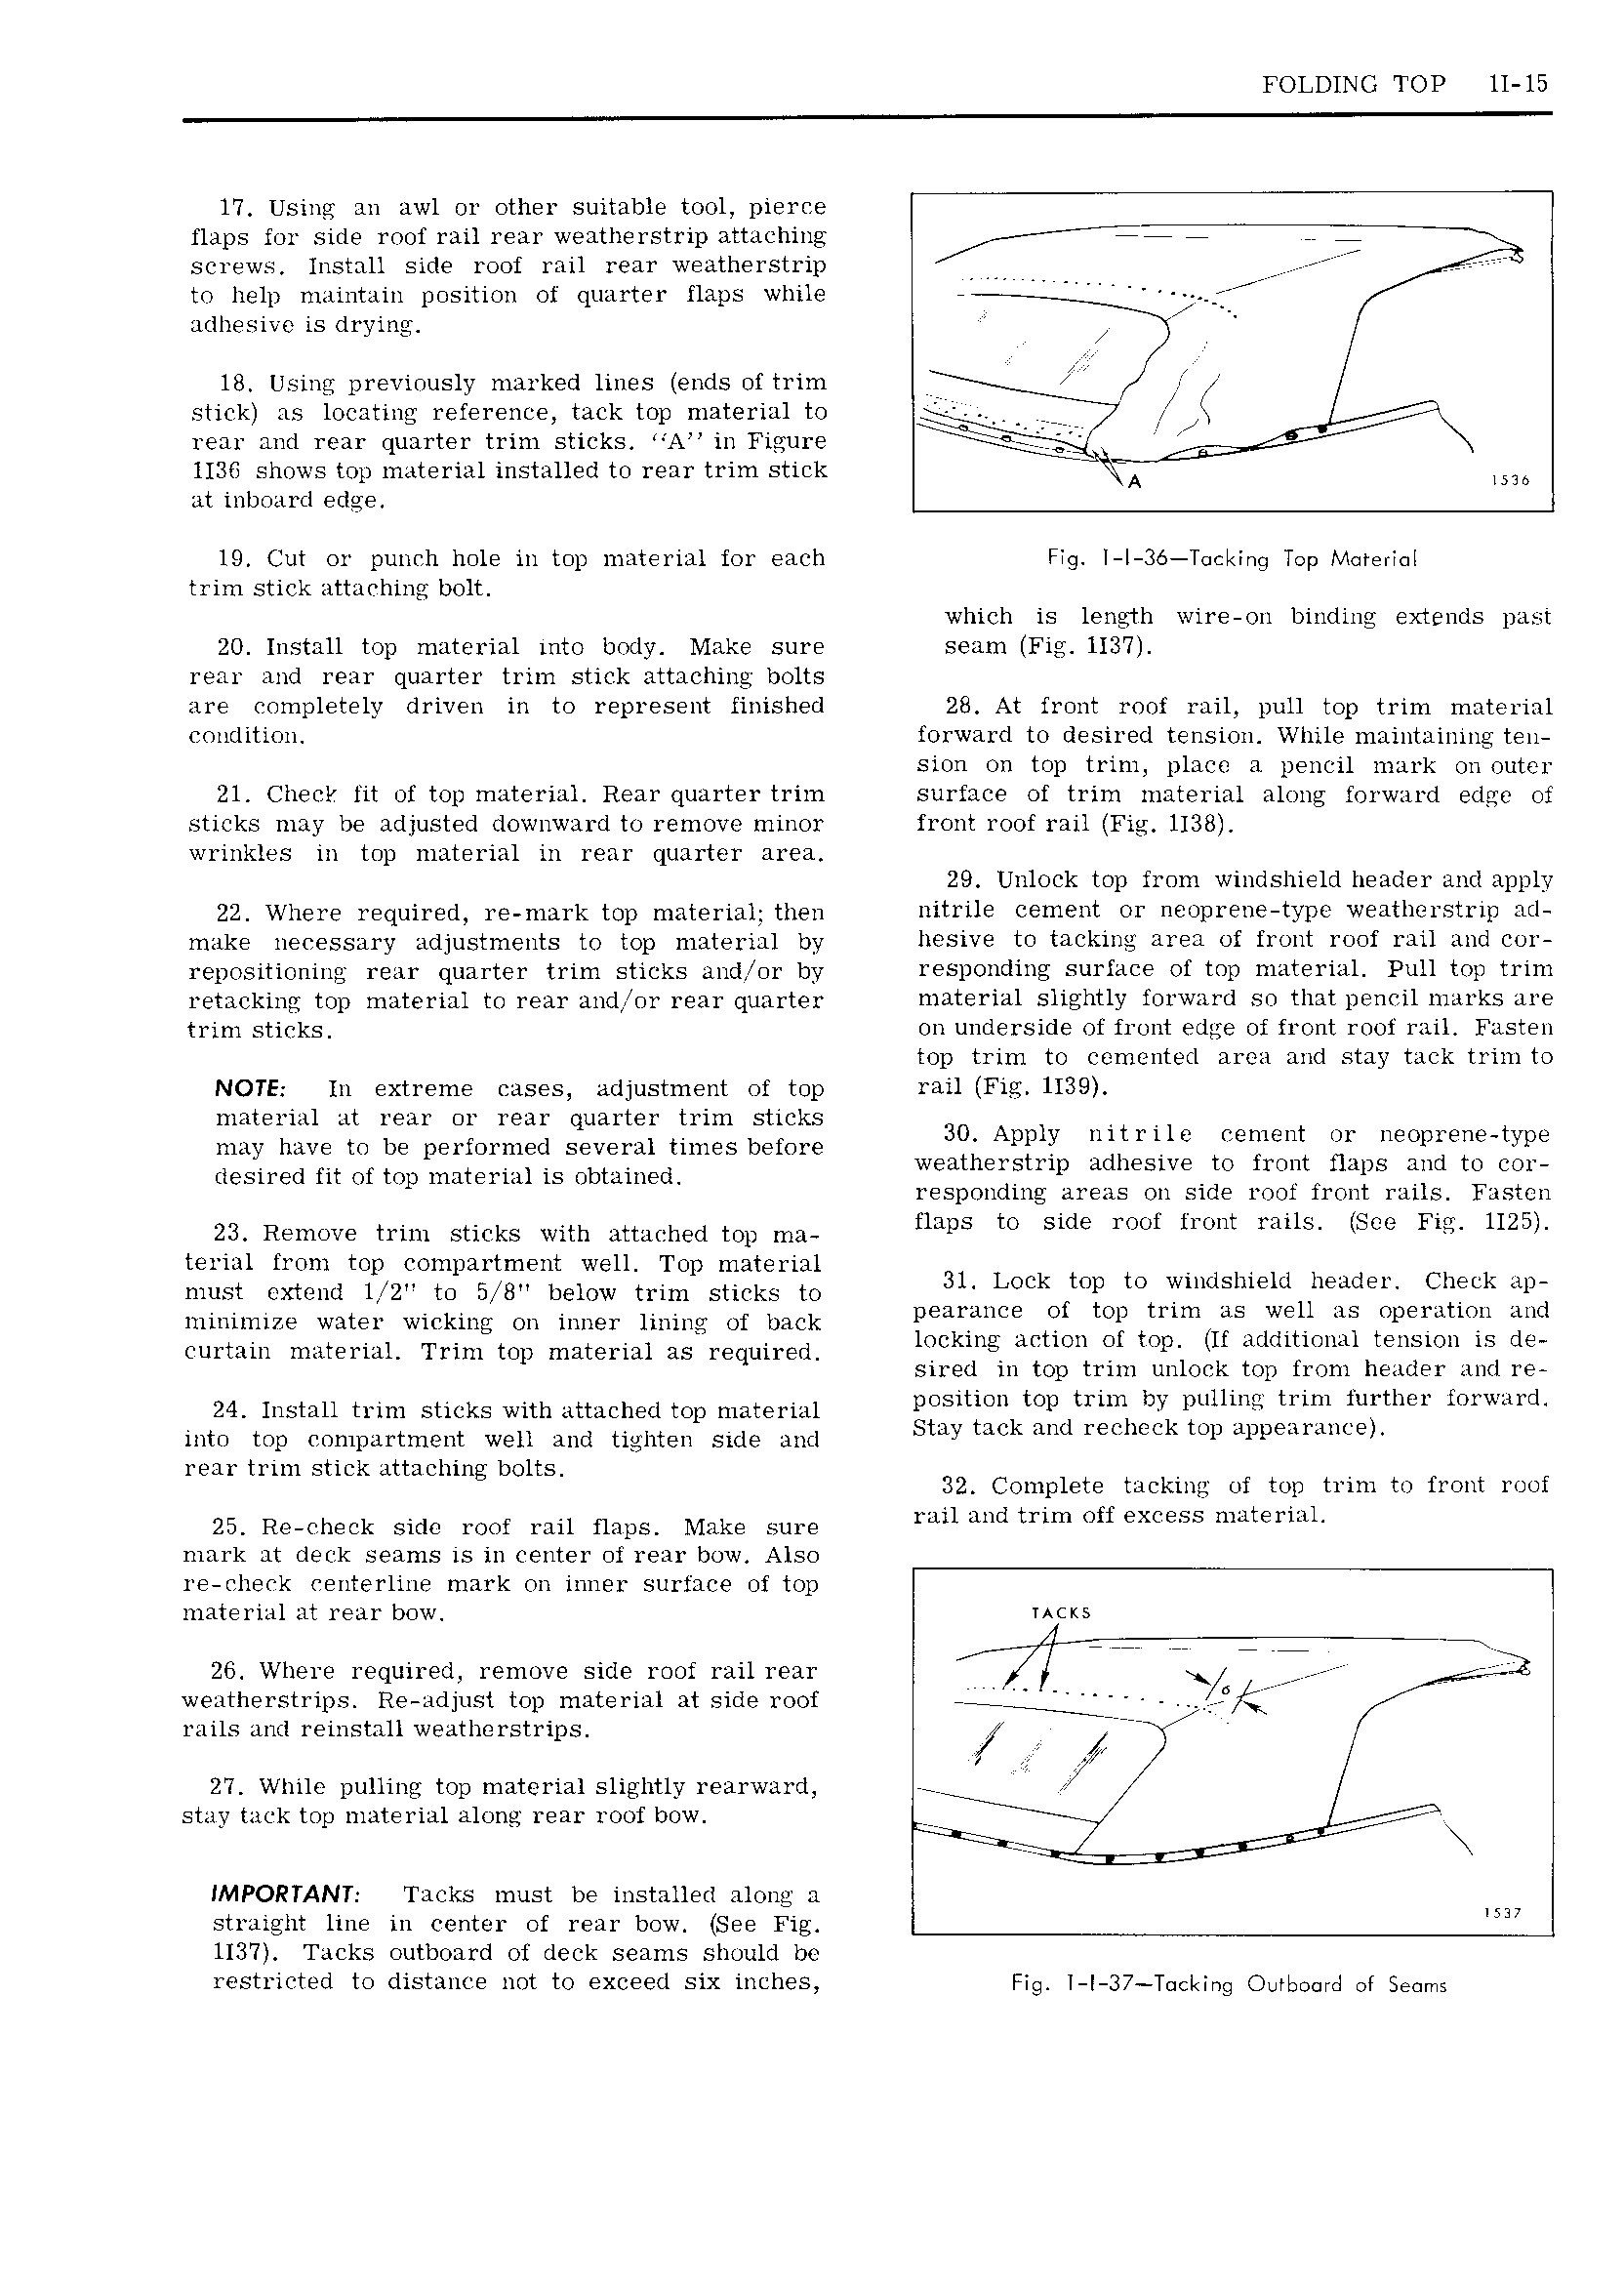
FOLDING TOP 11 15 17 Using an awl or other suitable tool pierce flaps for side roof rail rear weatherstrip attaching I i H i screws install side roof rail rear weatherstrip rrrr i rr to help maintain position of quarter flaps while V l i j adhesive is drying i 18 Using previously marked lines ends of trim r stick as locating reference tack top material to A rear and rear quarter trim sticks A in Figure 1136 shows top material installed to rear trim stick A ISM at inboard edge 19 Cut or punch hole in top material for each Fig I I 36 T king Top Material trim stick attaching bolt which is length wire on binding extends past 20 Install top material into body Make sure seam Fig 1137 rear and rear quarter trim stick attaching bolts are completely driven in to represent finished 28 At front roof rail pull top trim material condition forward to desired tension While maintaining ten sion on top trim place a pencil mark on outer 21 Checll 1 it of top material Rear quarter trim surface of trim material along forward edge oi sticks may be adjusted downward to remove minor front roof rail Fig 1138 wrinkles in top material in rear quarter area 29 Unlock top from windshield header and apply 22 Where required re m irk top material then nitrile cement or neoprene type weathcrstrip ad mukg uepessmy adjustments to Op mgtayigi by hesive to tacking area of front roof rail and cor repositioning rear quarter trim sticks and or by responding surface of top material Pull top trim retacking top material to rear andfor rear quarter material slightly forward so that pencil marks are trim sticks on underside of front edge of front roof rail Fasten top trim to cemented area and stay tack trim to NOTE 1n extreme cases adjustment of top rail Fig 1139 material at rear or rear quarter trim sticks 30 Apply llltflle cement or neoprene type may have to be peifoimed several times betoie V desired fit Of mp umterml is Obmmgdl weatherstrip adhesive I to front g flaps and to cor responding areas on side root tront rails Fasten 23 Remove trim sticks with attached top ma naps tO Slde TOM inmt mus SCG Fm H25 g gxdtil 2 O g A rt 1 El 11LispSxiigusg 31 Lock top to windshield header Check ap minimize water wicking on inner lining of back pemilm e Qt top tum as W ur as OpSm tUriu me Curmm nmterml Trim mp nmterial as required locking action of top 1f additional tension is de sired in top trim unlock top irom header and re 24 Install trim sticks with attached top material Ecsitmn mp trim by pulling trim mrthm mywMvd into top cimipartinent well and tigmgu side and 1 Yt i k Md 1 Fhc ki0p uppear m se rear trim stick attaching bolts 32 Complete tacking of top trim to tront roof 25 RG hECk SMC mmf mil flaps Mukg Surg rail and trim oft excess material mark at deck seams is in center oi rear bow Also re check centerline mark on inner surface of top material at rear bow ucxs 26 Where required remove side roof rail rear weatherstrips Re adjust top material at side roof 7G f rails and reinstall weatherstrips M G 27 While pulling top material slightly rearward V ff stay tack top material along rear roof bow c i IMPORTANT Tacks must be installed along a straight line in center of rear bow See Fig ww 1137 Tacks outboard of deck seams should bc restricted to distance not to exceed six inches Fig l I 37 T cking Outboard et Seems

 Next
Next