Jeep Parts Wiki | Ford Parts Wiki
Home | Search | Browse
|
Body Service Manual August 1964 |
|
Prev

 Next
Next
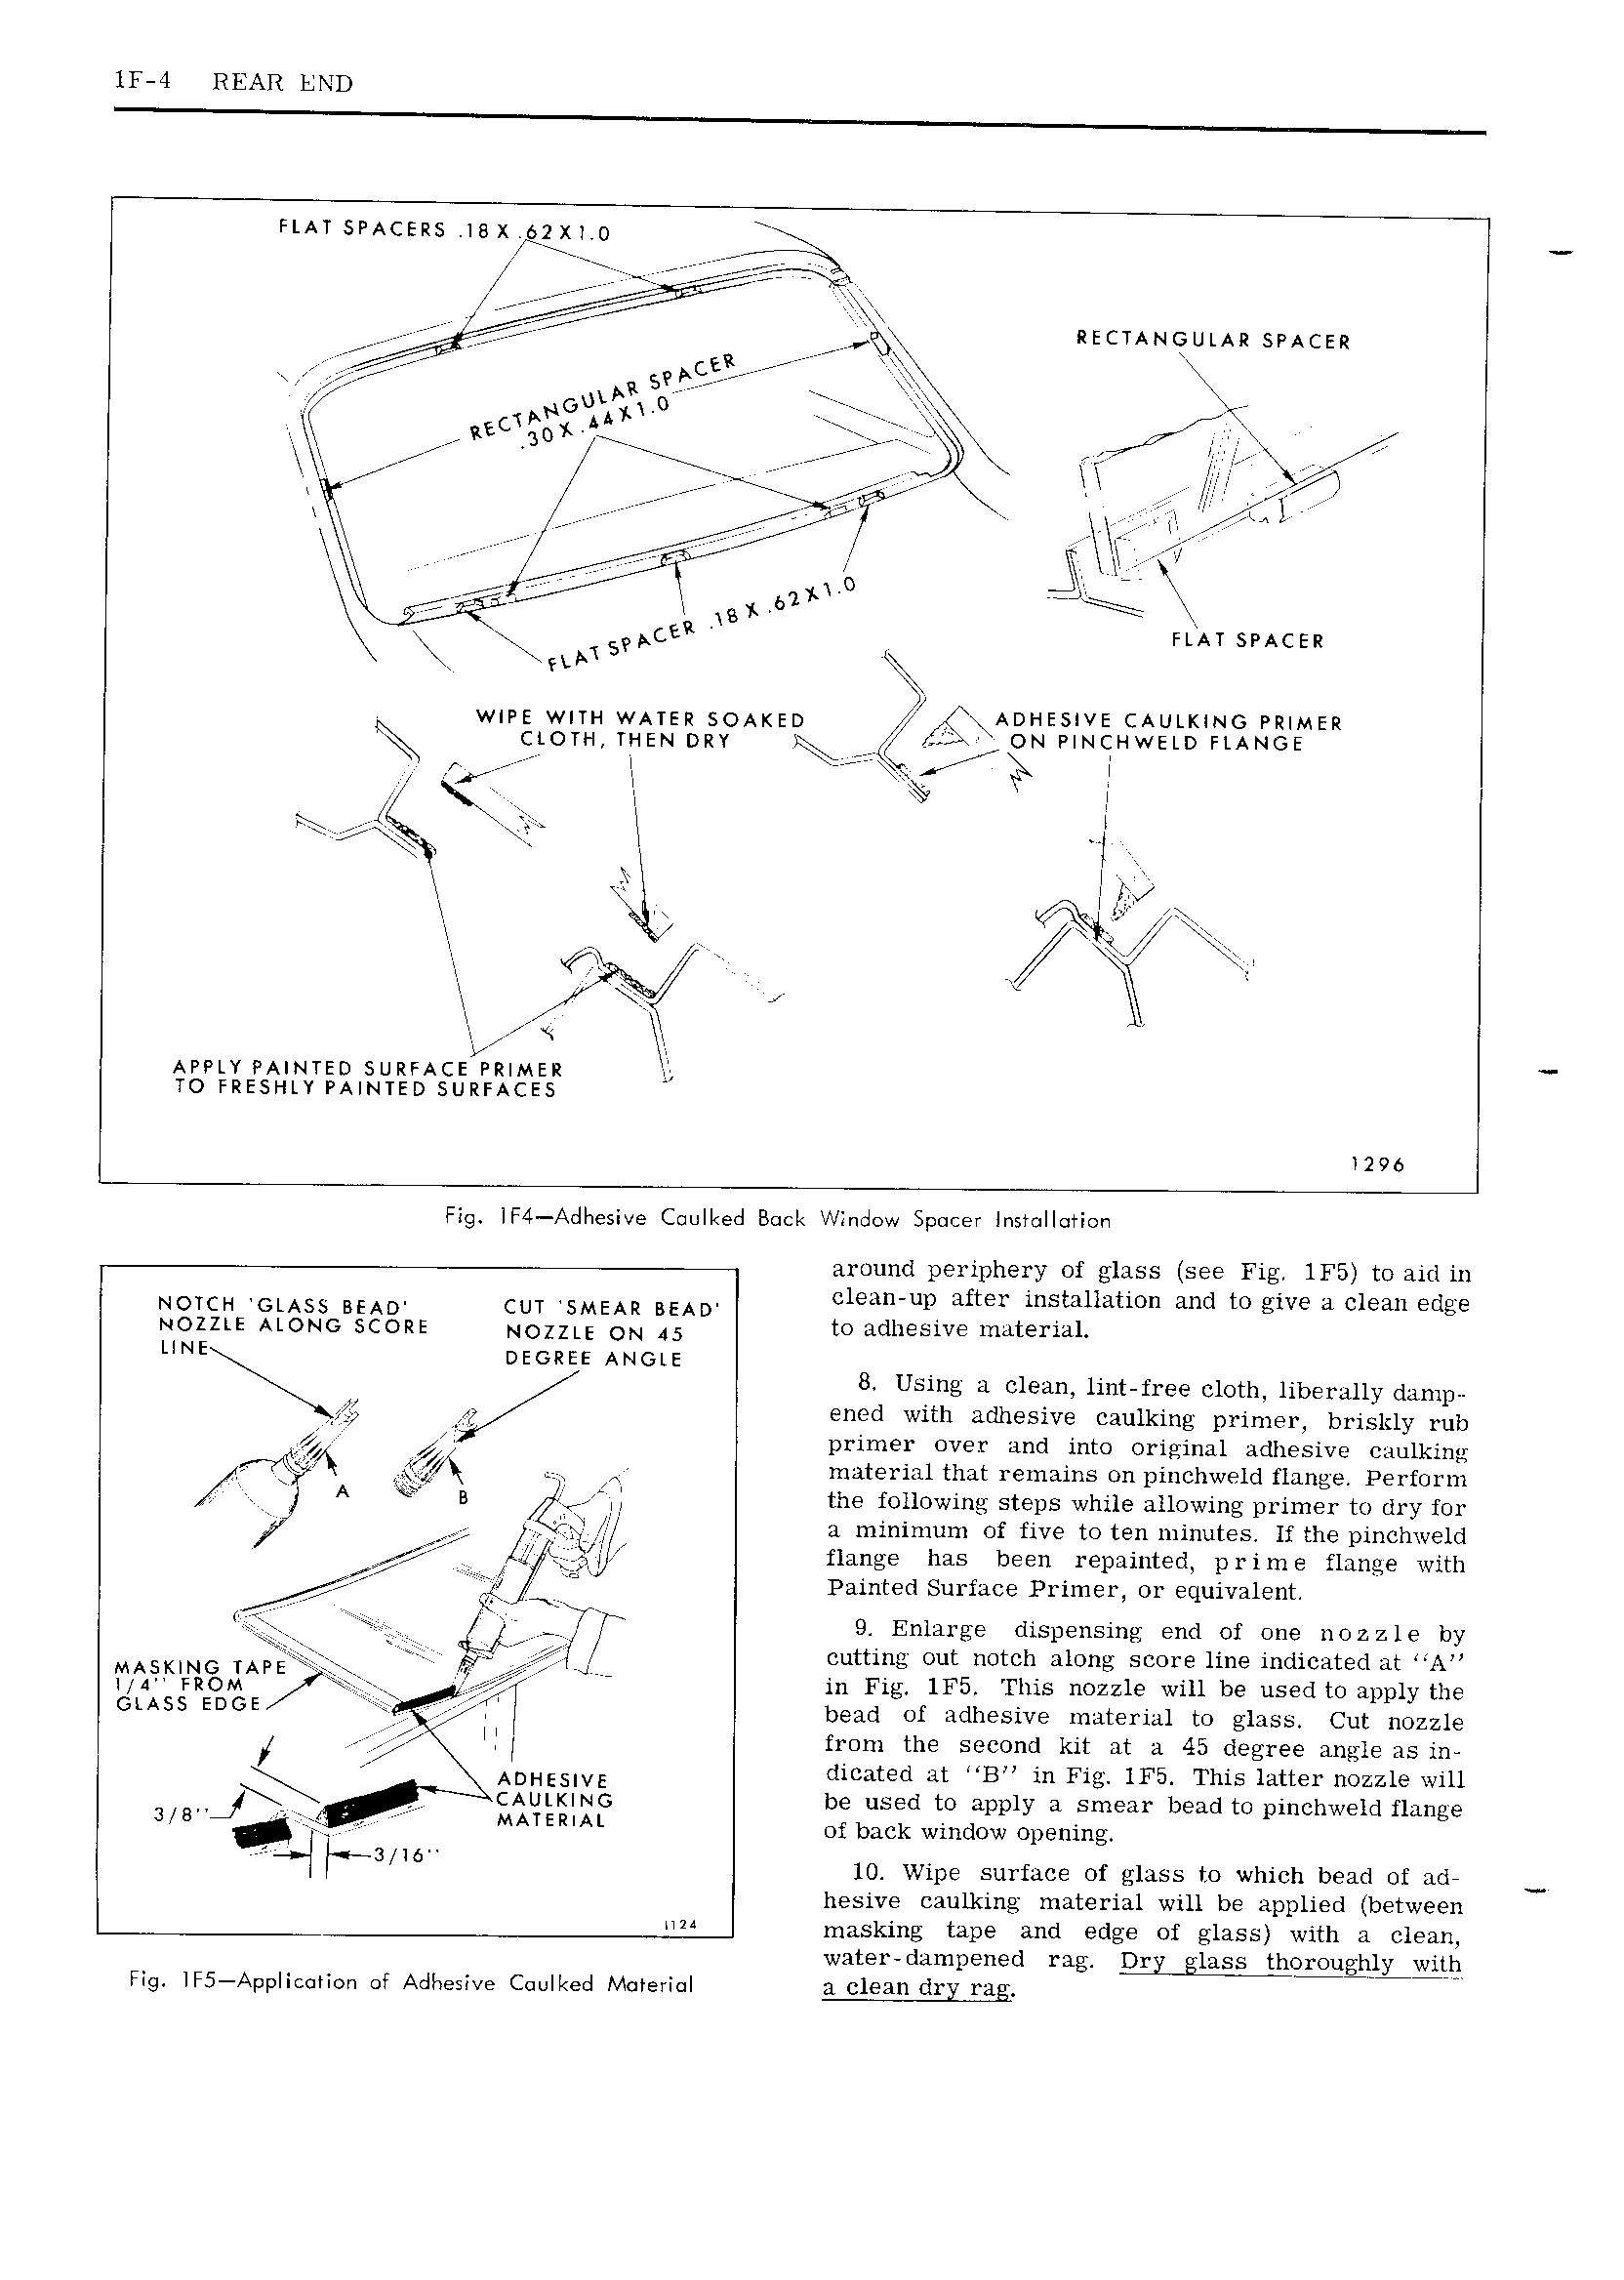
IF 1 REAR END FLAT SPACERS 1 x gVgXT 0 V V T an r rr Liar RECTANGULAR SPACER I Sv 1EE rrV rrr V Vrrrrrr 7 2 gx O V an V T Ed T AAy V V 7 rr 7 VVV r E 20 r a K VVVVV rrrr V e T V X rrr rr r e V T V V VV V L V T T T ryrr j Vrffrrr TT WC LTT or T TT T X4 V V V N T jg N 0 T V T B 67 g E FLAT SPACER 9 A T an 5 c V w pE WTTH WATER SOAKED TV ADHESIVE CAULKING PRTMER CLOTHVTHEN DRY P L VON PTNcHwELD FLANoE ff T I r E i E 5 X A T ei 1 T A i inf T 4 W 5 T V T S I R T T li APPLY PAINTED SURFACE PR MER lj TO FRESHLY PAINTED SURFACE5 T29 Fig IF4 Adhesive Cuulked Back Window Spacer Installation around periphery of glass see Fig lF5 to aid in NOTCH TGLASS BEAD CUT SMEAR BEAD clean up after installation and to give a clean edge NOZZLE ALONG SQORE NOZZLE ON 45 to adhesive material UNE DEGREE ANGLE 8 Using a clean lint free cloth liberally damp Ngi ened with adhesive caulking primer briskly rub VQ 4 V primer over and into original adhesive caulking LV material that remains on pinchweld flange Perform 1 I A Q B TQ the following steps while allowing primer to dry for in V V a minimum of five to ten minutes lf the pinchweld E Ti ea flange has been repainted prime flange with J T Painted Surface Primer or equivalent w V V T Tr 9 Enlarge dispensing end of one nozzle by V cutting out notch along score line indicated at A KIT IA f J in Fig 1F5 This nozzle will be used to apply the GLASS EDGE V Y I bead of adhesive material to glass Cut nozzle V I T from the second kit at a 45 degree angle as in ADHESIVE dicated at B in Fig lF5 This latter nozzle will V cAuLT NG be used to apply a smear bead to pinchweld flange 3 8 MATER L of back window opening V5 3 mu 10 Wipe surface of glass to which bead of ade hesive eaulking material will be applied between 2 masking tape and edge of glass with a clean water dampened rag Dr glass thorougimgth Fig lF5 AppIic Tic n ot Adhesive Cuulked Material a clean dr i ra

 Next
Next