Jeep Parts Wiki | Ford Parts Wiki
Home | Search | Browse | Marketplace | Messages | FAQ | Guest
|
Body Service Manual August 1964 |
|
Prev

 Next
Next
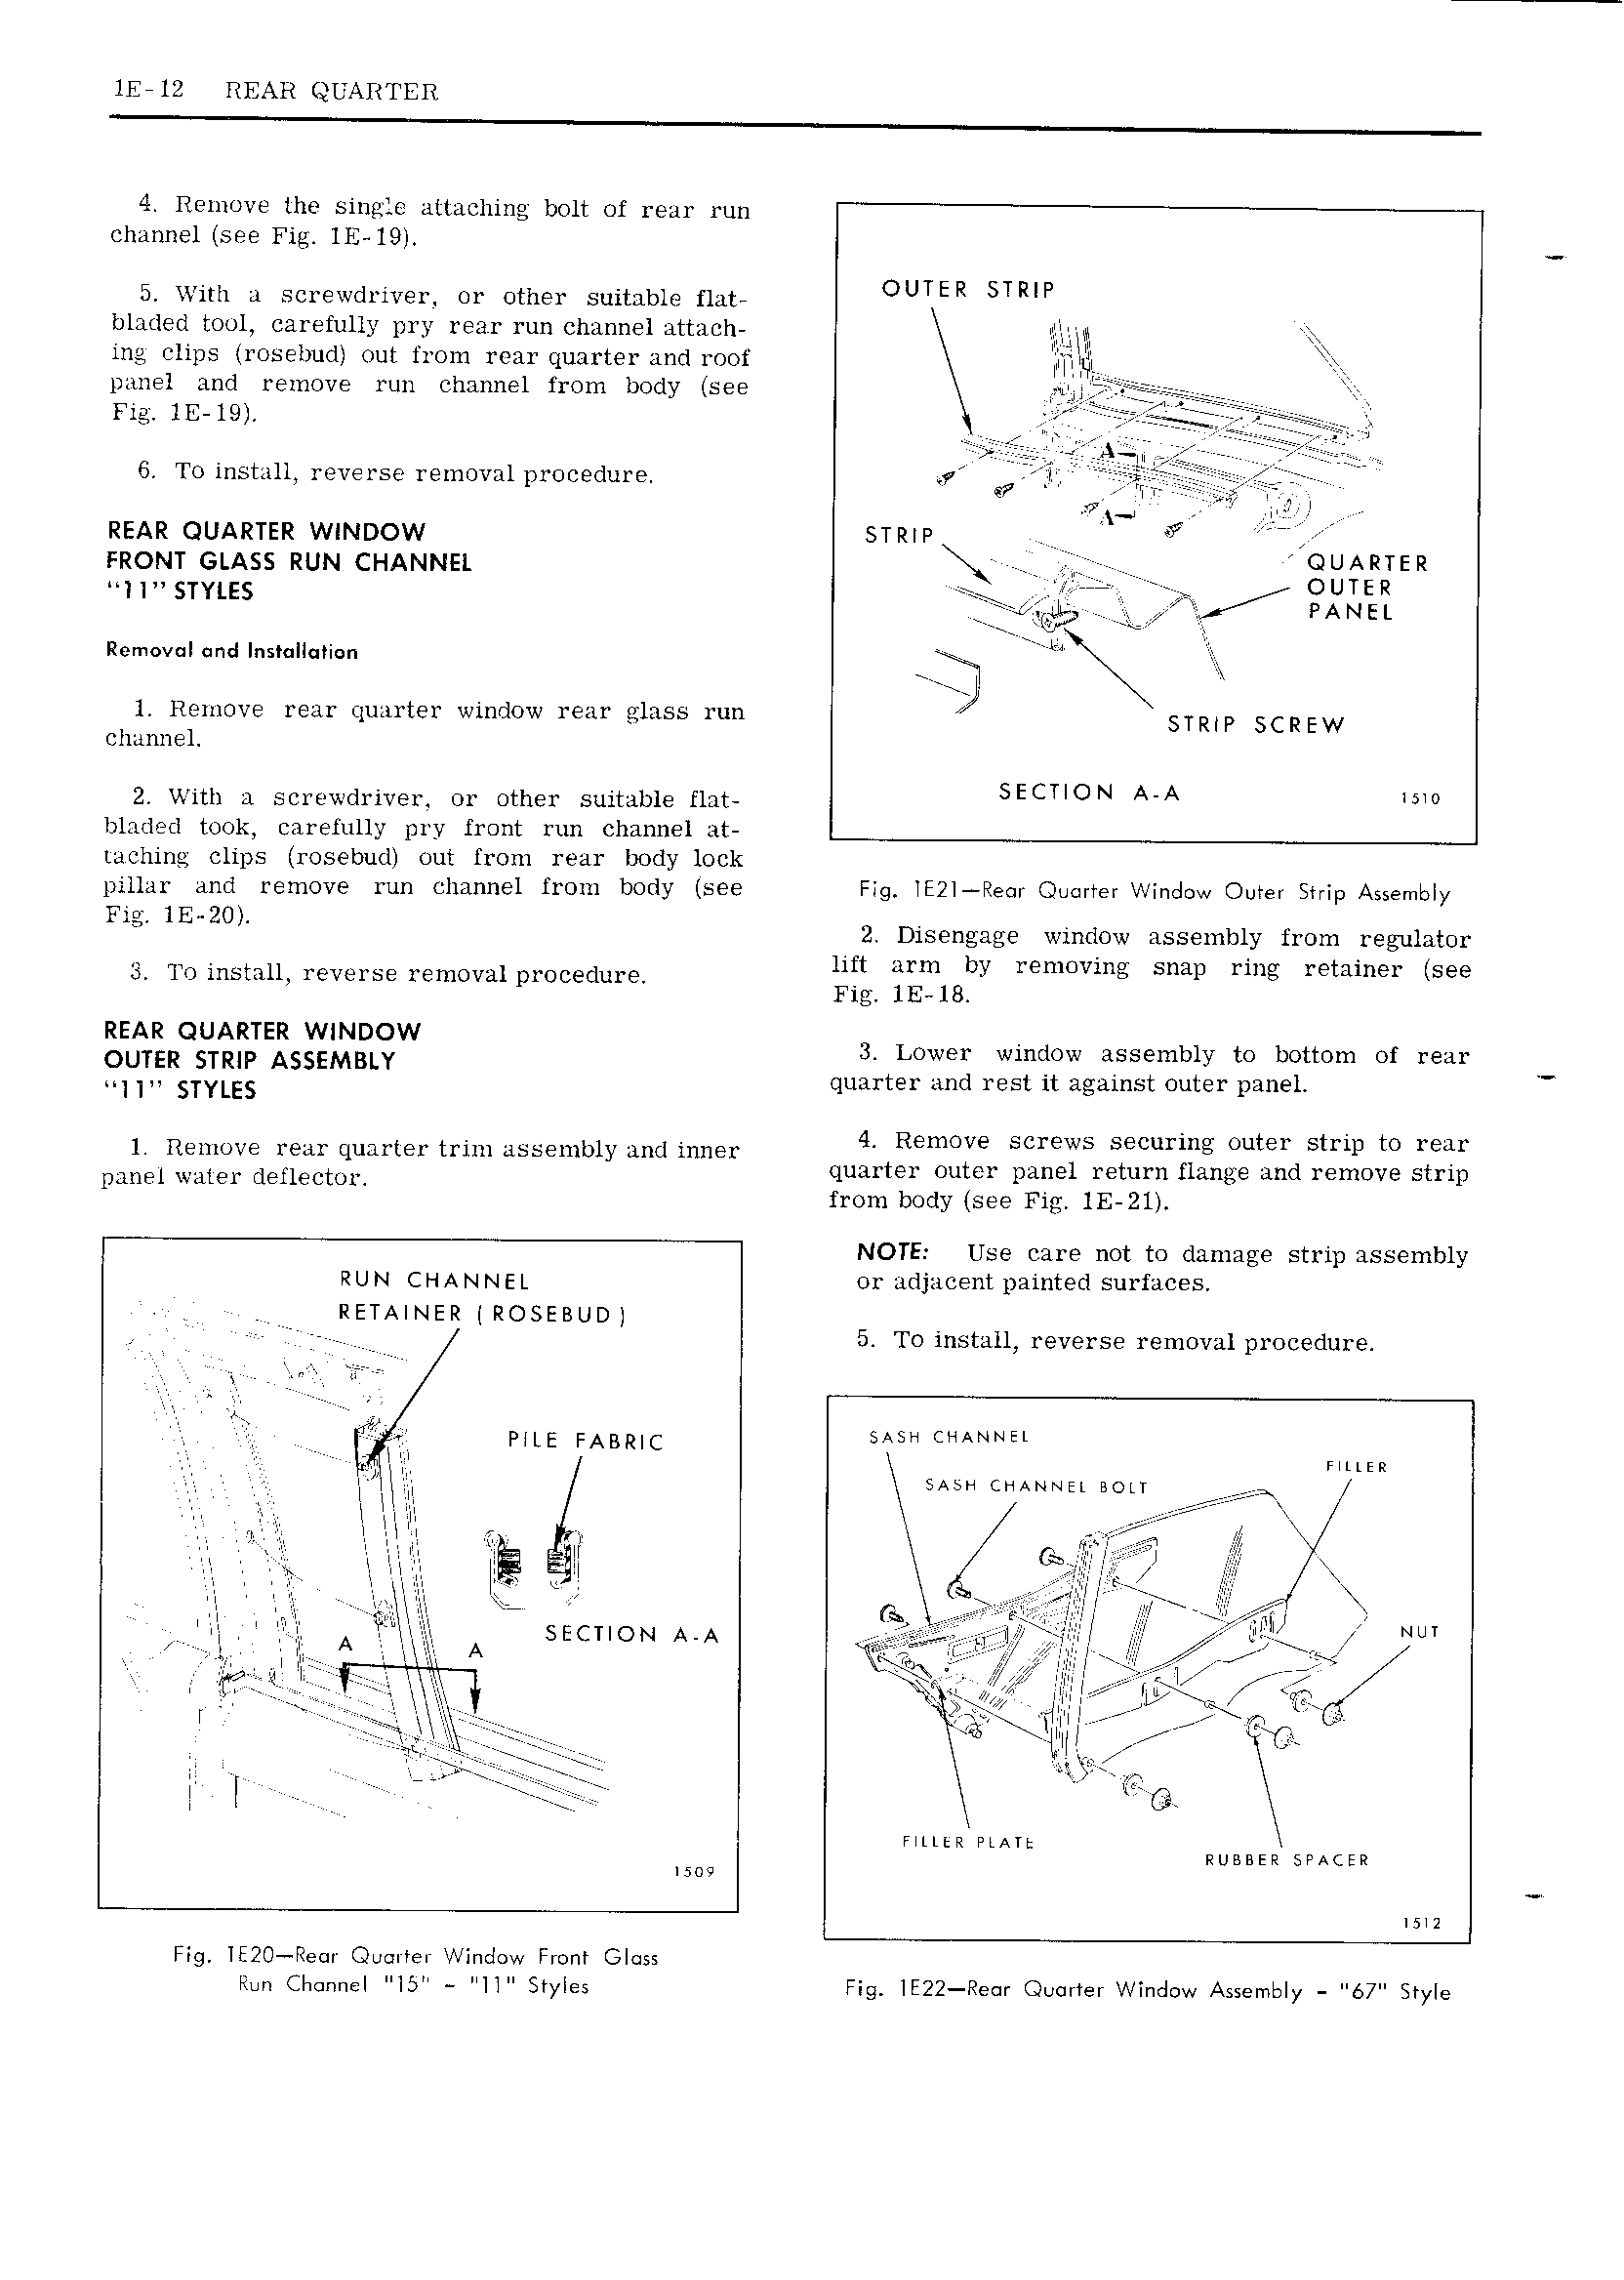
lE l2 REAR QUARTER 4 Remove the single attaching bolt of rear run channel see Fig lE l9l 5 with a ser ewtlr n er ur other suitable nap OUTER lR P bladed tool carefully pry rear run channel attach tim ing clips lrosebucl out from rear quarter and roof ll llltl panel and remove run channel from body see jg r r lr T TEBEVVJ Tl ATllV rrrrrr il 7 6 To install reverse removal procedure J 7 r v l T l REAR QUARTER WINDOW STRIP W T mom oi Ass RUN CHANNEL SBAERQER ll STYLES X PANEL Removal and Inst l ti n eW V A ll 1 Remove rear quarter window rear glass run STRIP SCREW channel 2 With a screwdriver or other suitable flat SECTION A A blatled took carefully pry front run channel at taching clips rosebudl out from rear body lock pillar and remove run channel from body see Fig lE2l Re i Oumter Window Outer Strip Assembl Y ieil 2 FD E Ol 2 Drsengage window assembly from regulator TO mstam reverse z mOVa1p1 0C dm E aignlgby removing snap ring retainer see ig REAR UARTER WINDOW OUTERQSTRIP ASSEMBLY 3 Lower window assembly to bottom of rear W 1 STYLES quarter and rest it against outer panel 1 Remove rear quarter trim assembly and inner V R m v S r WS Securhlg Quler Sfrip to flew panel Wm dgmectorl uarter Filter pgnel lgztugt flange and remove strip rom Joey see rg NOTE Use care not to damage strip assembly RUN CHANNEL or adjacent painted surfaces RETAINER ROSEBUD V 5 To install reverse removal procedure X l ll ei 4 PHE FABRIC saw CHANNEL yl lnlll mln fh SASH CHANNEL BOLT i i A I I R M W R rj C r w T Y 6 l iw xl 1 l iw E A ll y e i F l g l till is z 1 ll t f 1 T F5 E fl ll 1 ll j willirl l it l ll ll section A A ae ti l wl i xl r 5 l i A twill A Q r t i T i i gi l q m nel Ul ee J il lt l l l illlll yl l 1 llwl t V llll V N i will il i ll W ll l 7 R lllllll I rrrr V QA r if l i iieeeee it in V G FlLlI R FLATI RUBBER SPACER lil Fig lE20 Re t Quarter Window Front Gl s lion Cliennel lf ll Styles Fig lE22 Re t Ouorler Window Assembly 67 Style

 Next
Next