Jeep Parts Wiki | Ford Parts Wiki
Home | Search | Browse
Prev

 Next
Next
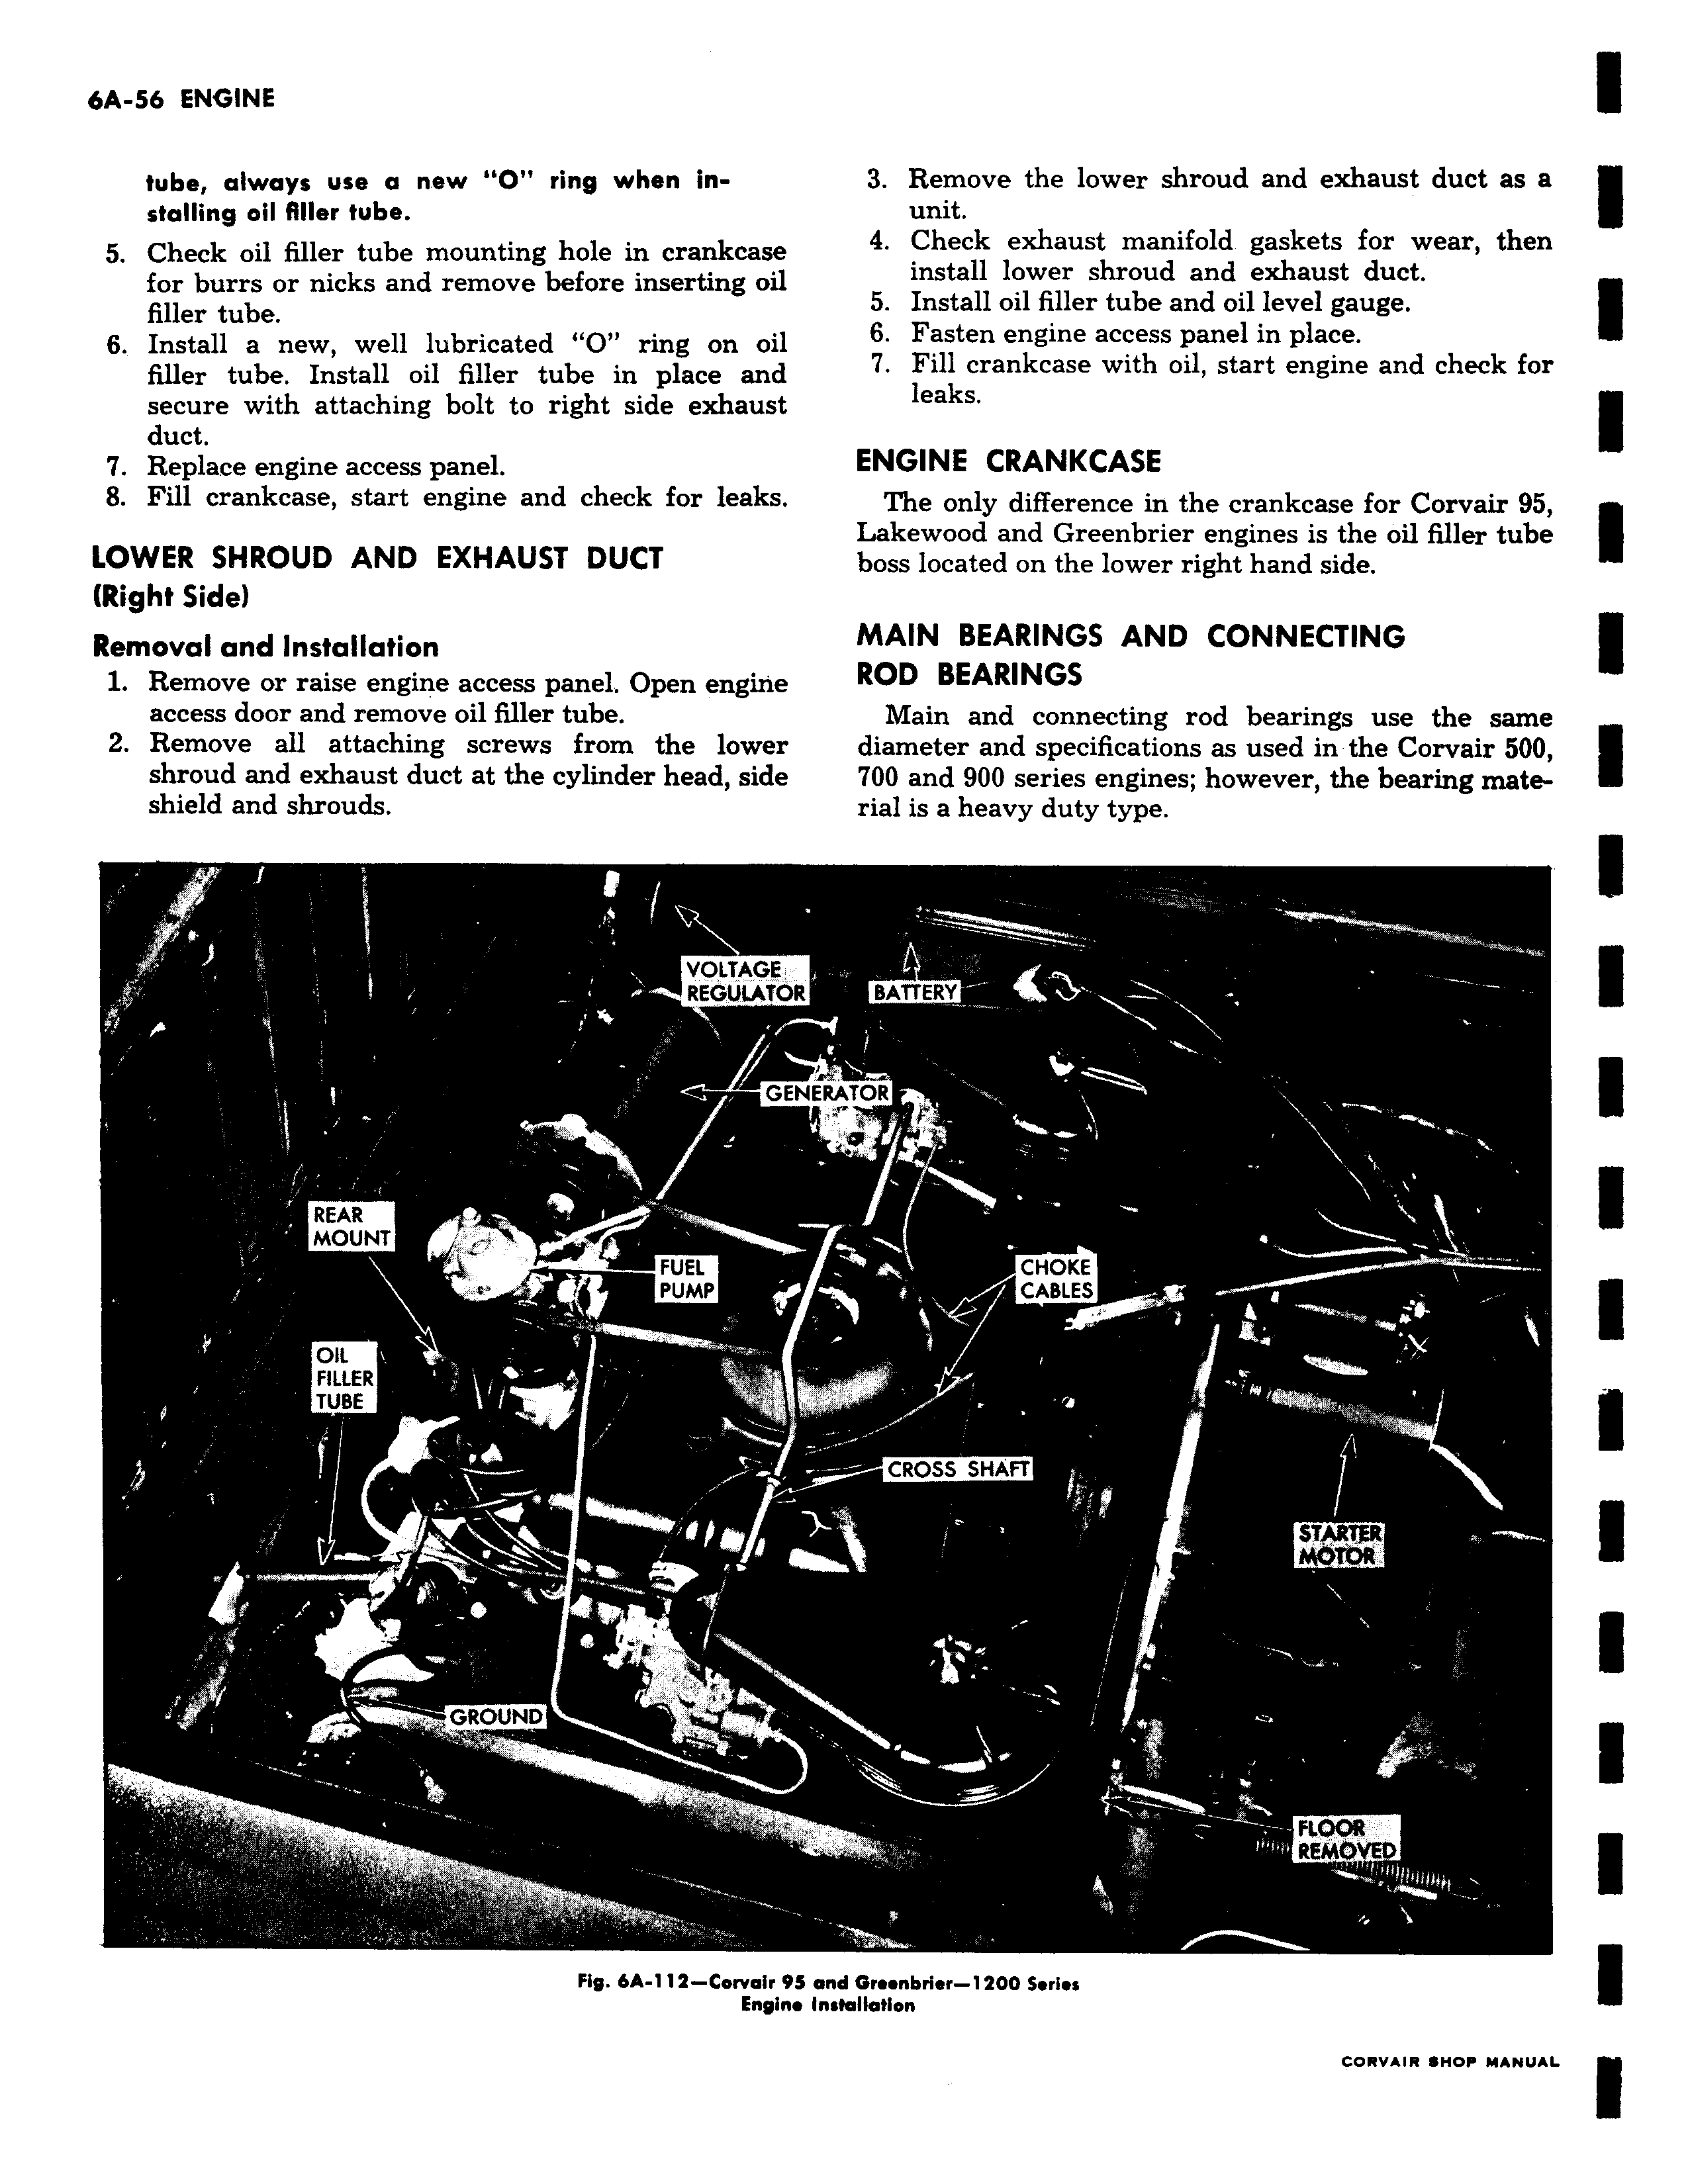
tube always use a new O ring when installing oil filler tube 5 Check oil filler tube mounting hole in crankcase for burrs or nicks and remove before inserting oil filler tube 6 Install a new well lubricated O ring on oil filler tube Install oil filler tube in place and secure with attaching bolt to right side exhaust duct 7 Replace engine access panel 8 Fill crankcase start engine and check for leaks LOWER SHROUD AND EXHAUST DUCT Right Side Removal and Installation 1 Remove or raise engine access panel Open engine access door and remove oil filler tube 2 Remove all attaching screws from the lower shroud and exhaust duct at the cylinder head side shield and shrouds VOLTAGE REGULATOR REAR MOUNT FUEL PUMP OIL FILLER TUBE r r GROUND Fig 6A 114 Corvair 95 Engine 3 Remove the lower shroud and exhaust duct as a unit 4 Check exhaust manifold gaskets for wear then install lower shroud and exhaust duct 5 Install oil filler tube and oil level gauge 6 Fasten engine access panel in place 7 Fill crankcase with oil start engine and check for leaks ENGINE CRANKCASE The only difference in the crankcase for Corvair 95 Lakewood and Greenbrier engines is the oil filler tube boss located on the lower right hand side MAIN BEARINGS AND CONNECTING ROD BEARINGS Main and connecting rod bearings use the same diameter and specifications as used in the Corvair 500 700 and 900 series engines however the bearing material is a heavy duty type BATTERY IERATOR I CHOKE CABLES II CROSS SHAFT STARTER MoroR FLOOR REMOVED and Greenbrier 1400 Series Installation

 Next
Next