Jeep Parts Wiki | Ford Parts Wiki
Home | Search | Browse
Prev

 Next
Next
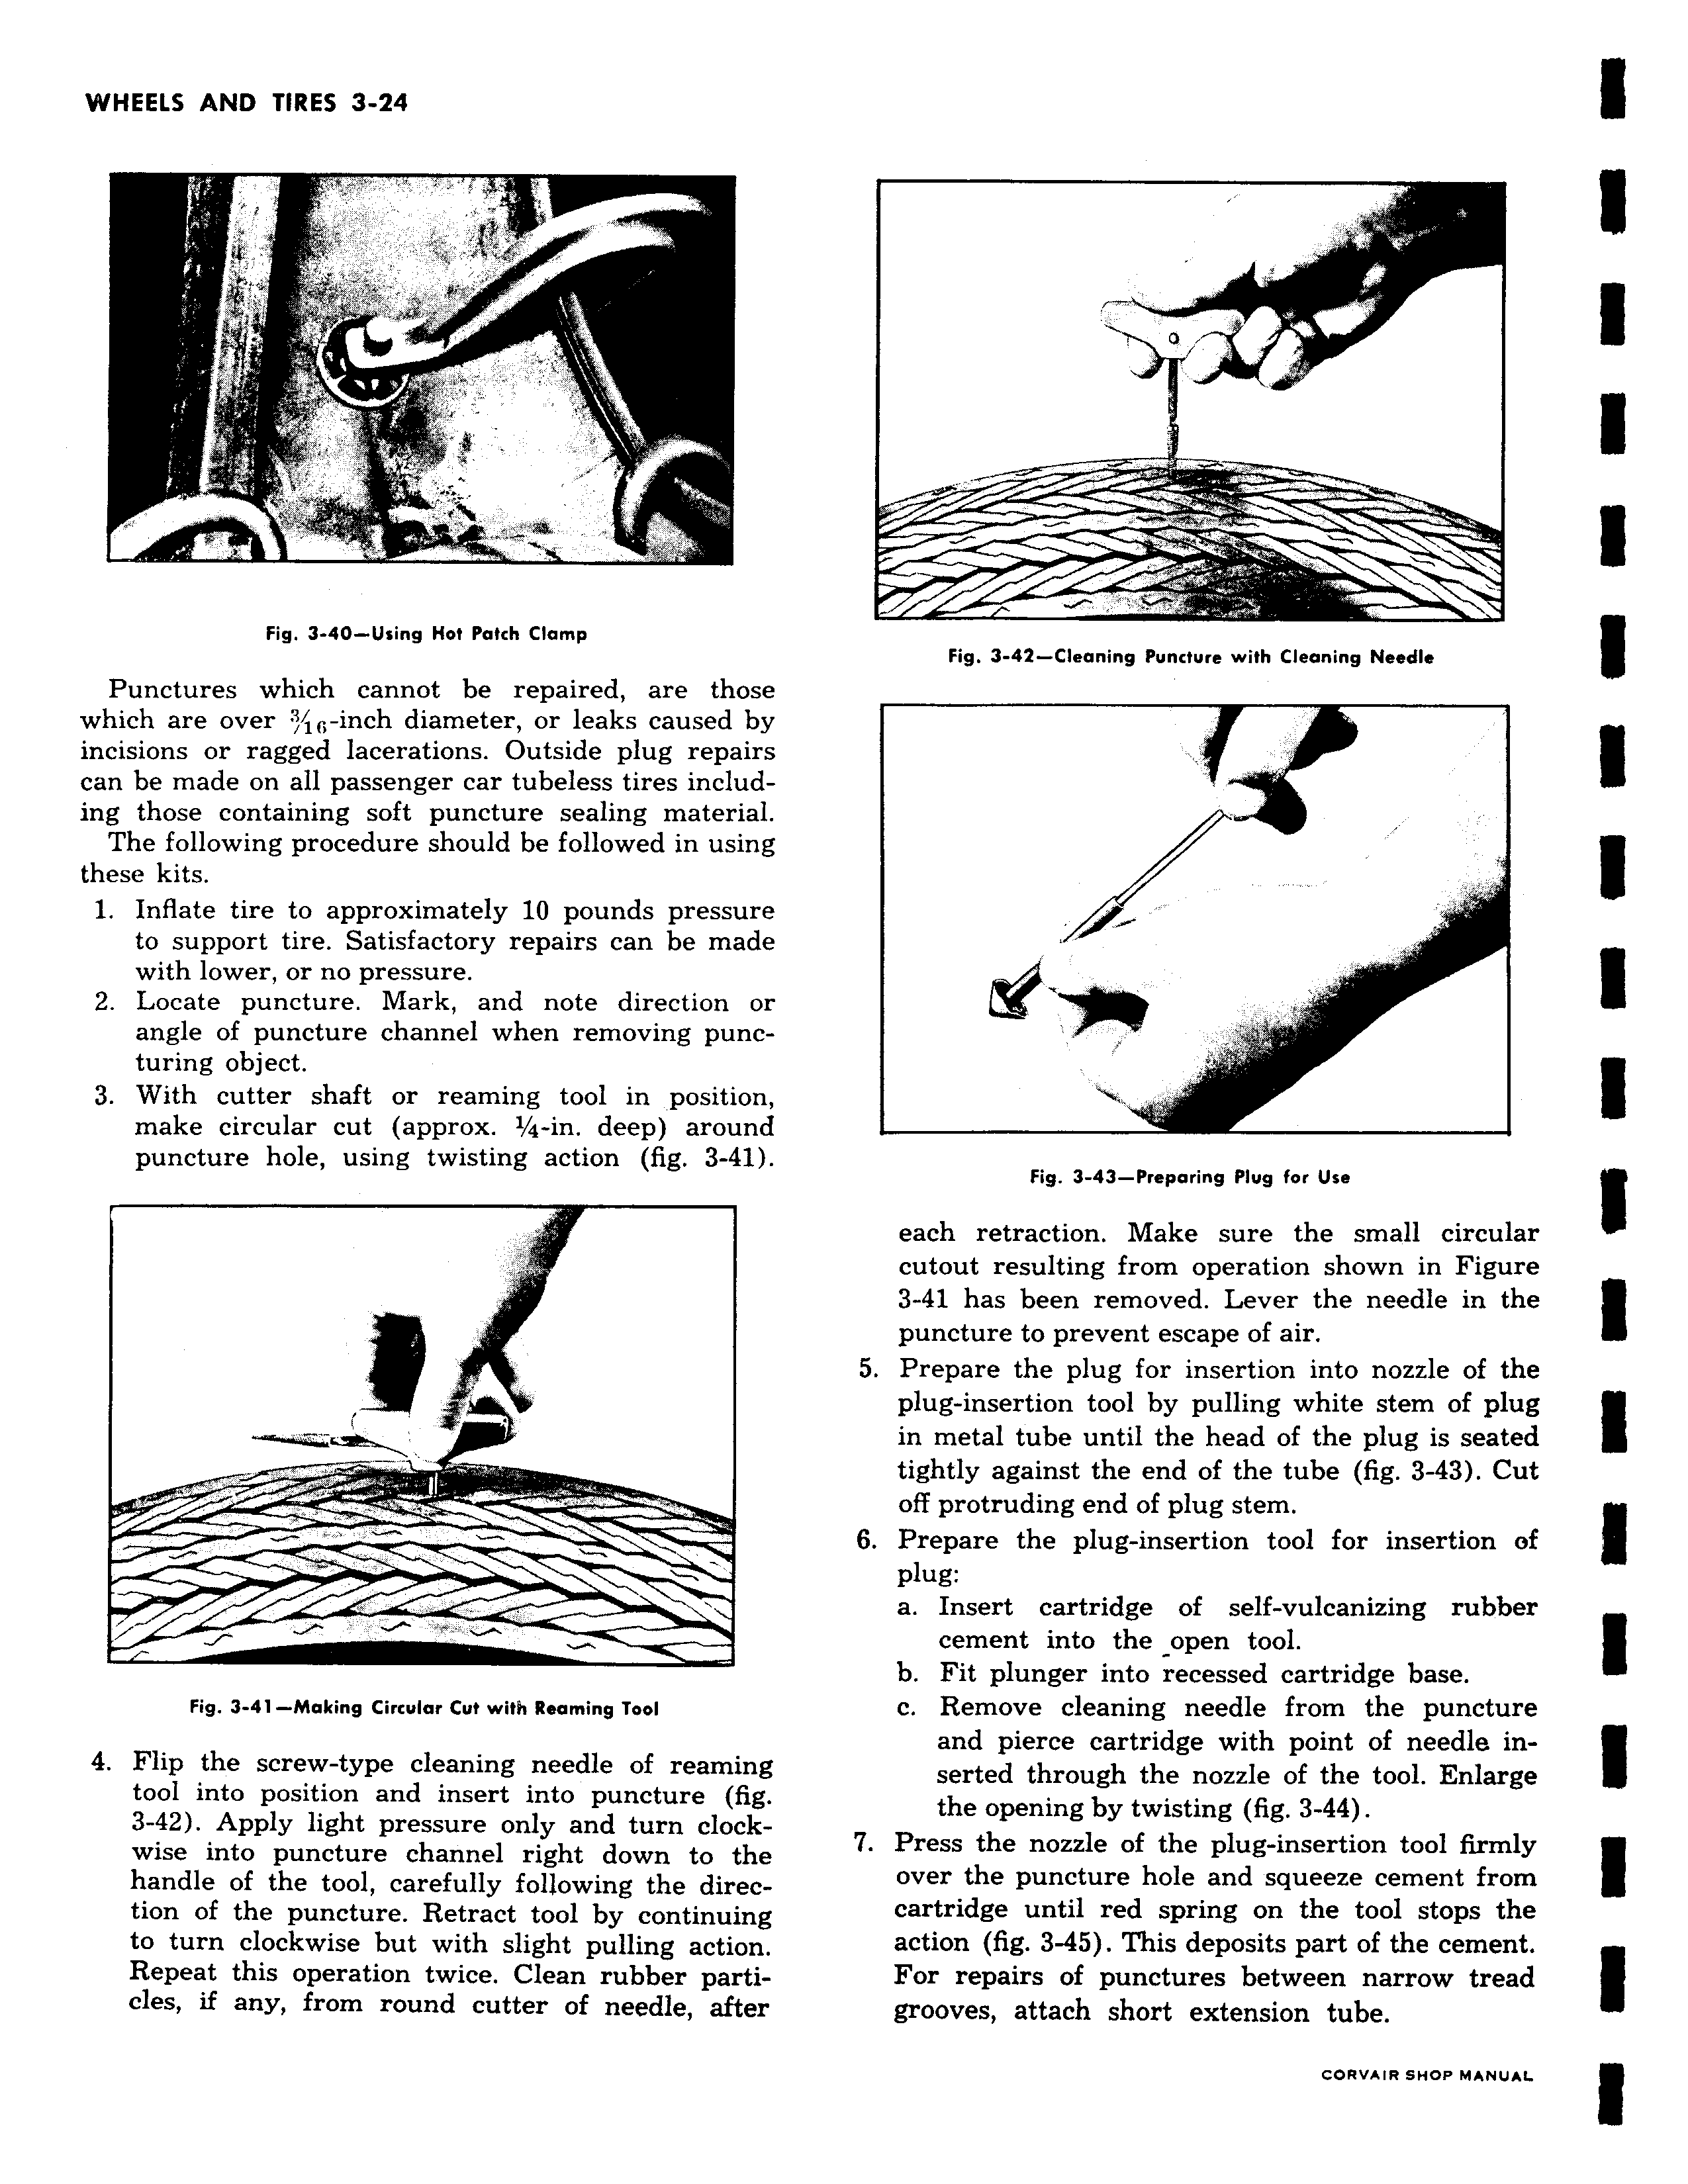
r w w 1 m x IIw a t Fig 3 42 Cleaning Puncture with Cleaning Needle Fig 3 43 Preparing Plug for Use each retraction Make sure the small circular cutout resulting from operation shown in Figure 3 41 has been removed Lever the needle in the puncture to prevent escape of air 5 Prepare the plug for insertion into nozzle of the plug insertion tool by pulling white stem of plug in metal tube until the head of the plug is seated tightly against the end of the tube fig 3 43 Cut off protruding end of plug stem 6 Prepare the plug insertion tool for insertion of plug a Insert cartridge of self vulcanizing rubber cement into the open tool b Fit plunger into recessed cartridge base c Remove cleaning needle from the puncture and pierce cartridge with point of needle inserted through the nozzle of the tool Enlarge the opening by twisting fig 3 44 7 Press the nozzle of the plug insertion tool firmly over the puncture hole and squeeze cement from cartridge until red spring on the tool stops the action fig 3 45 This deposits part of the cement For repairs of punctures between narrow tread grooves attach short extension tube

 Next
Next