Jeep Parts Wiki | Ford Parts Wiki
Home | Search | Browse
|
Corvair Chassis Shop Manual December 1964 |
|
Prev

 Next
Next
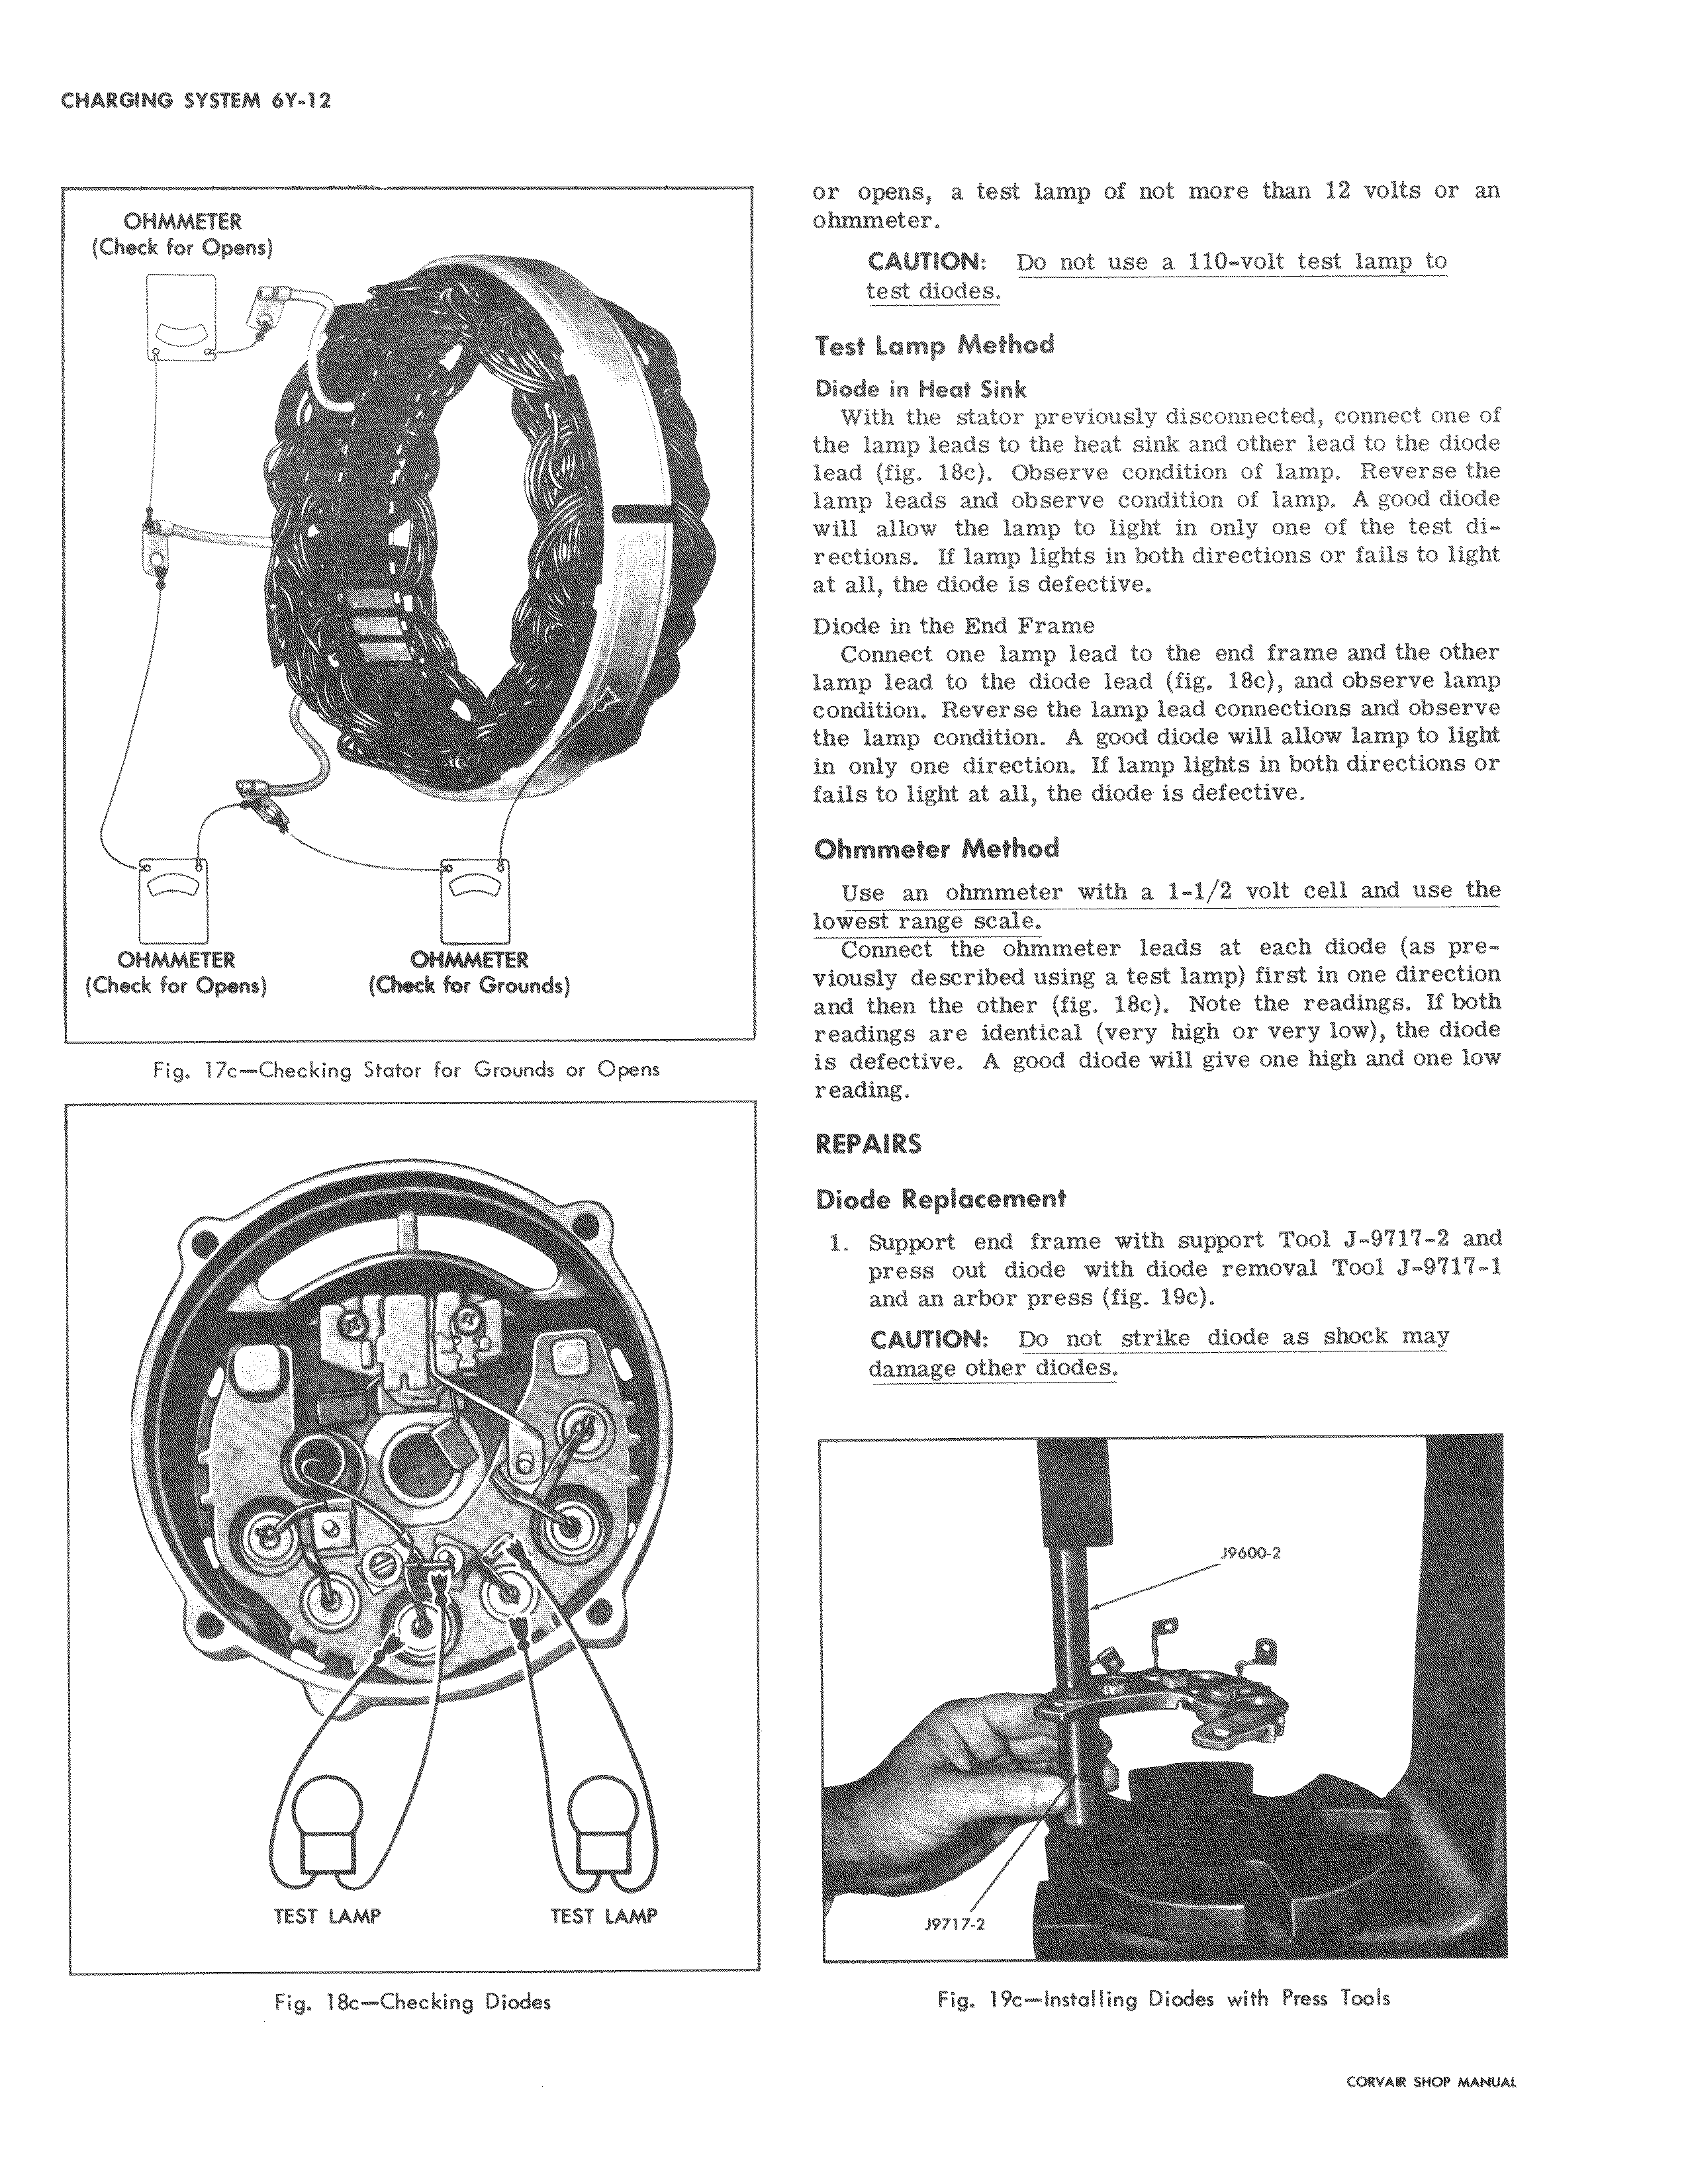
l II s R a J or opensy a test lamp of not more than 12 volts or an ohmmeter CAUTION Do not use a 110 volt test lamp to test iodes Test Lamp Method Diode in Heat Sink With the stator previously disconnected connect one of the lamp leads to the heat sink and other lead to the diode lead fig 18c Observe condition of lamp Reverse the lamp leads and observe condition of lamp A good diode will allow the lamp to light in only one of the test directions If lamp lights in both directions or fails to light at all tho diode is defective Diode in the End Frame Connect one lamp lead to the end frame and the other lamp lead to the diode lead fig 18c and observe lamp condition Reverse the lamp lead connections and observe the lamp condition A good diode will allow lamp to light in only me direction If lamp lights in both directions or fails to light at all the diode is defective Ohmmeter Method Use at ohmmeter with a 1 1 2 volt cell and use the lowest range scale Conneat the ohmmeter leads at each diode as previously described using a test lamp first in one direction and then the other fig 18c Note the readings If both readings are identical very high or very low the diode is defective A good diode will give one high and one low reading REPAIRS Diode Replacement 1 Support end frame with support Tool J 9717 2 and press out diode with diode removal Tool J 9717 1 and an arbor press fig 19c CAUTION Do not strike diode as shock may damage other diodes j 9600 z J9717 2 I Fig 19c Installing Diodes with Press Tools

 Next
Next