Jeep Parts Wiki | Ford Parts Wiki
Home | Search | Browse | Marketplace | Messages | FAQ | Guest
|
Corvair Chassis Shop Manual December 1964 |
|
Prev

 Next
Next
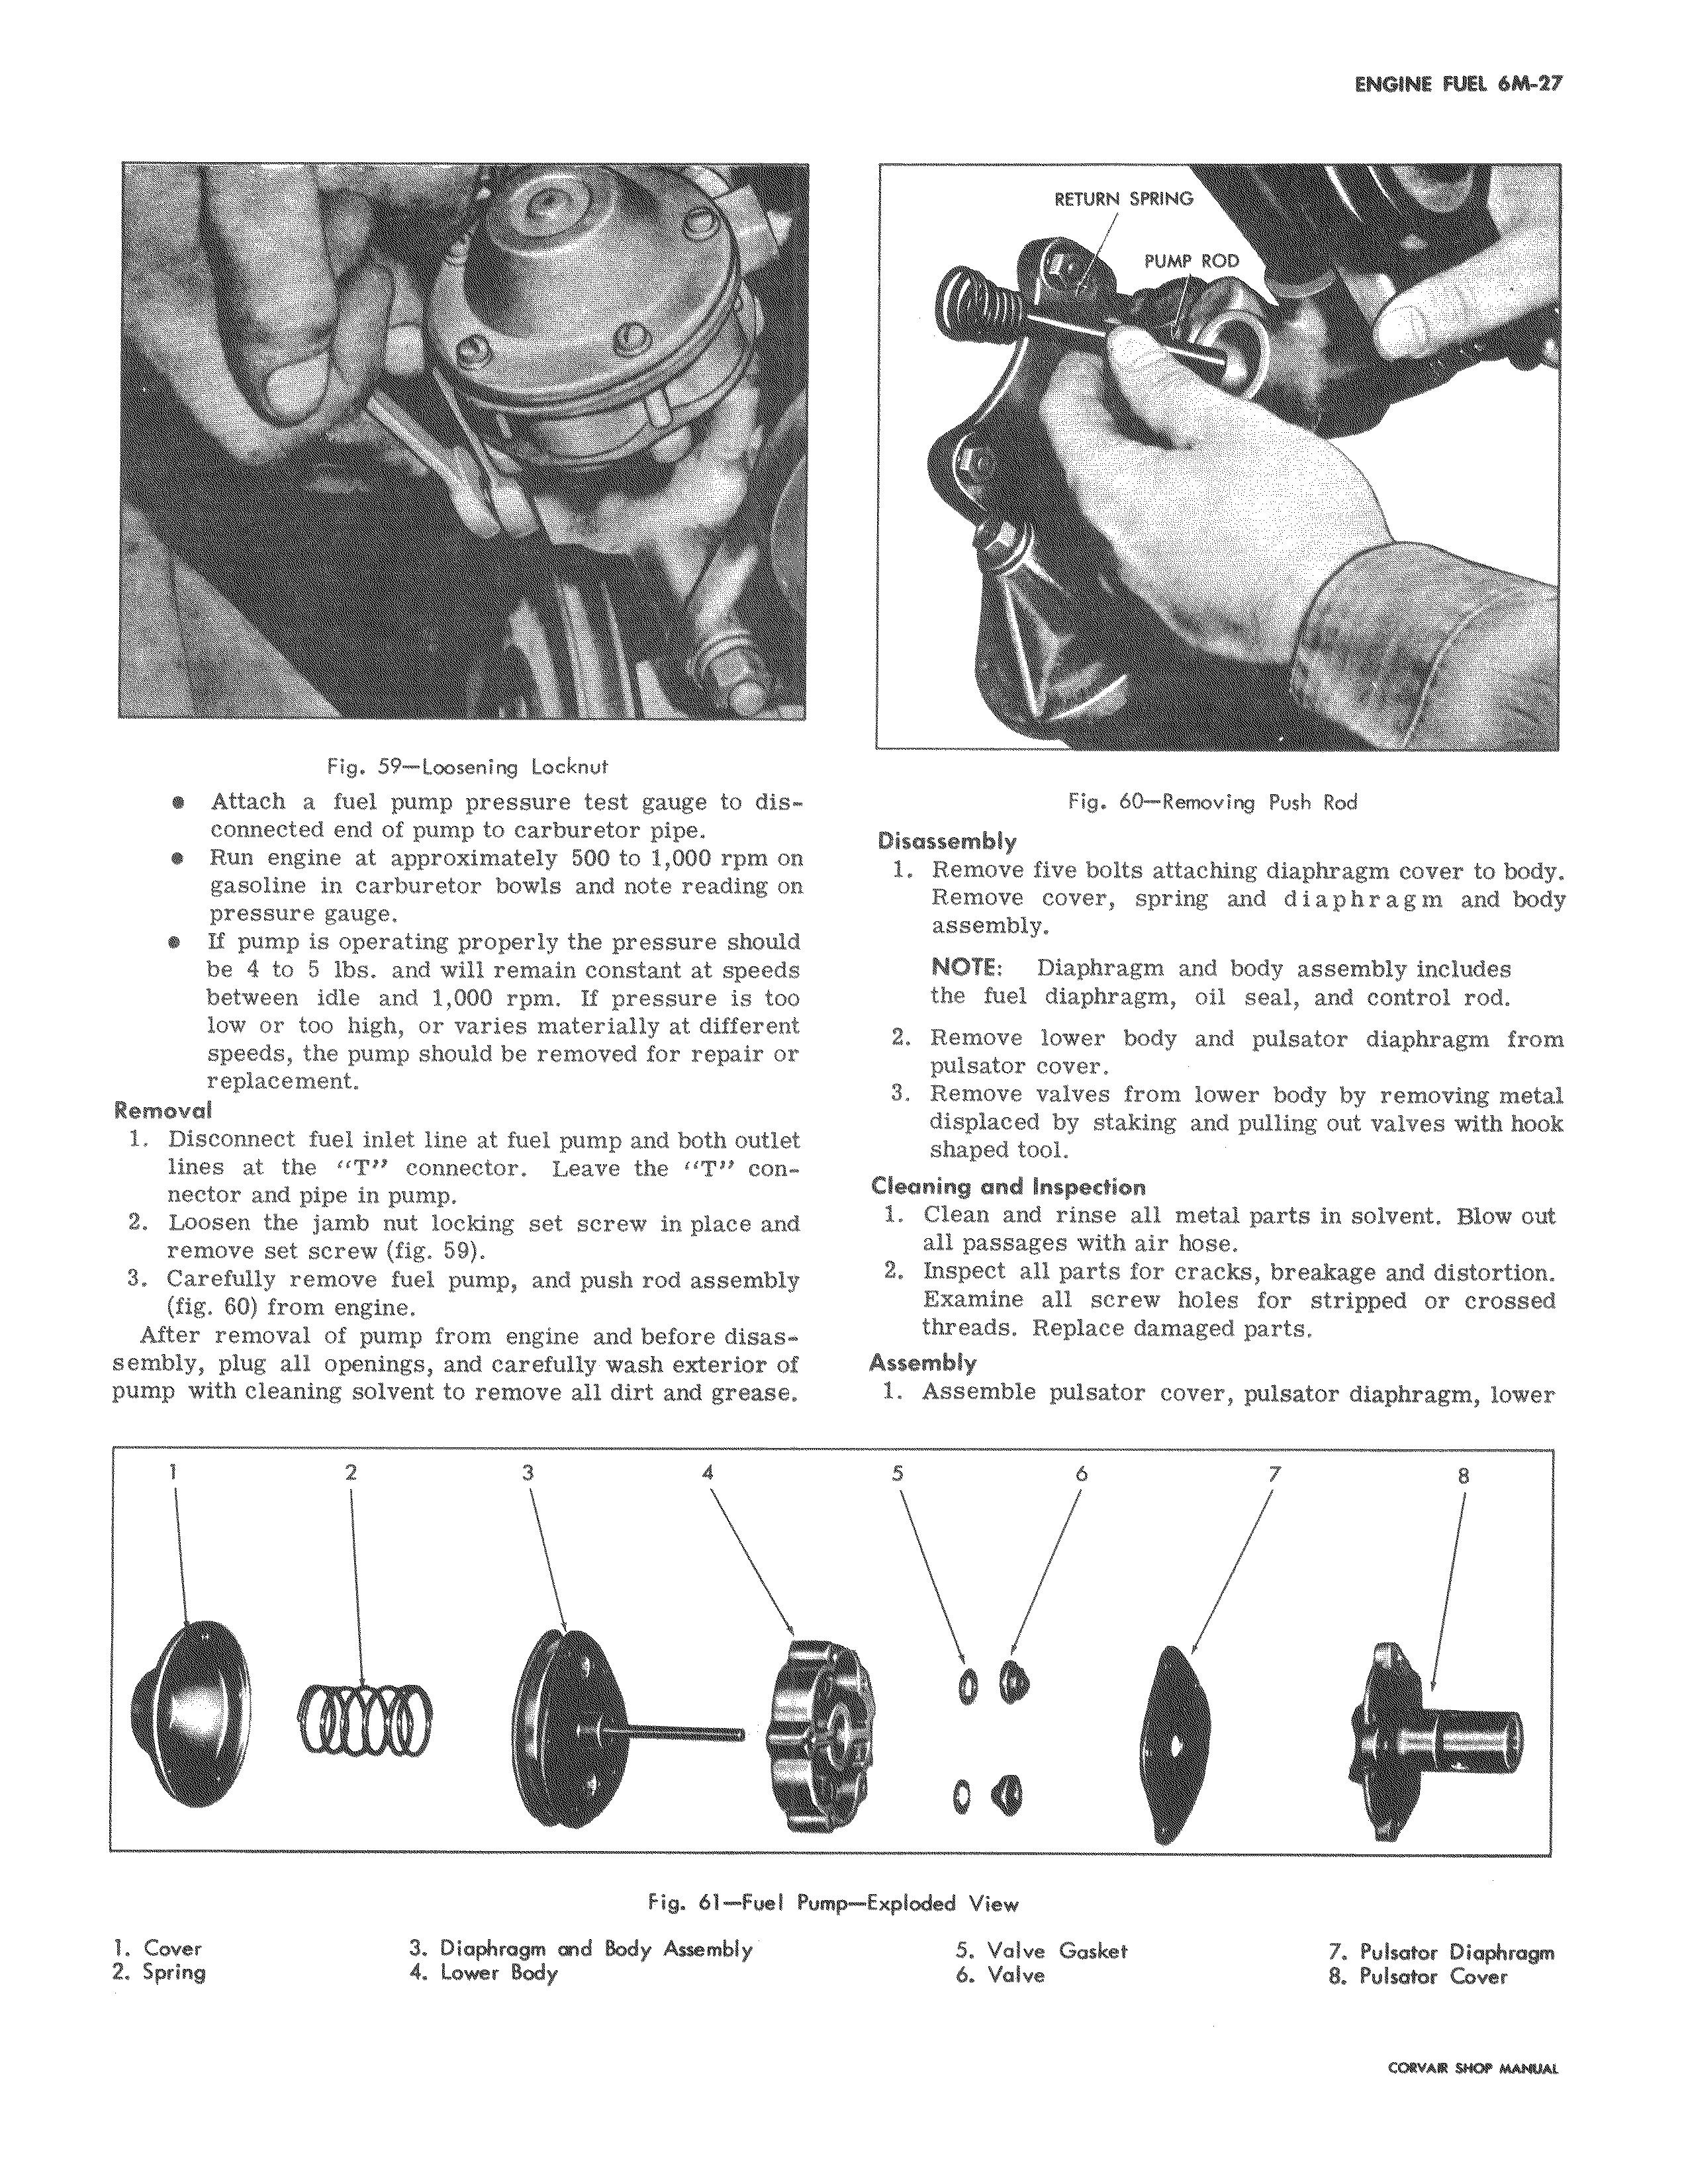
i a Fig 59 Loosening Loeknut Attach a fuel pump pressure test gauge to disconnected end of pump to carburetor pipe Run engine at approximately 500 to 1 000 rpm on gasoline in carburetor bowls and note reading on pressure gauge If pump is operating properly the pressure should be 4 to 5 ibs and will remain constant at speeds between idle and 1 000 rpm If pressure is too low or too high or varies materially at different speeds the pump should be removed for repair or replacement Removal 1 Disconnect fuel inlet line at fuel pump and both outlet lines at the T connector Leave the T connector and pipe in pump 2 Loosen the jamb nut locking set screw in place and remove set screw fig 59 3 Carefully remove fuel pump and push rod assembly fig 60 from engine After removal of pump from engine and before disassembly plug all openings and carefully wash exterior of pump with cleaning solvent to remove all dirt and grease 1 2 3 4 Fig 61 Fuel F 1 Cover 3 Diaphragm and Body Assembly 2 Spring 4 Lower Body RETURN SPRING PUMP ROD r s Y r Fig 60 Removing Push Rod Disassembly 1 Remove five bolts attaching diaphragm cover to body Remove cover spring and diaphragm and body assembly NOTE Diaphragm and body assembly includes the fuel diaphragm oil seal and control rod 2 Remove lower body and pulsator diaphragm from pulsator cover 3 Remove valves from lower body by removing metal displaced by staking and pulling out valves with hook shaped tool Cleaning and Inspection 1 Clean and rinse all metal parts in solvent Blow Gut all passages with air lose 2 Inspect all parts for cracks breakage and distortion Examine all screw holes for stripped or crossed threads Replace damaged parts Assembly 1 Assemble pulsator cover pulsator diaphragm lower 5 6 7 8 ump Exploded View 5 Valve Gasket 7 Pulsator Diaphragm 6 Valve 8 Putsator Cover

 Next
Next