Jeep Parts Wiki | Ford Parts Wiki
Home | Search | Browse
|
Corvair Chassis Shop Manual December 1964 |
|
Prev

 Next
Next
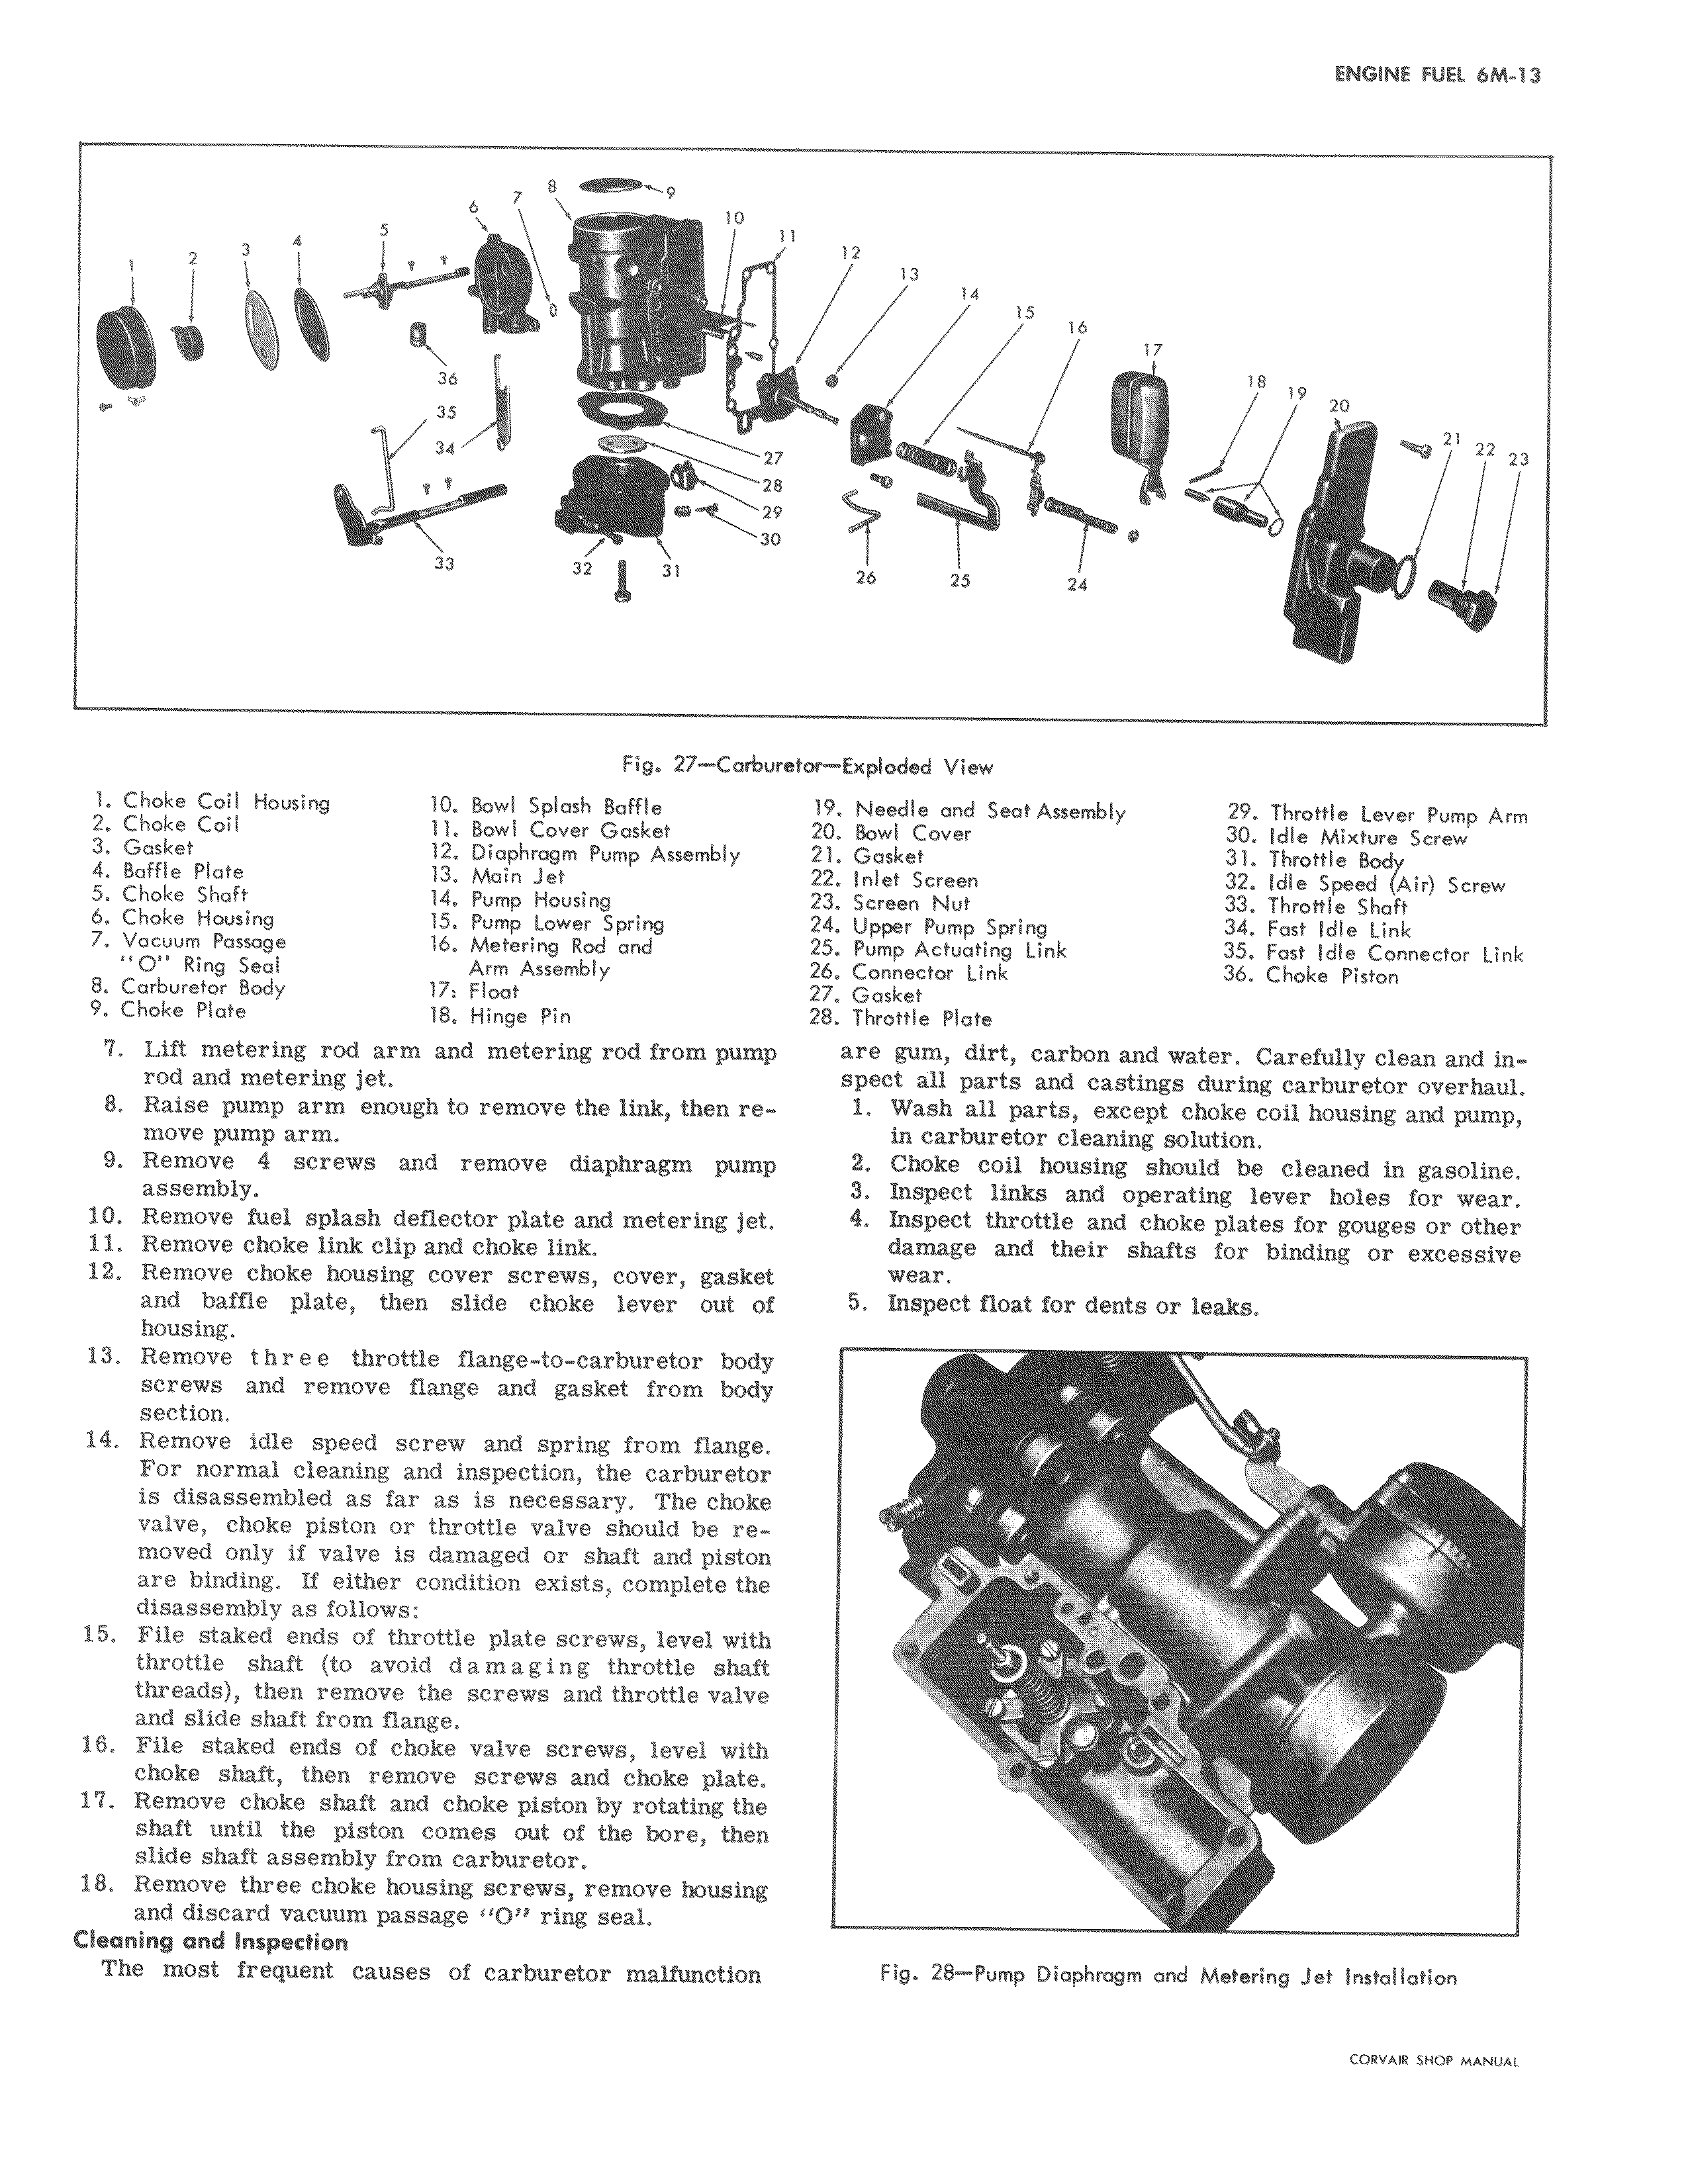
8 10 5 11 z i 1 l 36 35 34 27 f 28 Ie 29 30 33 32 31 Fig 27 COrbureh l Choke Coil Housing 10 Bowl Splash Baffle 2 Choke Coil 11 Bowl Cover Gasket 3 Gasket 12 Diaphragm Pump Assembly 4 Baffle Plate 1 3 Main Jet 5 Choke Shaft 14 Pump Housing 6 Choke Housing 15 Pump Lower Spring 7 Vacuum Passage 16 Metering Rod and O Ring Seal Arm Assembly 8 Carburetor Body 17 Float 9 Choke Plate 18 Hinge Pin 7 Lift metering rod arm and metering rod from pump rod and metering jet 8 Raise pump arm enough to remove the link then remove pump arm 9 Remove 4 screws and remove diaphragm pump assembly 10 Remove fuel splash deflector plate and metering jet 11 Remove choke link clip and choke link 12 Remove choke housing cover screws cover gasket and baffle plate then slide choke lever out of housing 13 Remove three throttle flange to carburetor body screws and remove flange and gasket from body section 14 Remove idle speed screw and spring from flange For normal cleaning and inspection the carburetor is disassembled as far as is necessary The choke valve choke piston or throttle valve should be removed only if valve is damaged or shaft and piston are binding If either condition exists complete the disassembly as follows 15 File staked ends of throttle plate screws level with throttle shaft to avoid damaging throttle shaft threads then remove the screws and throttle valve and slide shaft from flange 16 File staked ends of choke valve screws level with choke shaft then remove screws and choke plate 17 Remove choke shaft and choke piston by rotating the shaft until the piston comes out of the bore then slide shaft assembly from carburetor 18 Remove three choke housing screws remove housing and discard vacuum passage 1 O ring seal Cleaning and Inspection The most frequent causes of carburetor malfunction 12 13 14 15 16 17 18 19 21 9 22 23 1 w 7 r e p v s vJ 26 25 24 v r a t v v f

 Next
Next