Jeep Parts Wiki | Ford Parts Wiki
Home | Search | Browse
|
Corvair Chassis Shop Manual December 1964 |
|
Prev

 Next
Next
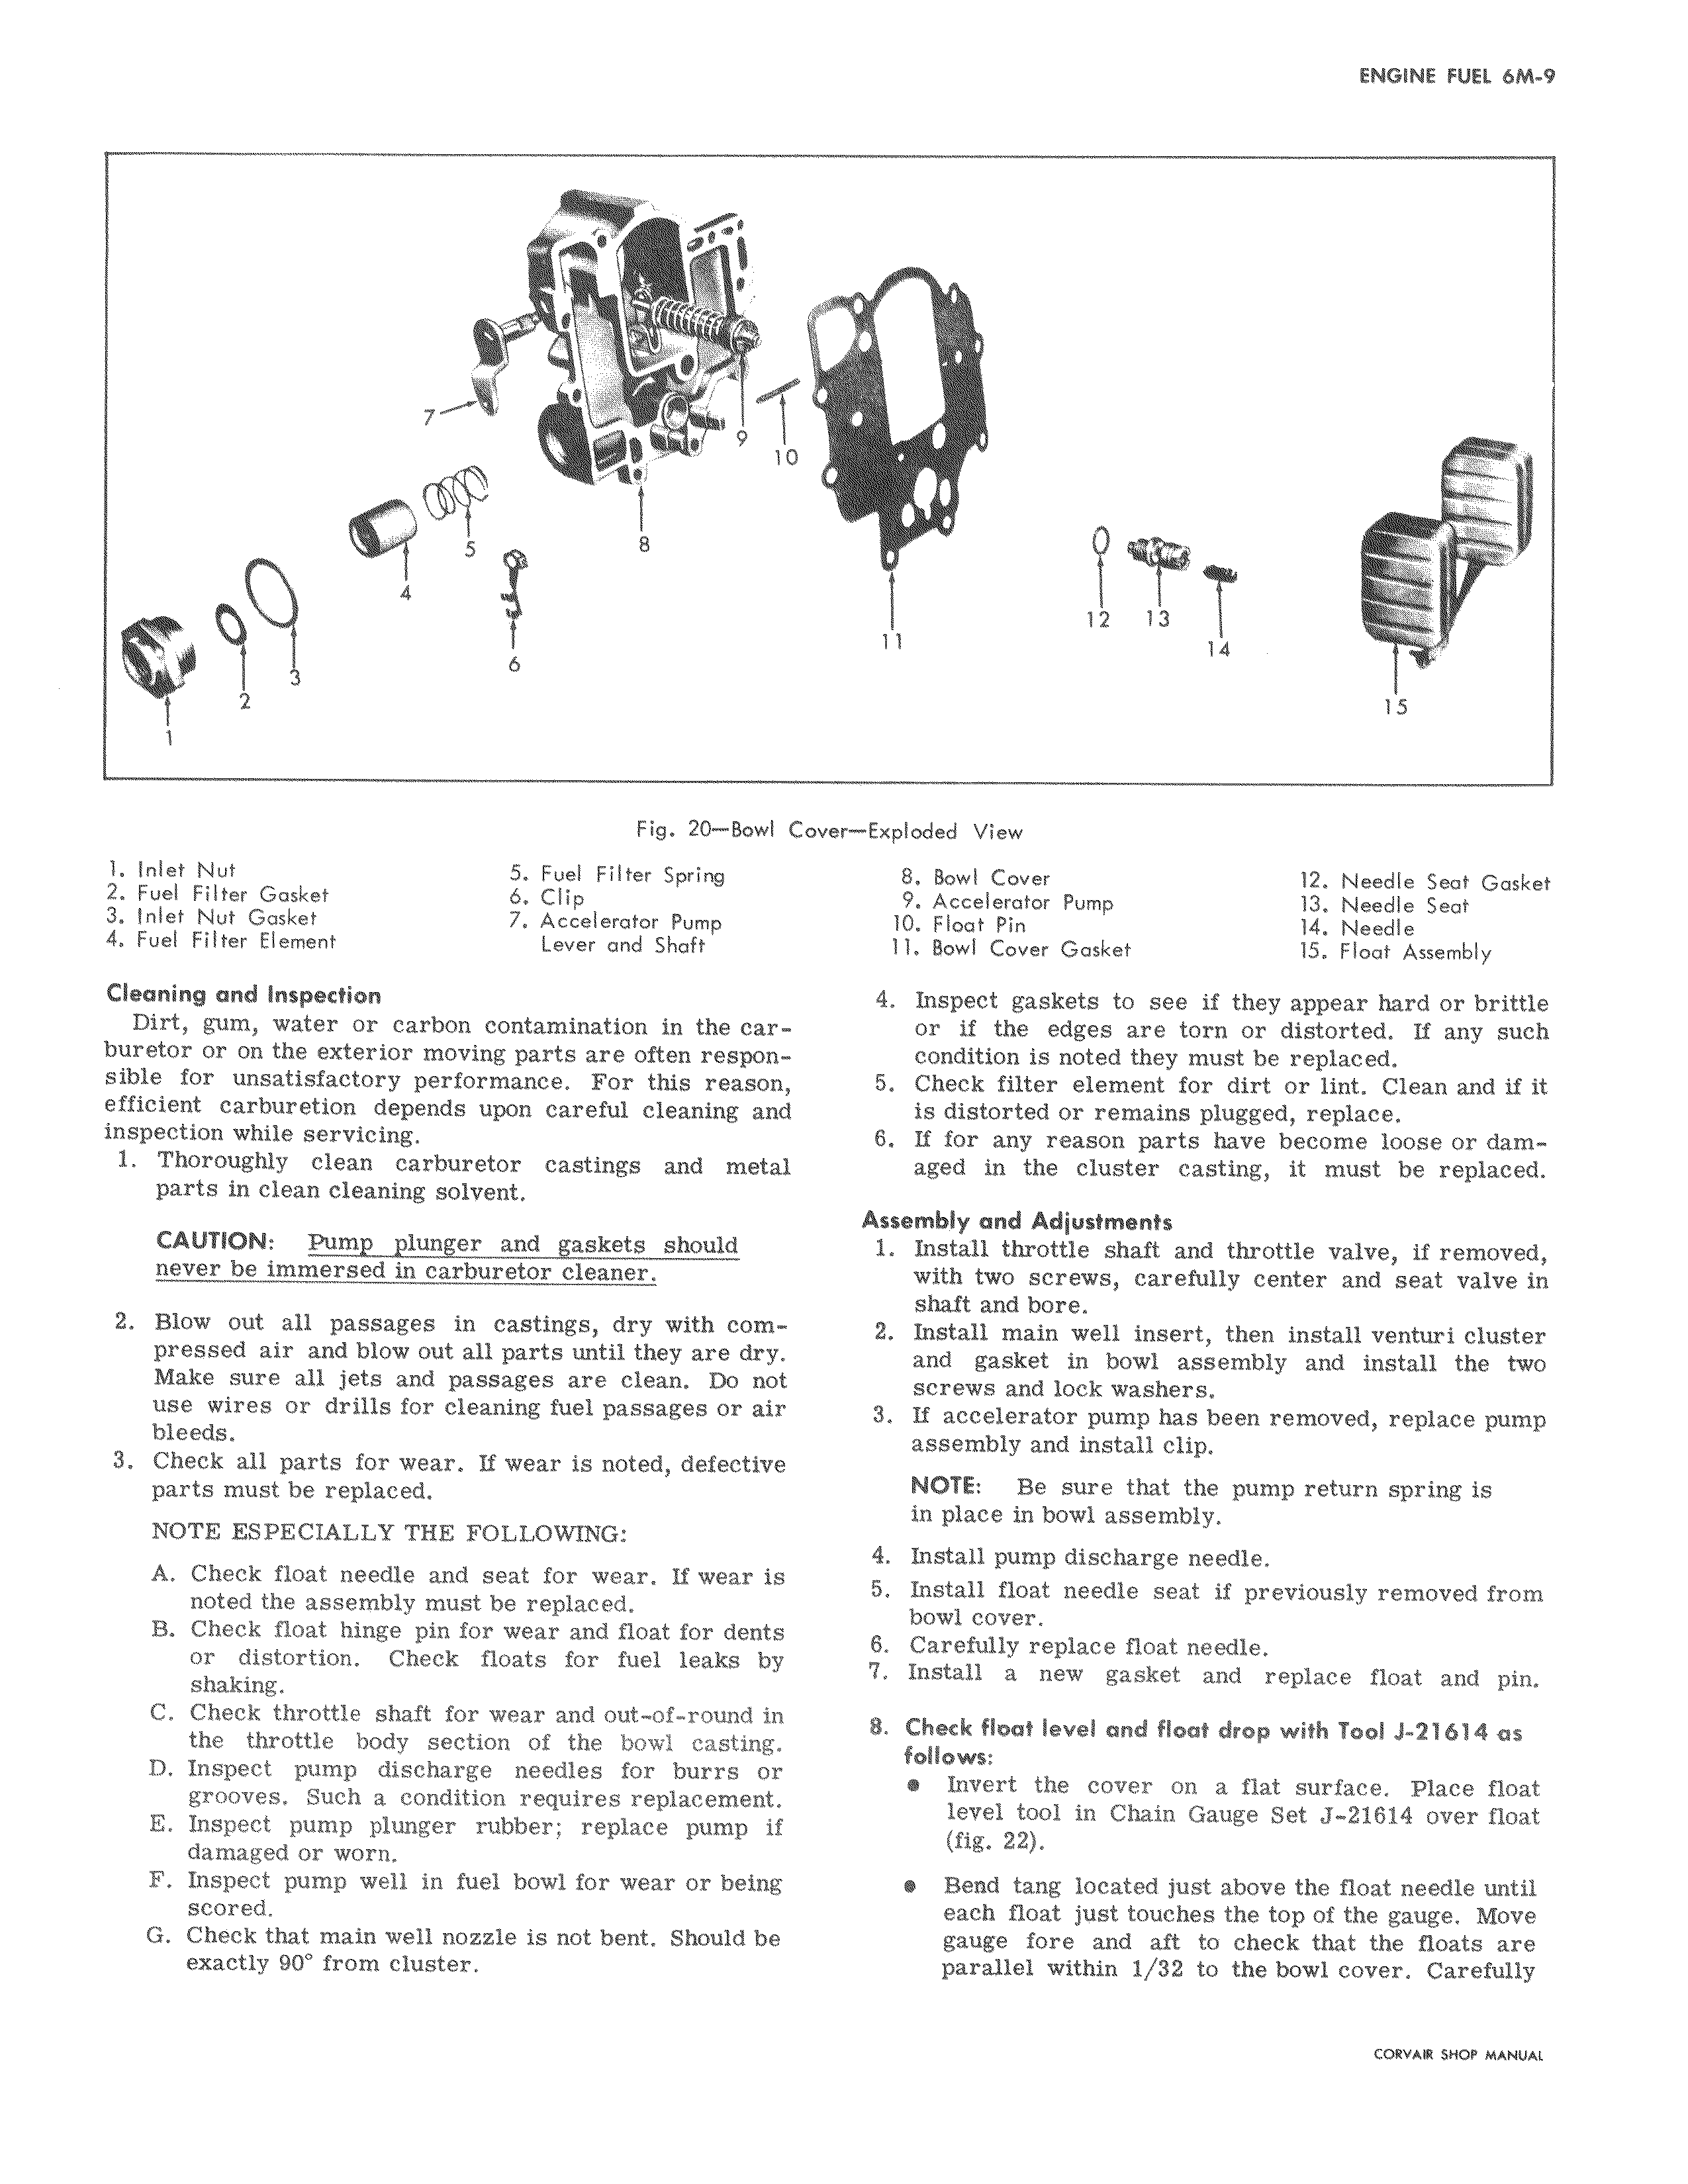
r A Ot R1 q 9 10 1 4 5 8 6 2 1 Fig 20 Bowl G 1 Inlet Nut 5 Fuel Filter Spring 2 Fuel Filter Gasket 6 Clip 3 Inlet Nut Gasket 7 Accelerator Pump 4 Fuel Filter Element Lever and Shaft Cleaning and Inspection Dirt gum water or carbon contamination in the carburetor or on the exterior moving parts are often responsible for unsatisfactory performance For this reason efficient carburetion depends upon careful cleaning and inspection while servicing 1 Thoroughly clean carburetor castings and metal parts in clean cleaning solvent CAUTION Pump plunger and gaskets should never be immersed in carburetor cleaner 2 Blow out all passages in castings dry with compressed air and blow out all parts until they are dry Make sure all jets and passages are clean Do not use wires or drills for cleaning fuel passages or air bleeds 3 Check all parts for wear If wear is noted defective parts must be replaced NOTE ESPECIALLY THE FOLLOWING A Check float needle and seat for wear If wear is noted the assembly must be replaced B Check float hinge pin for wear and float for dents or distortion Check floats for fuel leaks by shaking C Check throttle shaft for wear and out of round in the throttle body section of the bowl casting D Inspect pump discharge needles for burrs or grooves Such a condition requires replacement E Inspect pump plunger rubber replace pump if damaged or worn F Inspect pump well in fuel bowl for wear or being scored G Check that main well nozzle is not bent Should be exactly 90 from cluster 12 13 11 14 15 wer Exploded View 8 Bowl Cover 12 Needle Seat Gasket 9 Accelerator Pump 13 Needle Seat 10 Float Pin 14 Needle 11 Bowl Cover Gasket 15 Float Assembly 4 Inspect gaskets to see if they appear hard or brittle or if the edges are torn or distorted If any such condition is noted they must be replaced 5 Check filter element for dirt or lint Clean and if it is distorted or remains plugged replace 6 If for any reason parts have become loose or damaged in the cluster casting it must be replaced Assembly and Adjustments 1 Install throttle shaft and throttle valve if removed with two screws carefully center and seat valve in shaft and bore 2 Install main well insert then install venturi cluster and gasket in bowl assembly and install the two screws and lock washers 3 If accelerator pump has been removed replace pump assembly and install clip NOTE Be sure that the pump return spring is in place in bowl assembly 4 Install pump discharge needle 5 Install float needle seat if previously removed from bowl cover 6 Carefully replace float needle 7 Install a new gasket and replace float and pin 8 Check float level and float drop with Tool J 21614 as follows Invert the cover on a flat surface Place float level tool in Chain Gauge Set J 21614 over float fig 22 Bead tang located just above the float needle until each float just touches the top of the gauge Move gauge fore and aft to check that the floats are parallel within i 32 to the bowl cover Carefully CORVAR SHOP MANUAL

 Next
Next