Jeep Parts Wiki | Ford Parts Wiki
Home | Search | Browse | Marketplace | Messages | FAQ | Guest
|
Corvair Chassis Shop Manual December 1964 |
|
Prev

 Next
Next
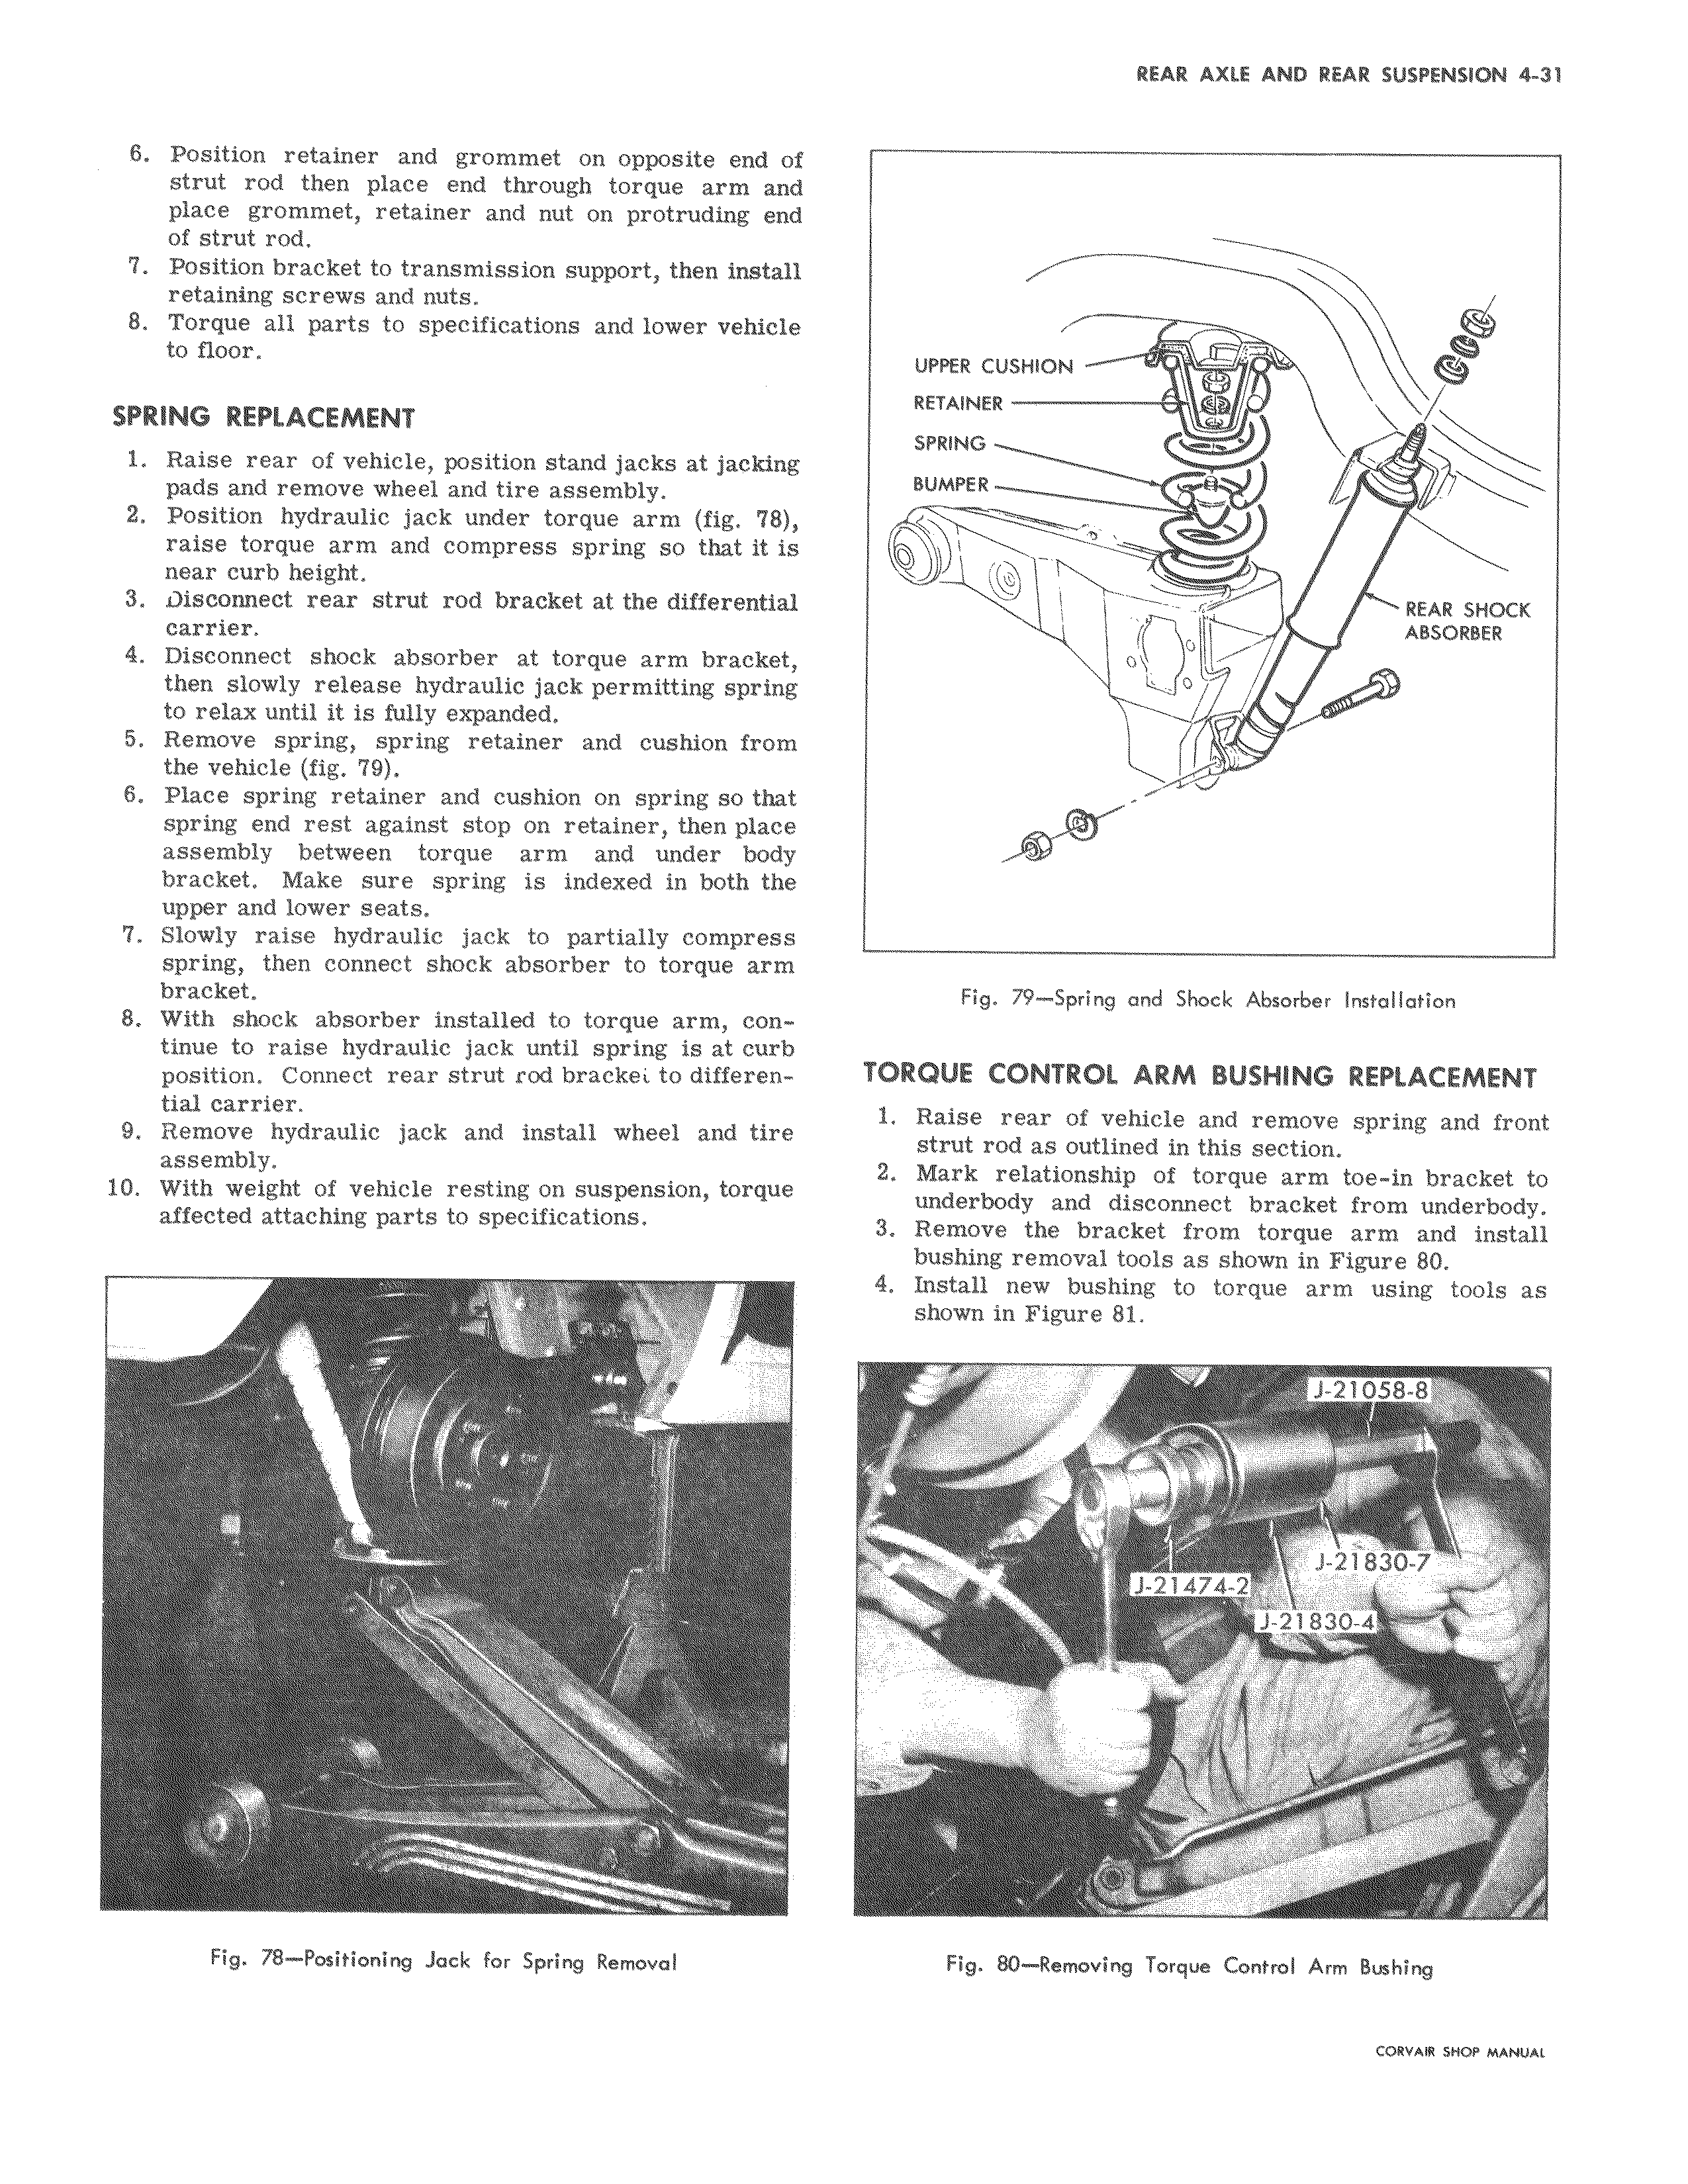
6 Position retainer and grommet on opposite end of strut rod then place end through torque arm and place grommet retainer and nut on protruding end of strut rod 7 Position bracket to transmission support then install retaining screws and nuts 8 Torque all parts to specifications and lower vehicle to floor SPRING REPLACEMENT 1 Raise rear of vehicle position stand jacks at jacking pads and remove wheel and tire assembly 2 Position hydraulic jack under torque arm fig 8 raise torque arm and compress spring so that it is near curb height 3 Disconnect rear strut rod bracket at the differential carrier 4 Disconnect shock absorber at torque arm bracket then slowly release hydraulic jack permitting spring to relax until it is fully expanded 5 Remove spring spring retainer and cushion from the vehicle fig 79 6 Place spring retainer and cushion on spring so that spring end rest against stop on retainer then place assembly between torque arm and under body bracket Make sure spring is indexed in both the upper and lower seats 7 Slowly raise hydraulic jack to partially compress spring then connect shock absorber to torque arm bracket 8 With shock absorber installed to torque arm continue to raise hydraulic jack until spring is at curb position Connect rear strut rod brackei to differential carrier 9 Remove hydraulic jack and install wheel and tire assembly 10 With weight of vehicle resting on suspension torque affected attaching parts to specifications f Fig 78 Positioning Jack for Spring Removal UPPER CUSHION RETAINER SPRING BUMPER i w REAR SHOCK olrl ABSORBER o Illll J Fig 79 Spring and Shock Absorber Installation TORQUE CONTROL ARM BUSHING REPLACEMENT 1 Raise rear of vehicle and remove spring and front strut rod as outlined in this section 2 Mark relationship of torque arm toe in bracket to underbody and disconnect bracket from underbody 3 Remove the bracket from torque arm and install bushing removal tools as shown in Figure 80 4 Install new bushing to torque arm using tools as shown in Figure 81 1 21058 8 R 21830 7 J 21474 2 J 21830 4 a 3 r r Fig 80 Removing Torque Control Arm Bushing CORVAR SHOP MANUAL

 Next
Next