Jeep Parts Wiki | Ford Parts Wiki
Home | Search | Browse
|
Corvair Chassis Shop Manual Supplement December 1966 |
|
Prev

 Next
Next
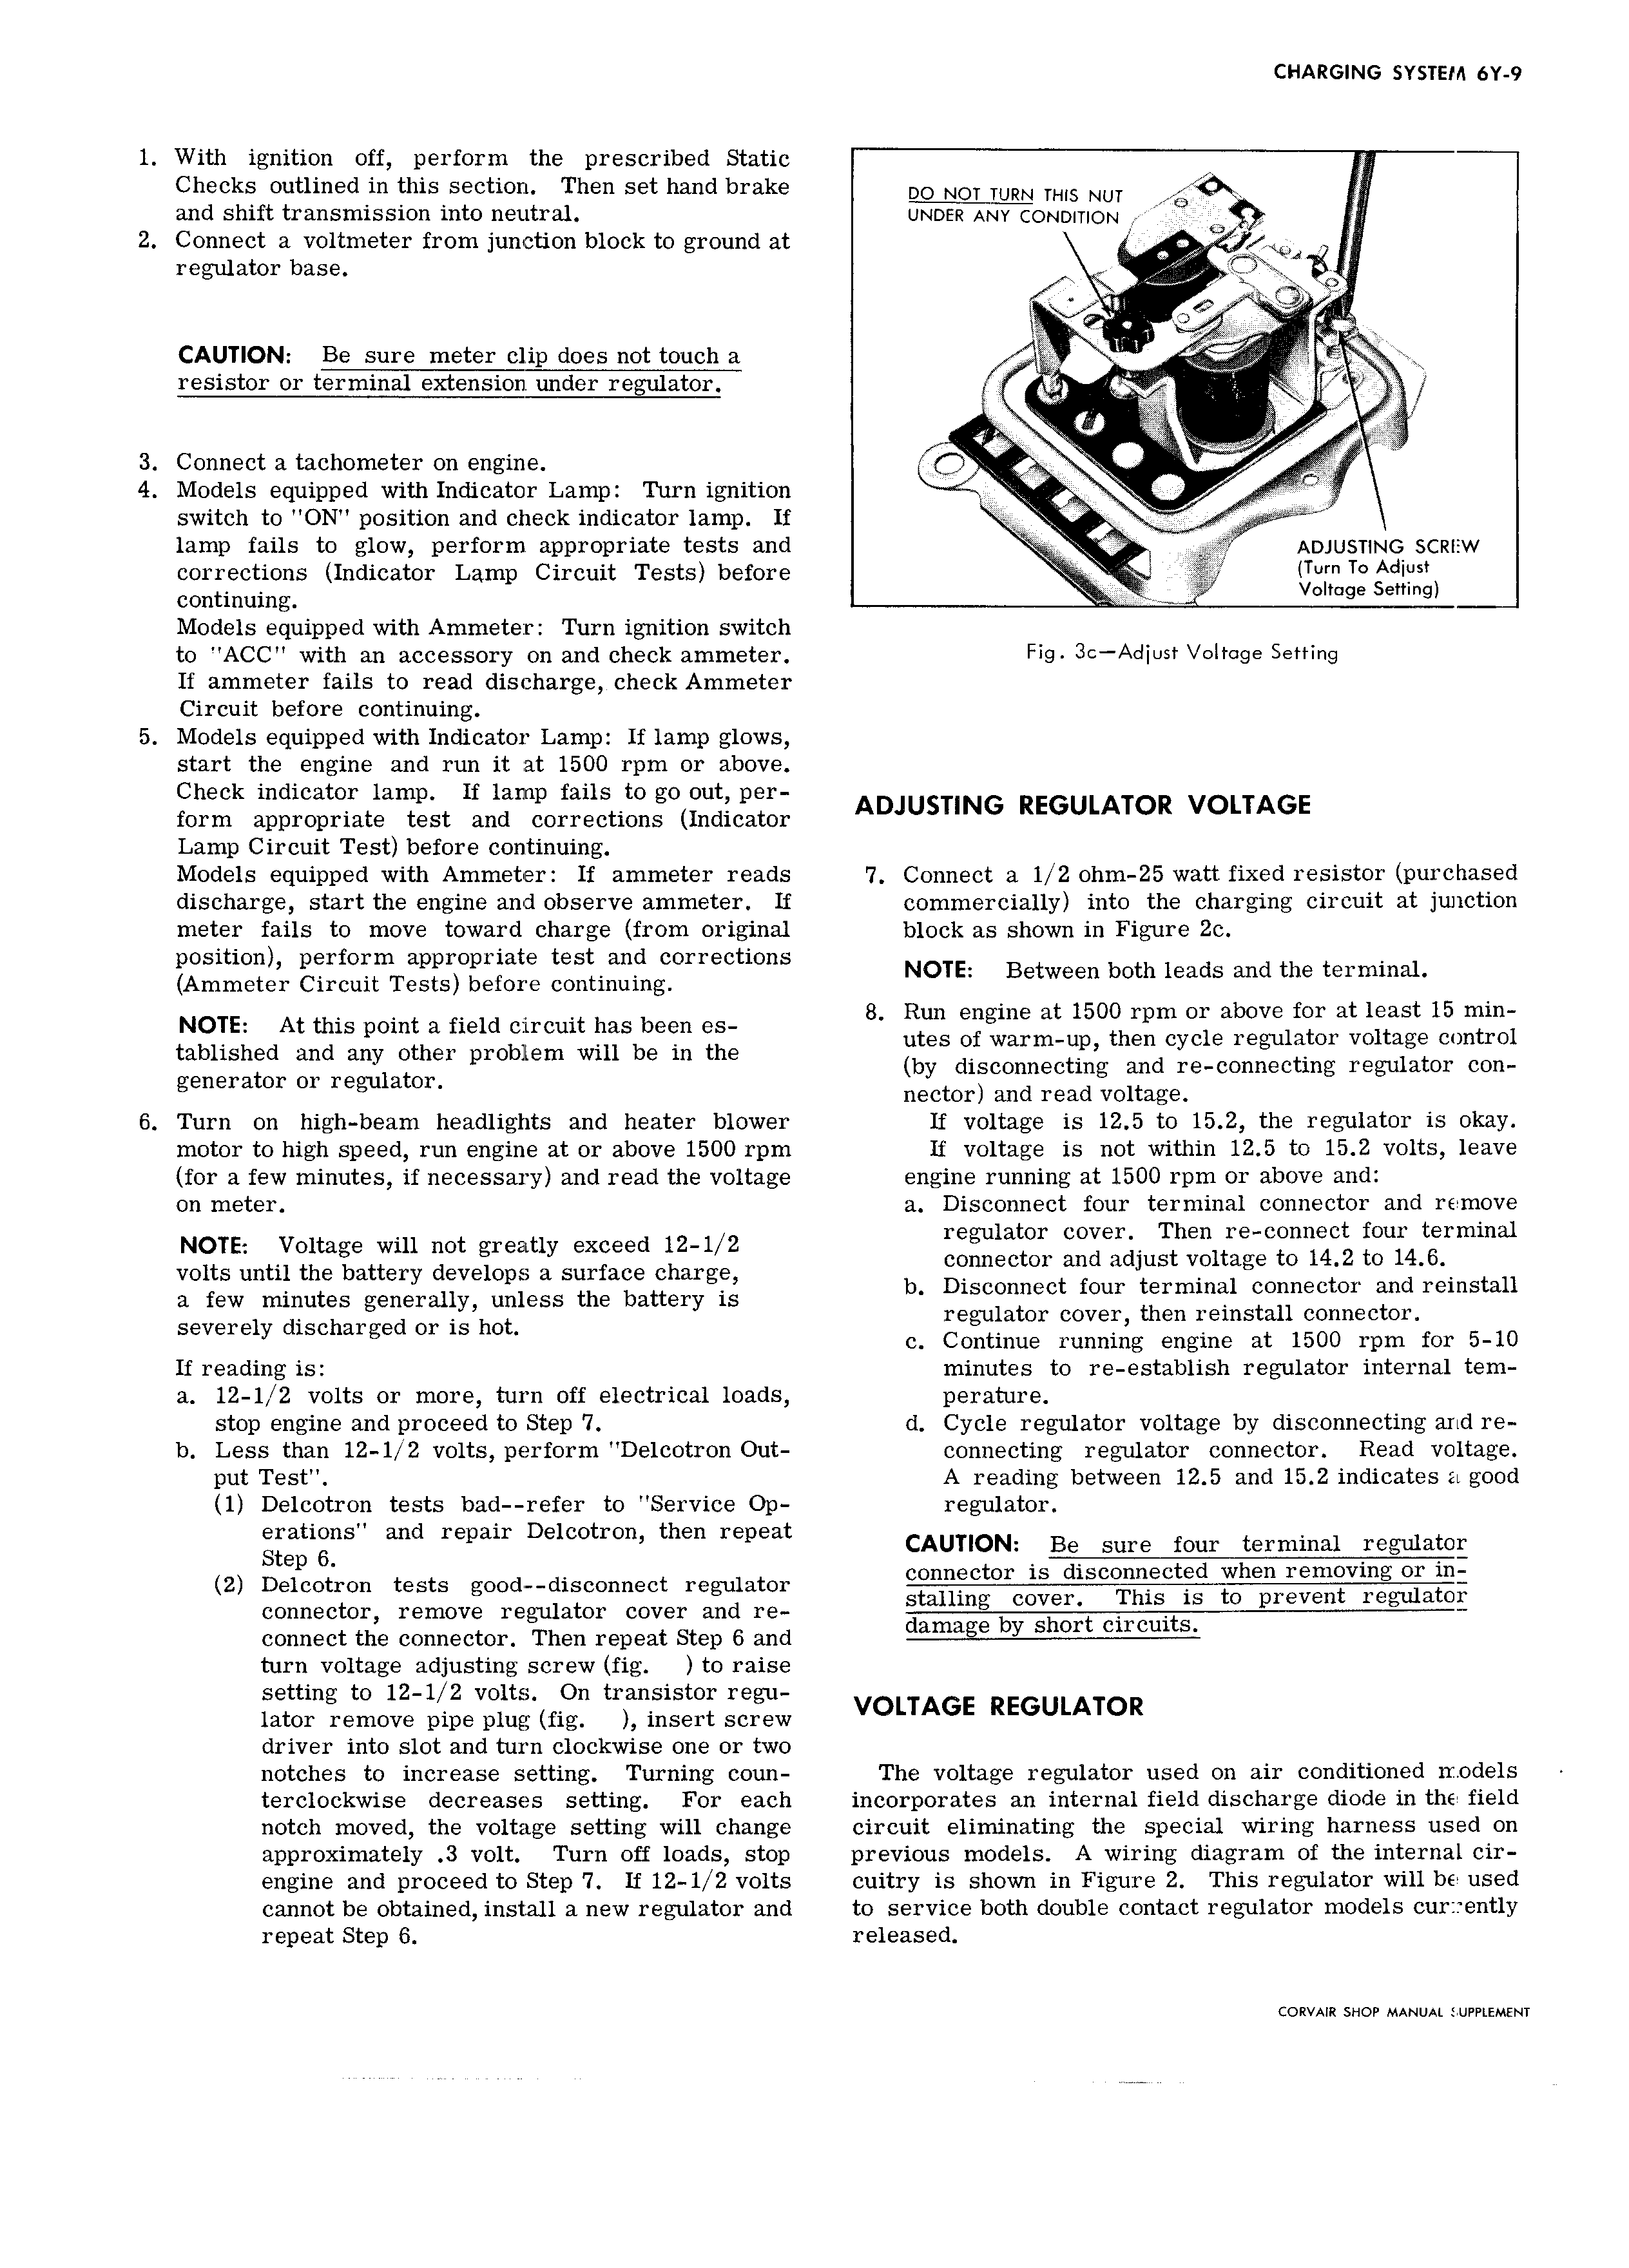
CHARGING SYSTEM 6Y 9 1 With ignition off perform the prescribed Static 4 T Checks outlined in this section Then set hand brake DQ NOT TURN THTS NUT 3 and shift transmission into neutral UNDER ANWONDITION Z T I 2 Connect a voltmeter from junction block to ground at 0 gd 4 i I regulator base 4 3 Ow Q x CAUTION Be sure meter clip does not touch a ir E resistor or terminal extension under regulator VV TTT It T T 3 Connect a tachometer on engine Q M 4 Models equipped with Indicator Lamp Turn ignition g r switch to ON position and check indicator lamp If i j i lamp fails to glow perform appropriate tests and I ADJUSTINQ SCRIEW corrections Indicator Lamp Circuit Tests before 1 continuing Models equipped with Ammeter Turn ignition switch to ACC with an accessory on and check ammeter Fig 3 Adi St V it 9 Setting If ammeter fails to read discharge check Ammeter Circuit before continuing 5 Models equipped with Indicator Lamp If lamp glows start the engine and run it at 1500 rpm or above Check indicator lamp lf lamp fails to go out per form appropriate test and corrections Indicator ADJUS LING REGULATOR VOLTAGE Lamp Circuit Test before continuing Models equipped with Ammeter lf ammeter reads 7 Connect a 1 2 ohm 25 watt fixed resistor purchased discharge start the engine and observe ammeter If commercially into the charging circuit at junction meter fails to move toward charge from original block as shown in Figure 2c p Sm rrrrrrrr app p t t St a Y1 ti S NOTE Between beth leads and the terminal Ammeter Circuit Tests before continuing NOTE At this point a field Circuit has been S 8 Run engine at 1500 rpm or above for at least 15 min utes of warm up then cycle regulator voltage control tablished and any other problem will be in the by disconnecting and re connecting regulator con generamr Or regulator nector and read voltage 6 Turn on high beam headlights and heater blower If voltage is 12 5 to 15 2 the regulator is okay motor to high speed run engine at or above 1500 rpm If voltage is not within 12 5 to 15 2 volts leave for a few minutes if necessary and read the voltage engine running at 1500 rpm or above and on meter a Disconnect four terminal connector and remove NOTE Voltage Wm not greatly exceed 12 1 2 regulator cover Then re connect four terminal connector and adjust voltage to 14 2 to 14 6 volts until the battery develops a surface charge D t f t 1 Connector and reinstall a few minutes generally unless the battery is b lscomwc Our Hmm Severely discharged Or is hot regulator cover then reinstall connector c Continue running engine at 1500 rpm for 5 10 If reading is minutes to re establish regulator internal tem a 12 1 2 volts or more turn off electrical loads perature stop engine and proceed to Step 7 d Cycle regulator voltage by disconnecting and re b Less than 12 1 2 volts perform Delcotron Out connecting regulator connector Read voltage put Test A reading between 12 5 and 15 2 indicates a good 1 Delcotron tests bad refer to Service Op regulator g g rgrr rrd rrrrrr Drrrrrrr rrrr rrrrrt eaunett Ba sure four terminal regulator 2 Dellcotron tests good disconnect regulator stalling cover This is to prevent regulator COIIl l9CtOI remove regulator COVBT Qllld I connect the connector Then repeat Step 6 and turn voltage adjusting screw fig to raise setting to 12 1 2 volts On transistor regu lator remove pipe plug fig insert screw VOLTAGE REGULATOR driver into slot and turn clockwise one or two notches to increase setting Turning coun The voltage regulator used on air conditioned models terclockwise decreases setting For each incorporates an internal field discharge diode in the field notch moved the voltage setting will change circuit eliminating the special wiring harness used on approximately 3 volt Turn off loads stop previous models A wiring diagram of the internal cir engine and proceed to Step 7 If 12 1 2 volts cuitry is shovsm in Figure 2 This regulator will be used cannot be obtained install a new regulator and to service both double contact regulator models currently repeat Step 6 released CORVAIR SHOP MANUAL SUPPLEMENT

 Next
Next