Jeep Parts Wiki | Ford Parts Wiki
Home | Search | Browse | Marketplace | Messages | FAQ | Guest
Prev
 Next
Next
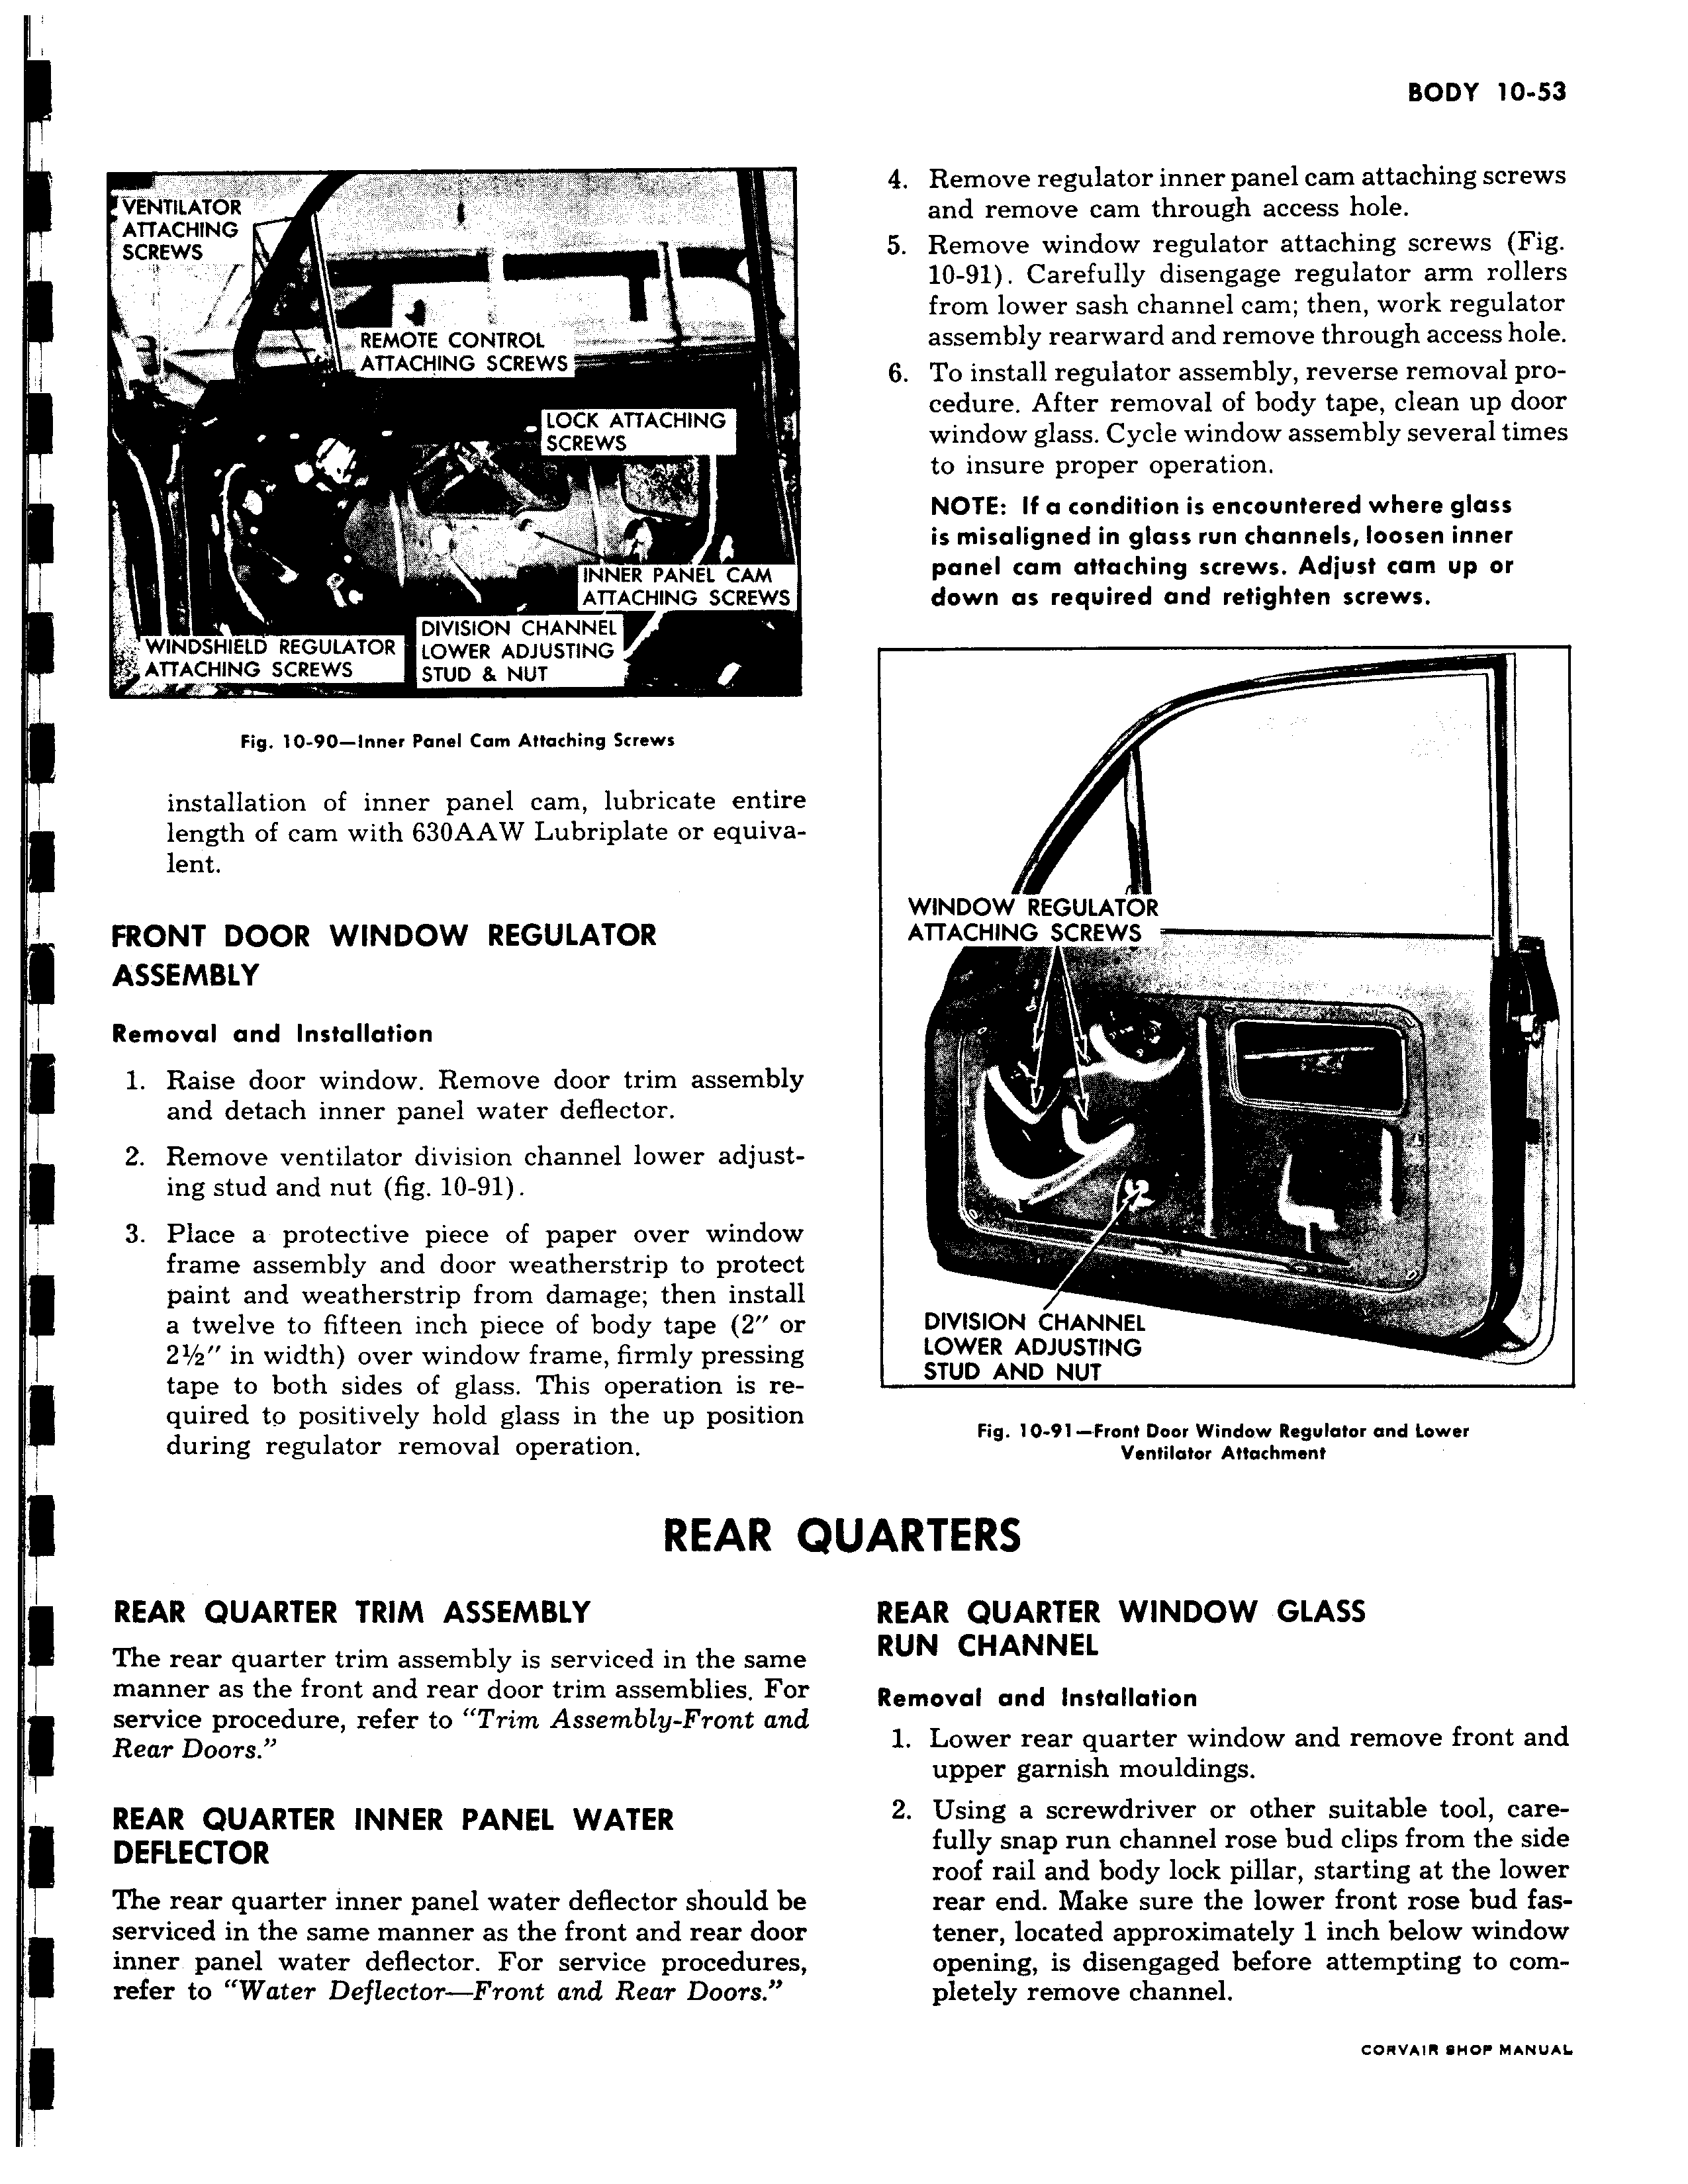
VENTILATOR ATTACHING SCREWS REMOTE CONTROL ATTACHING SCREWS LOCK ATTACHING SCREWS INNER PANEL CAM ATTACHING SCREWS WINDSHIELD REGULATOR DIVISION CHANNE LOWER ADJUSTING ATTACHING SCREWS STUD 8 NUT Fig 10 90 Inner Panel Cam Attaching Screws installation of inner panel cam lubricate entire length of cam with 630AAW Lubriplate or equivalent FRONT DOOR WINDOW REGULATOR ASSEMBLY Removal and Installation l Raise door window Remove door trim assembly and detach inner panel water deflector 2 Remove ventilator division channel lower adjusting stud and nut fig 10 91 3 Place a protective piece of paper over window frame assembly and door weatherstrip to protect paint and weatherstrip from damage then install a twelve to fifteen inch piece of body tape 2 or 21 2 in width over window frame firmly pressing tape to both sides of glass This operation is required to positively hold glass in the up position during regulator removal operation REAR REAR QUARTER TRIM ASSEMBLY The rear quarter trim assembly is serviced in the same manner as the front and rear door trim assemblies Fol service procedure refer to Trim Assembly Front ana ii Rear Doors REAR QUARTER INNER PANEL WATER DEFLECTOR The rear quarter inner panel water deflector should be I serviced in the same manner as the front and rear door inner panel water deflector For service procedures refer to Water Deflector Front and Rear Doors 4 Remove regulator inner panel cam attaching screws and remove cam through access hole 5 Remove window regulator attaching screws Fig 10 91 Carefully disengage regulator arm rollers from lower sash channel cam then work regulator assembly rearward and remove through access hole 6 To install regulator assembly reverse removal procedure After removal of body tape clean up door window glass Cycle window assembly several times to insure proper operation NOTE If a condition is encountered where glass is misaligned in glass run channels loosen inner panel cam attaching screws Adjust cam up or down as required and retighten screws WINDOW REGULATOR ATTACHING SCREWS i r q 9 l DIVISION CHANNEL LOWER ADJUSTING STUD AND NUT Fig 10 91 Front Door Window Regulator and Lower Ventilator Attachment WARTERS REAR QUARTER WINDOW GLASS RUN CHANNEL Removal and Installation 1 Lower rear quarter window and remove front and upper garnish mouldings 2 Using a screwdriver or other suitable tool carefully snap run channel rose bud clips from the side roof rail and body lock pillar starting at the lower rear end Make sure the lower front rose bud fastener located approximately 1 inch below window opening is disengaged before attempting to completely remove channel CORVAIReHOP MANUAL