Jeep Parts Wiki | Ford Parts Wiki
Home | Search | Browse
Prev

 Next
Next
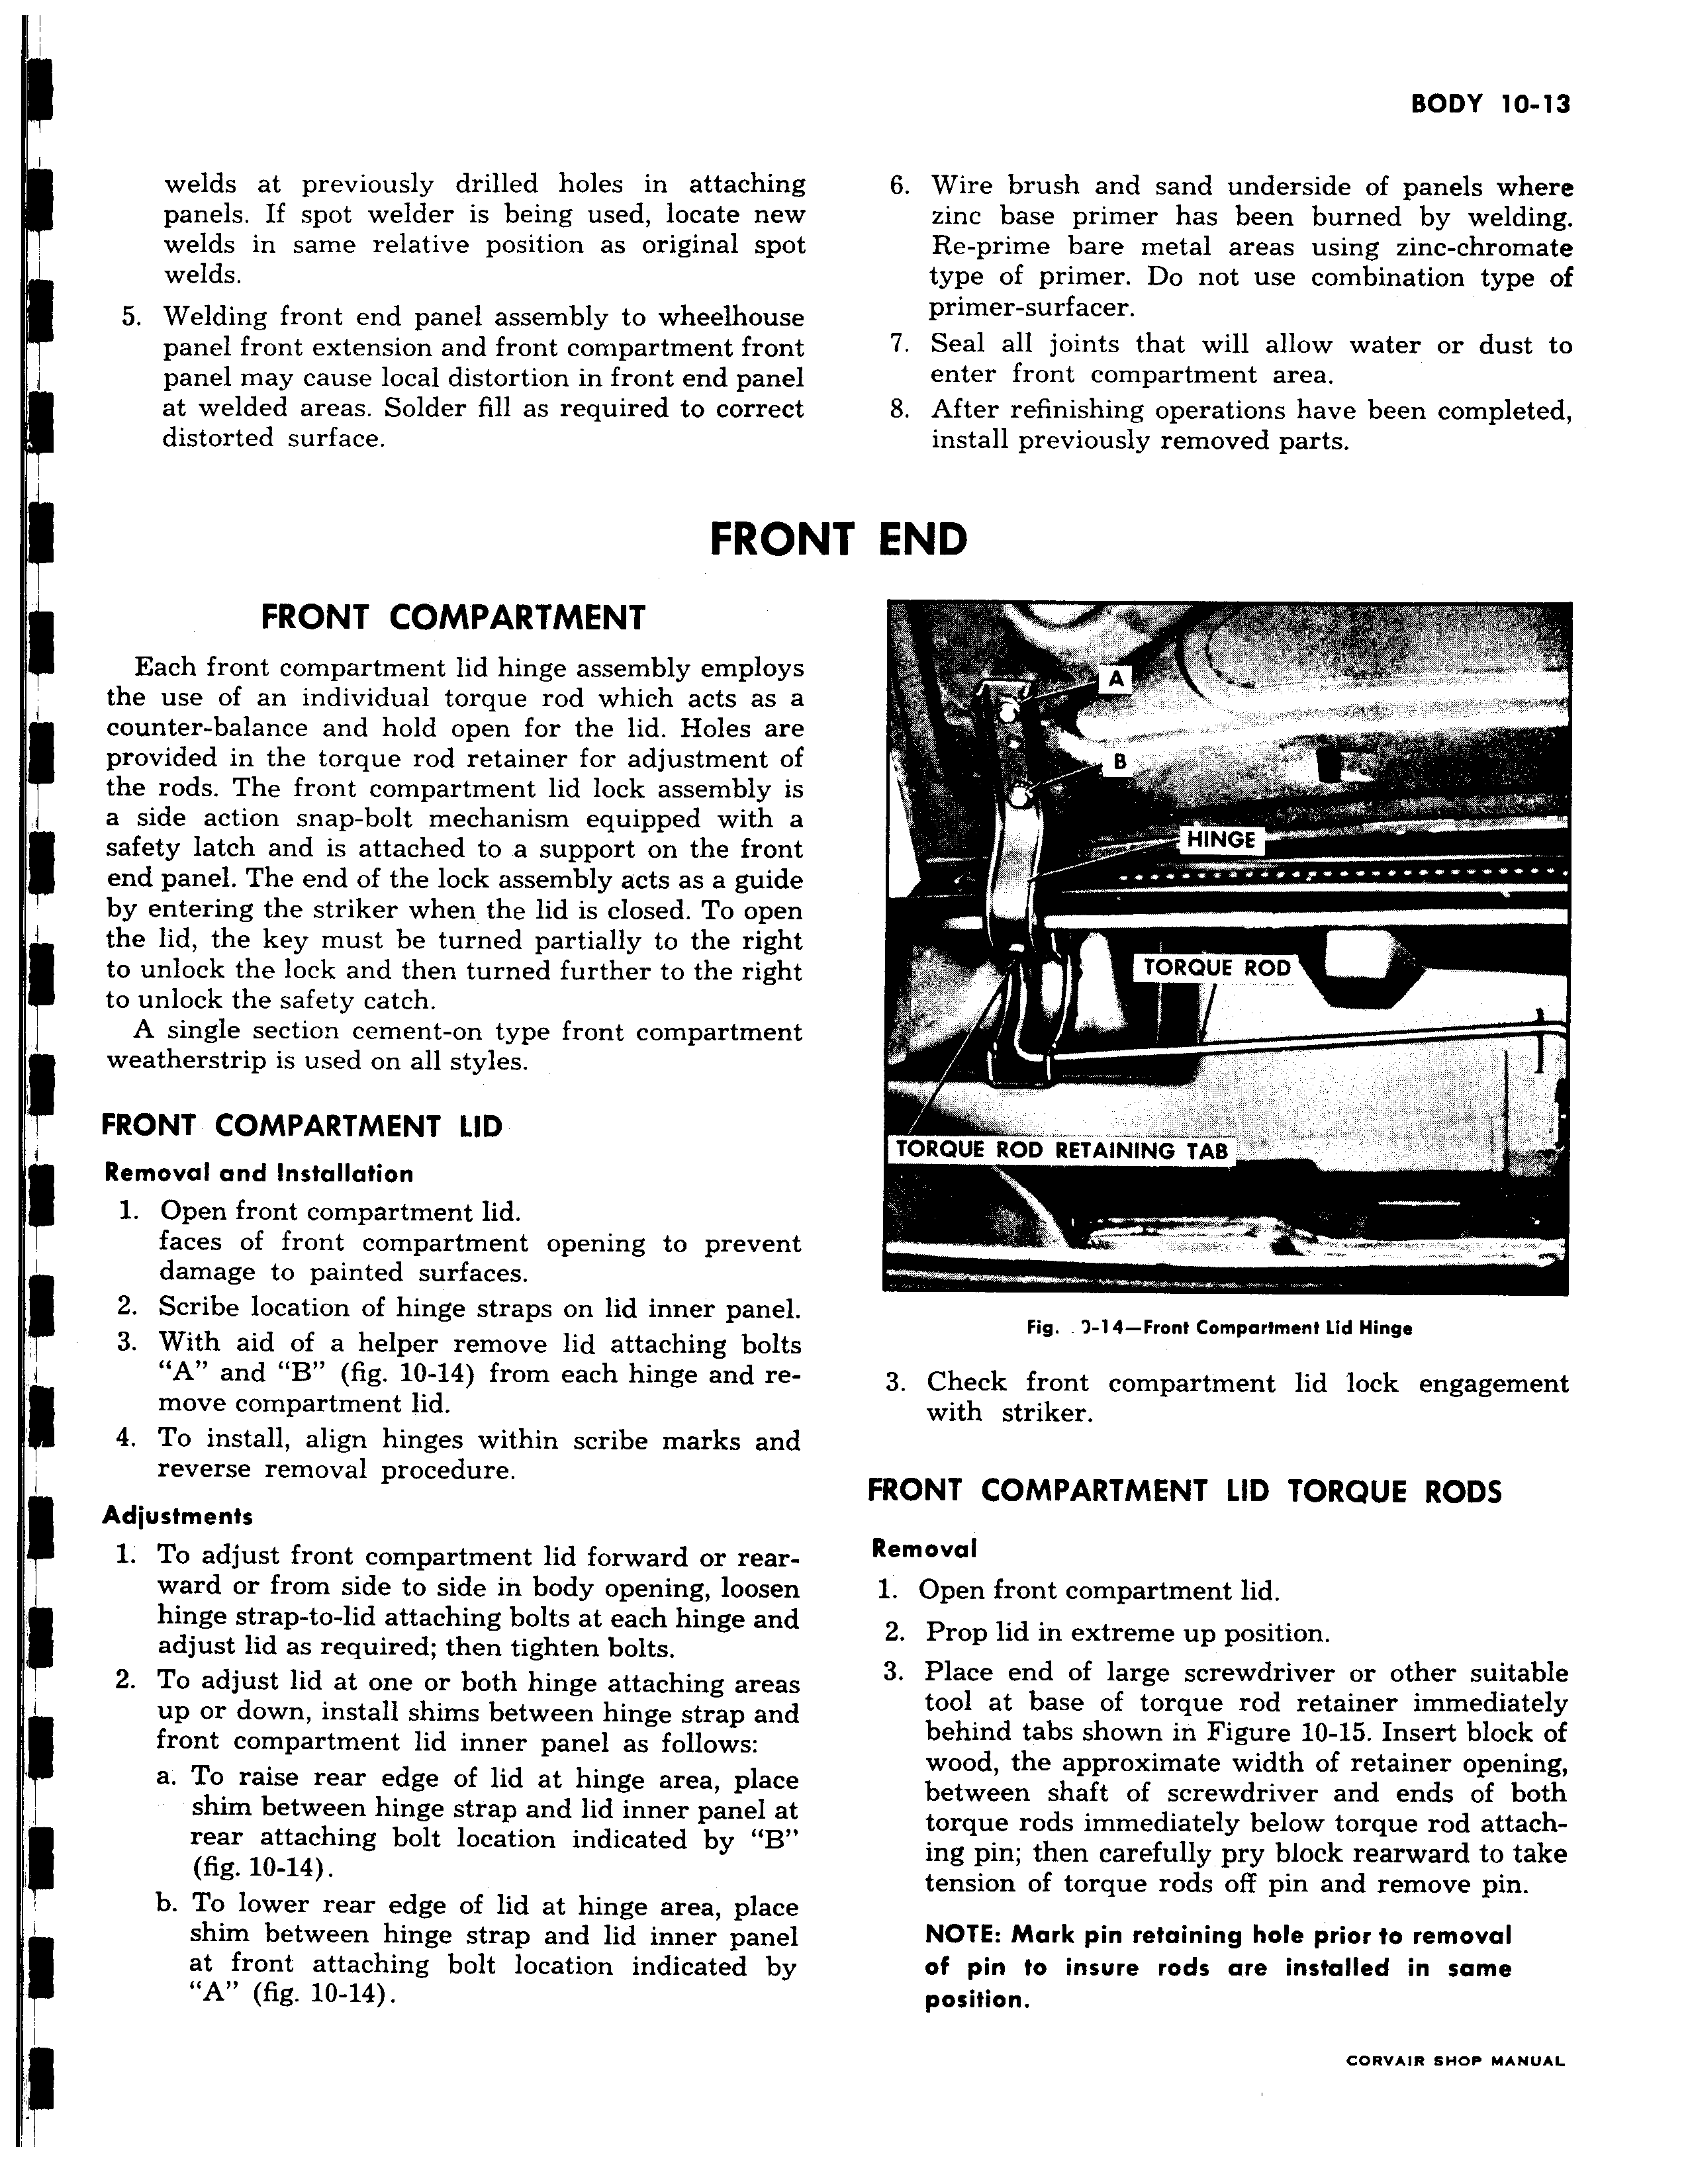
welds at previously drilled holes in attaching panels If spot welder is being used locate new welds in same relative position as original spot welds 5 Welding front end panel assembly to wheelhouse panel front extension and front compartment front panel may cause local distortion in front end panel at welded areas Solder fill as required to correct distorted surface FROI FRONT COMPARTMENT Each front compartment lid hinge assembly employs the use of an individual torque rod which acts as a counter balance and hold open for the lid Holes are provided in the torque rod retainer for adjustment of the rods The front compartment lid lock assembly is a side action snap bolt mechanism equipped with a safety latch and is attached to a support on the front end panel The end of the lock assembly acts as a guide by entering the striker when the lid is closed To open the lid the key must be turned partially to the right to unlock the lock and then turned further to the right to unlock the safety catch A single section cement on type front compartment weatherstrip is used on all styles FRONT COMPARTMENT LID Removal and Installation 1 Open front compartment lid faces of front compartment opening to prevent damage to painted surfaces 2 Scribe location of hinge straps on lid inner panel 3 With aid of a helper remove lid attaching bolts A and B fig 10 14 from each hinge and remove compartment lid 4 To install align hinges within scribe marks and reverse removal procedure Adjustments 1 To adjust front compartment lid forward or rearward or from side to side in body opening loosen hinge strap to lid attaching bolts at each hinge and adjust lid as required then tighten bolts 2 To adjust lid at one or both hinge attaching areas up or down install shims between hinge strap and front compartment lid inner panel as follows a To raise rear edge of lid at hinge area place shim between hinge strap and lid inner panel at rear attaching bolt location indicated by B fig 10 14 b To lower rear edge of lid at hinge area place shim between hinge strap and lid inner panel at front attaching bolt location indicated by A fig 10 14 6 Wire brush and sand underside of panels where zinc base primer has been burned by welding Re prime bare metal areas using zinc chromate type of primer Do not use combination type of primer surfacer 7 Seal all joints that will allow water or dust to enter front compartment area 8 After refinishing operations have been completed install previously removed parts VT END t wlli HINGE TOROUE ROD TOROUE ROD RETAINING TAB Fig 9 14 Front Compartment Lid Hinge 3 Check front compartment lid lock engagement with striker FRONT COMPARTMENT LID TORQUE RODS Removal 1 Open front compartment lid 2 Prop lid in extreme up position 3 Place end of large screwdriver or other suitable tool at base of torque rod retainer immediately behind tabs shown in Figure 10 15 Insert block of wood the approximate width of retainer opening between shaft of screwdriver and ends of both torque rods immediately below torque rod attaching pin then carefully pry block rearward to take tension of torque rods off pin and remove pin NOTE Mark pin retaining hole prior to removal of pin to insure rods are installed in same position

 Next
Next