Jeep Parts Wiki | Ford Parts Wiki
Home | Search | Browse
Prev
 Next
Next
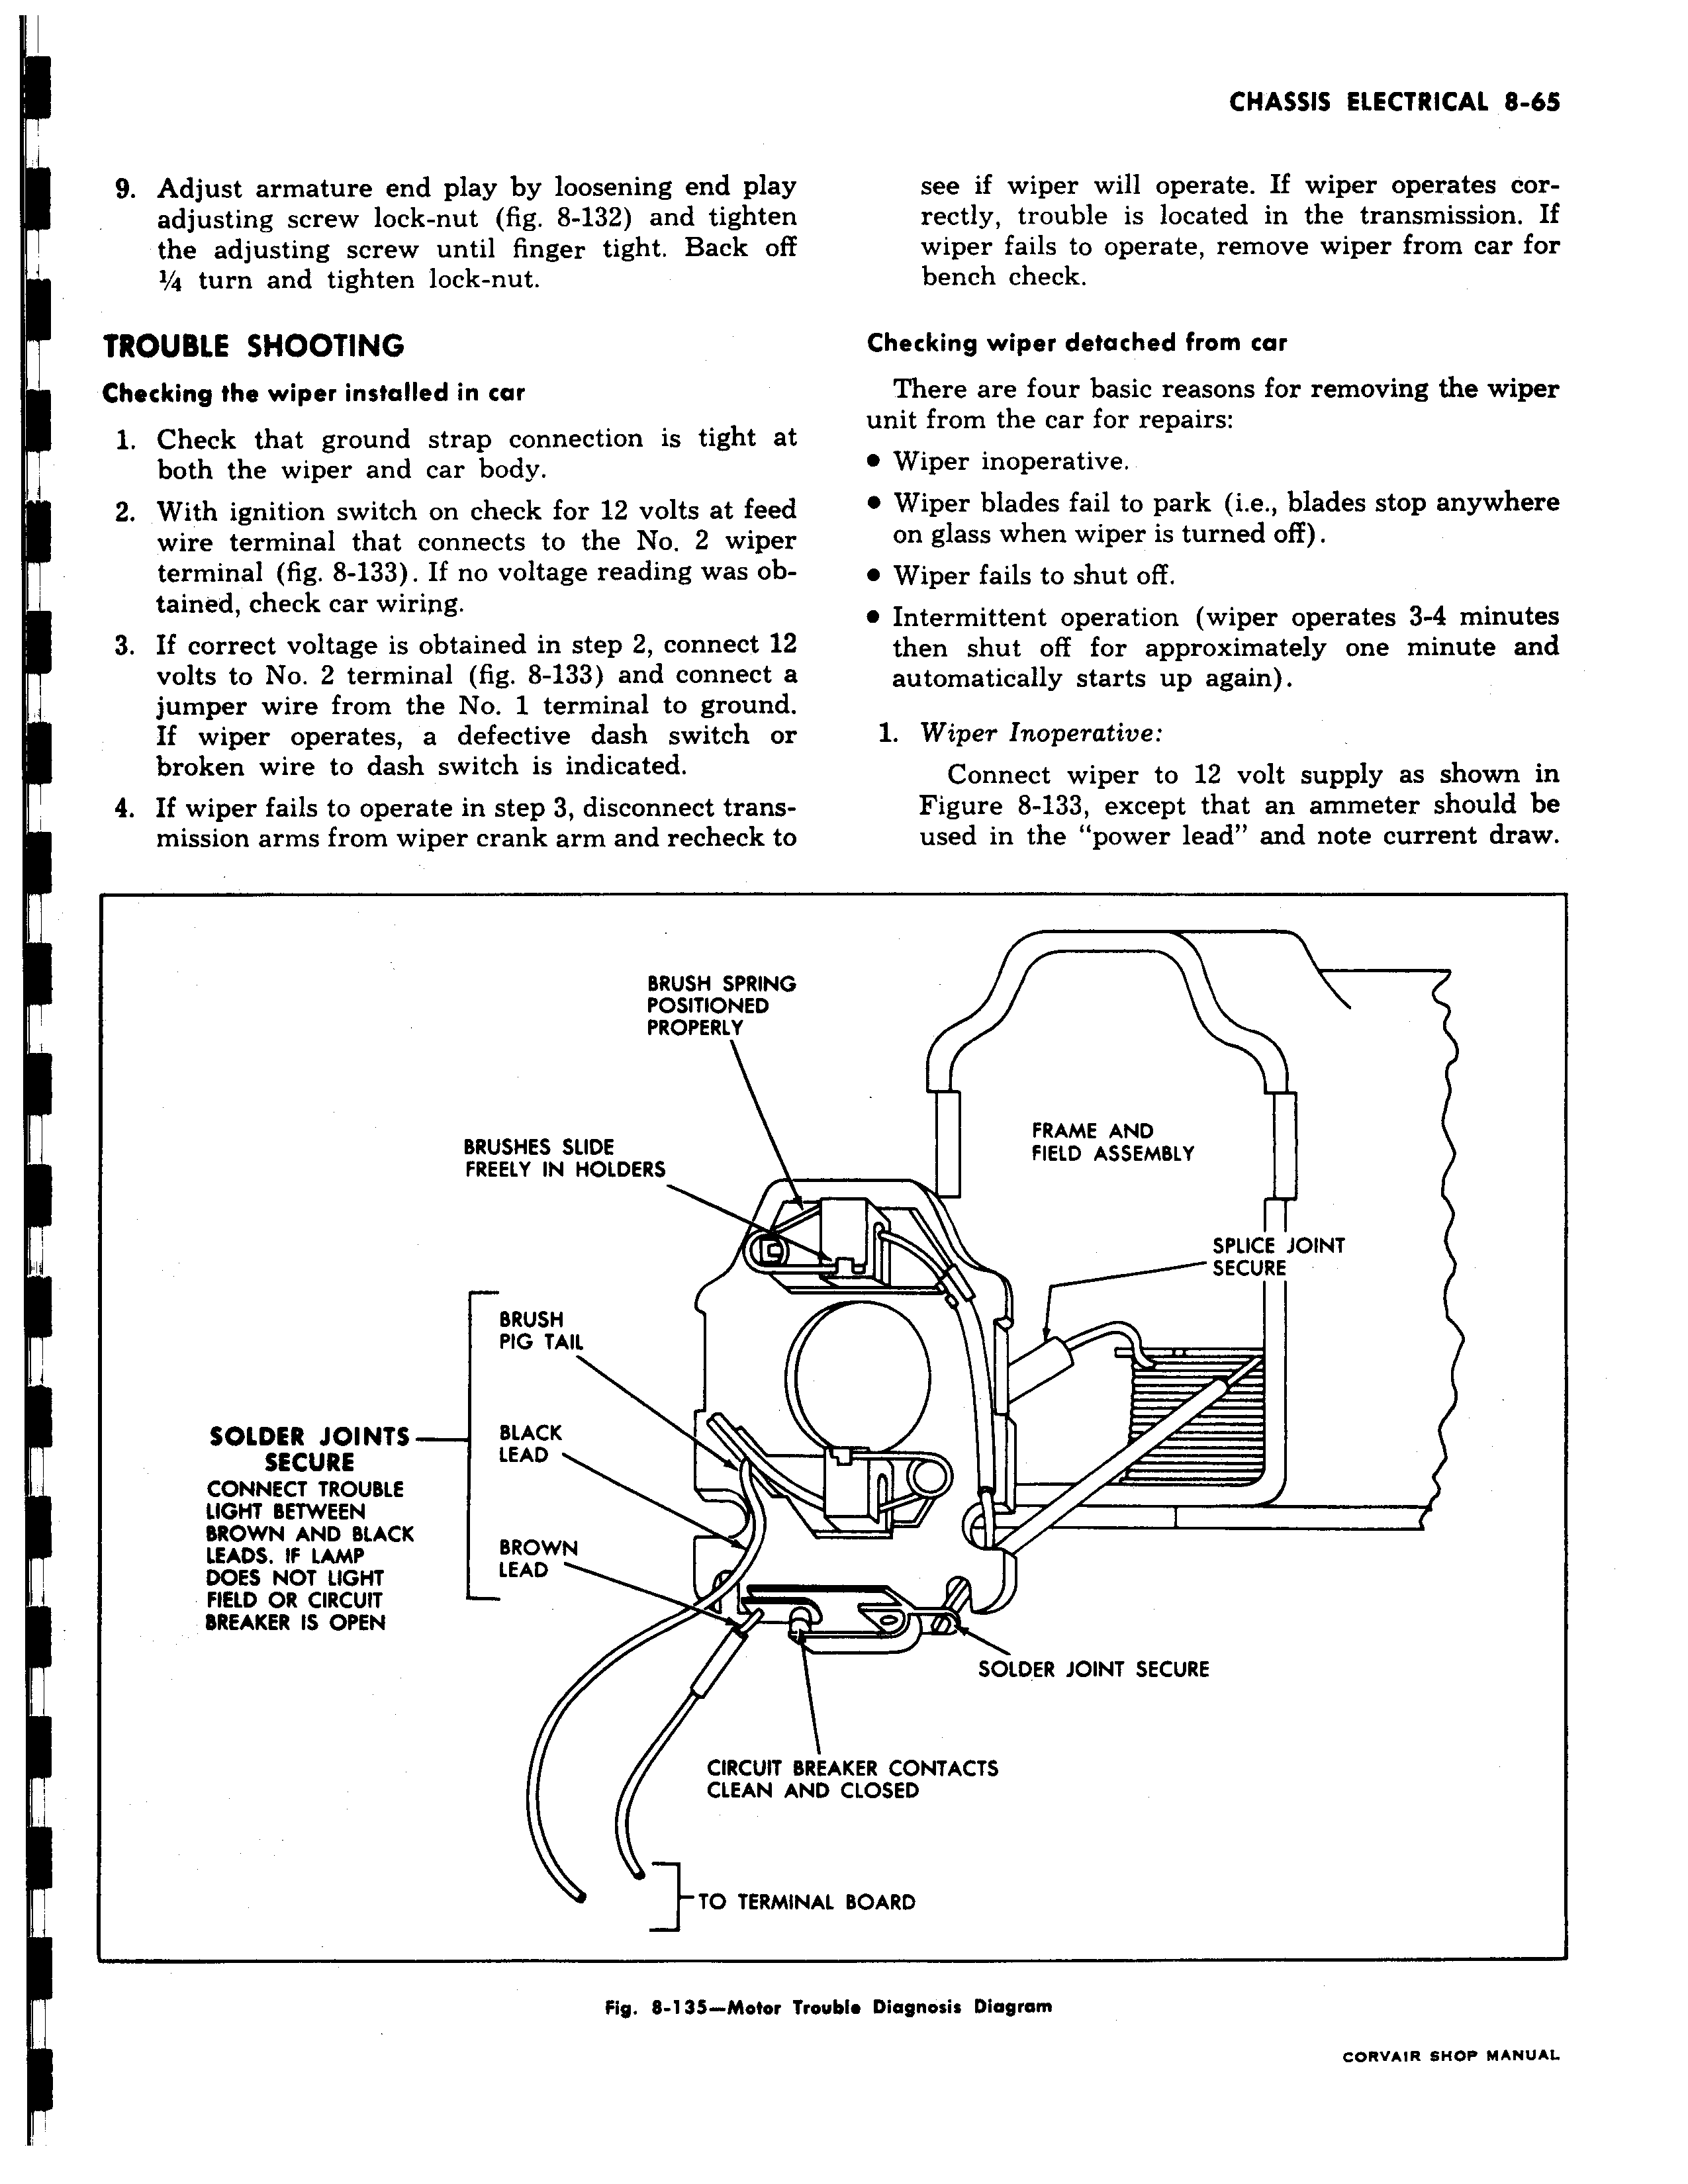
9 Adjust armature end play by loosening end play adjusting screw lock nut fig 8 132 and tighten the adjusting screw until finger tight Back off I I 4 turn and tighten lock nut TROUBLE SHOOTING Checking the wiper installed in car 1 Check that ground strap connection is tight at both the wiper and car body 2 With ignition switch on check for 12 volts at feed wire terminal that connects to the No 2 wiper terminal fig 8 133 If no voltage reading was obtained check car wiring 3 If correct voltage is obtained in step 2 connect 12 volts to No 2 terminal fig 8 133 and connect a jumper wire from the No 1 terminal to ground If wiper operates a defective dash switch or broken wire to dash switch is indicated 4 If wiper fails to operate in step 3 disconnect transmission arms from wiper crank arm and recheck to BRUSH SPRING POSITIONED PROPERLY BRUSHES SLIDE FREELY IN HOLDERS BRUSH PIG TAIL I SOLDER JOINTS BLACK SECURE LEAD CONNECT TROUBLE LIGHT BETWEEN BROWN AND BLACK LEADS If LAMP BROWN LEAD DOES NOT LIGHT FIELD OR CIRCUIT BREAKER IS OPEN 1 CIRCUIT B CLEAN AI TO TERMfF Fig 8 135 Motor T operate rectly trouble is located in the transmission If wiper fails to operate remove wiper from car for bench Checking wiper detached from car removing the Wiper inoperative r blades fail to park i e blades stop anywhere on glass when wiper is turned off Wiper fails to shut off Intermittent operation wiper operates 3 4 minutes then shut off for approximately one minute and automatically starts up again 1 Wiper Inoperative Connect wiper to 12 volt supply as shown in Figure should be used in the power lead and note current draw FRAME AND FIELD ASSEMBLY 0 SPLICE JOINT SECURE oublis Diagnosis Diagram