Jeep Parts Wiki | Ford Parts Wiki
Home | Search | Browse
|
Body Service Manual August 1964 |
|
Prev

 Next
Next
111211
111211
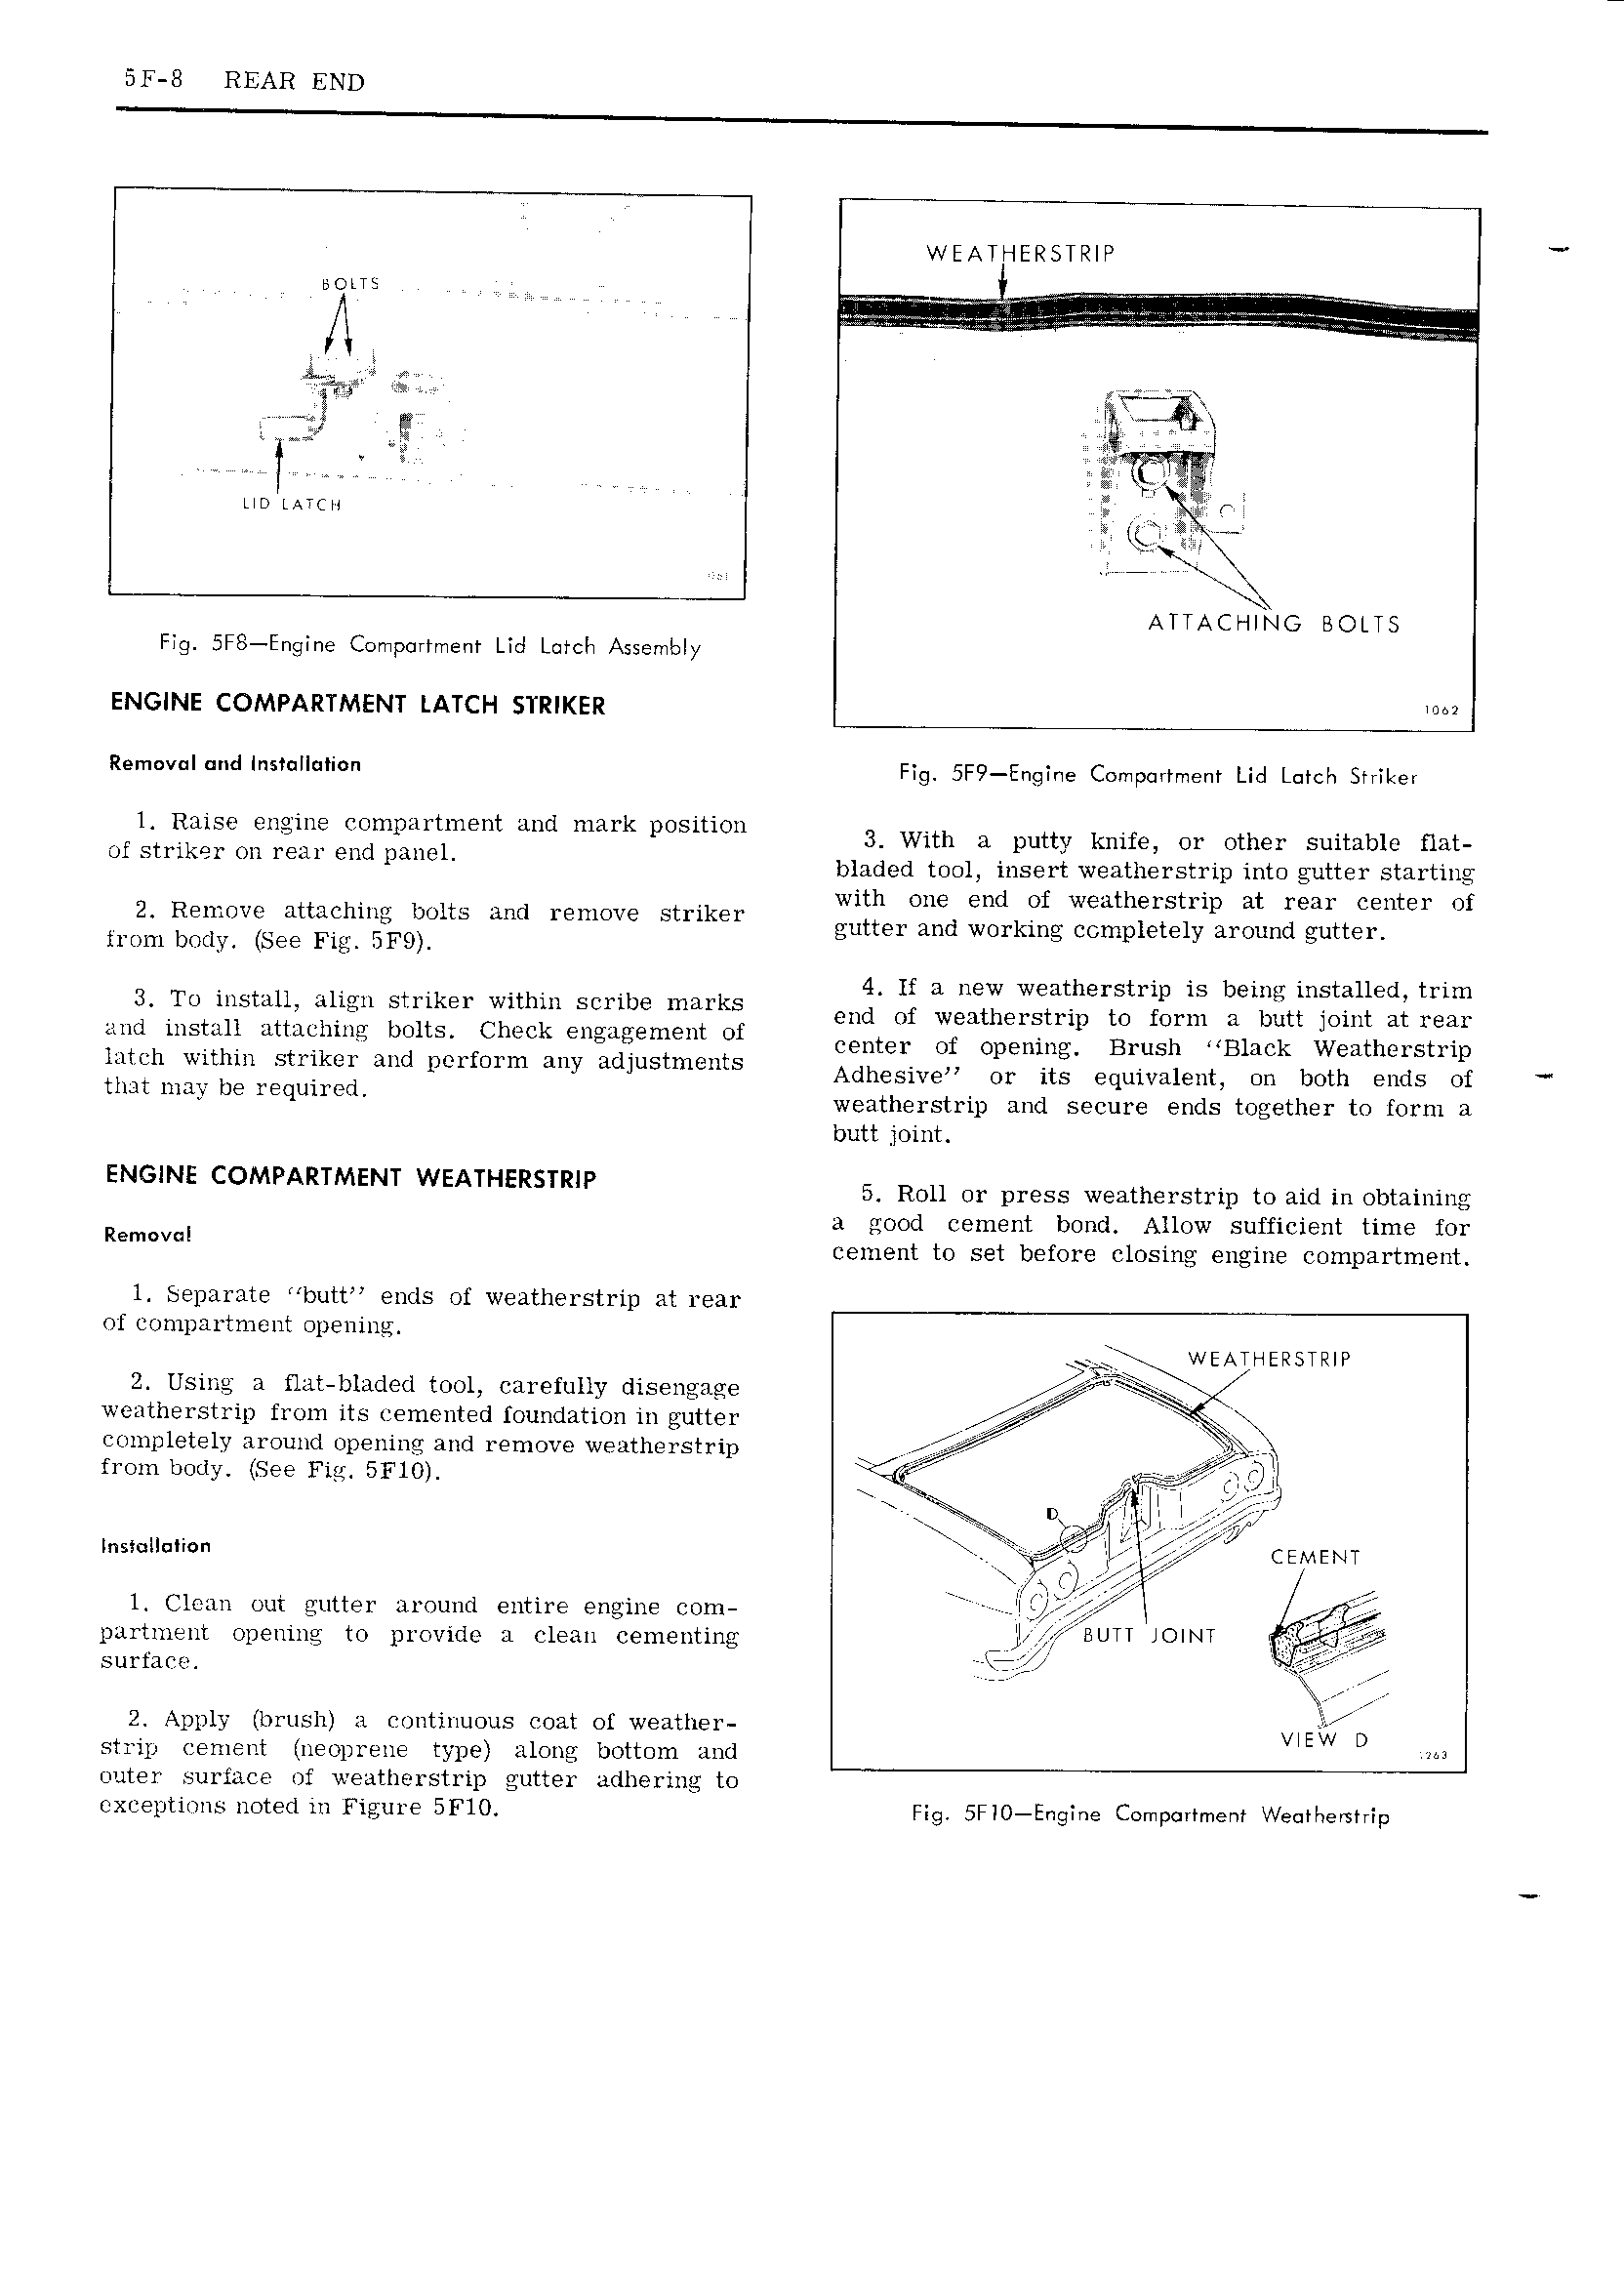
5F 3 REAR END WEATHERSTRIP BOLT5 A m r T A Et aa w two imcn I sq Q ATTACHING BOLTS Fig 5F8 Engine Compartment Lid Lotcti Assembly ENGINE COMPARTMENT LATCH STRIKER mm Rem v d 5t ti Fig 5F9 Engine Componmem Lid Lutch Snikei l Raise engine r ompartnient and mark position 3 with 3 putt knife Or other suitable fmt Jf Stllkql on lem Bud panel bladed tool insert weatherstrip into gutter starting 1 l M A I V with one end of weatherstrip at rear center of 2 R9u U Mm mtg do Am mmme b U el gutter and working completely around gutter from body See 5F9 F I yr 4 V 1 l K 4 If a new weatherstrip is being installed trim 3 T 111 1 1 1 111211 1111 21 1 1 1 S 11 1 1 end of Waiiimii ip to form 11 me joint at mn aud install attaching bolts Check engagement of cemer Of Opening Brush B1 u k W Hthm St1 ip latch within striker and perform any adjustments Adh siv n Or it equivalent UD both Buds Of mit UHF U6 lUU d wggthgl strip and secure ends together to f01 H1 H butt joint ENGINE COMPARTMENT WEATHERSTRIP 5 Roll or press weatherstrip to aid in obtaining I a good cement bond Allow sufficient time for RE V cement to set before closing engine compartment 1 Separate butt ends of weatherstrip at rear of compartment opening vQ wEAiF ERSTR P 2 Using a flat bladed tool carefully disengage weatherstrip from its cemented foundation in gutter f completely around opening and remove weatherstrip V from body See Fig 5FlO ifi it F sg i J 1 iti I r 5i 1 a it L IM cement l Clean out gutter around entire engine com rr lift rv purtnieni opening to provide a clean cenienting t1 BUTT JOWT gr T surfaee fire 2 Apply brush 1 continuous Goat of weather Ettv D strip cement neoprene type along bottom and 1 outer surface of weatherstrip gutter adhering to exrseptioiis noted iu Figure 5FlO Fig 5FiO Engine Componmem V euttverstrip

 Next
Next