Jeep Parts Wiki | Ford Parts Wiki
Home | Search | Browse | Marketplace | Messages | FAQ | Guest
|
Body Service Manual August 1964 |
|
Prev

 Next
Next
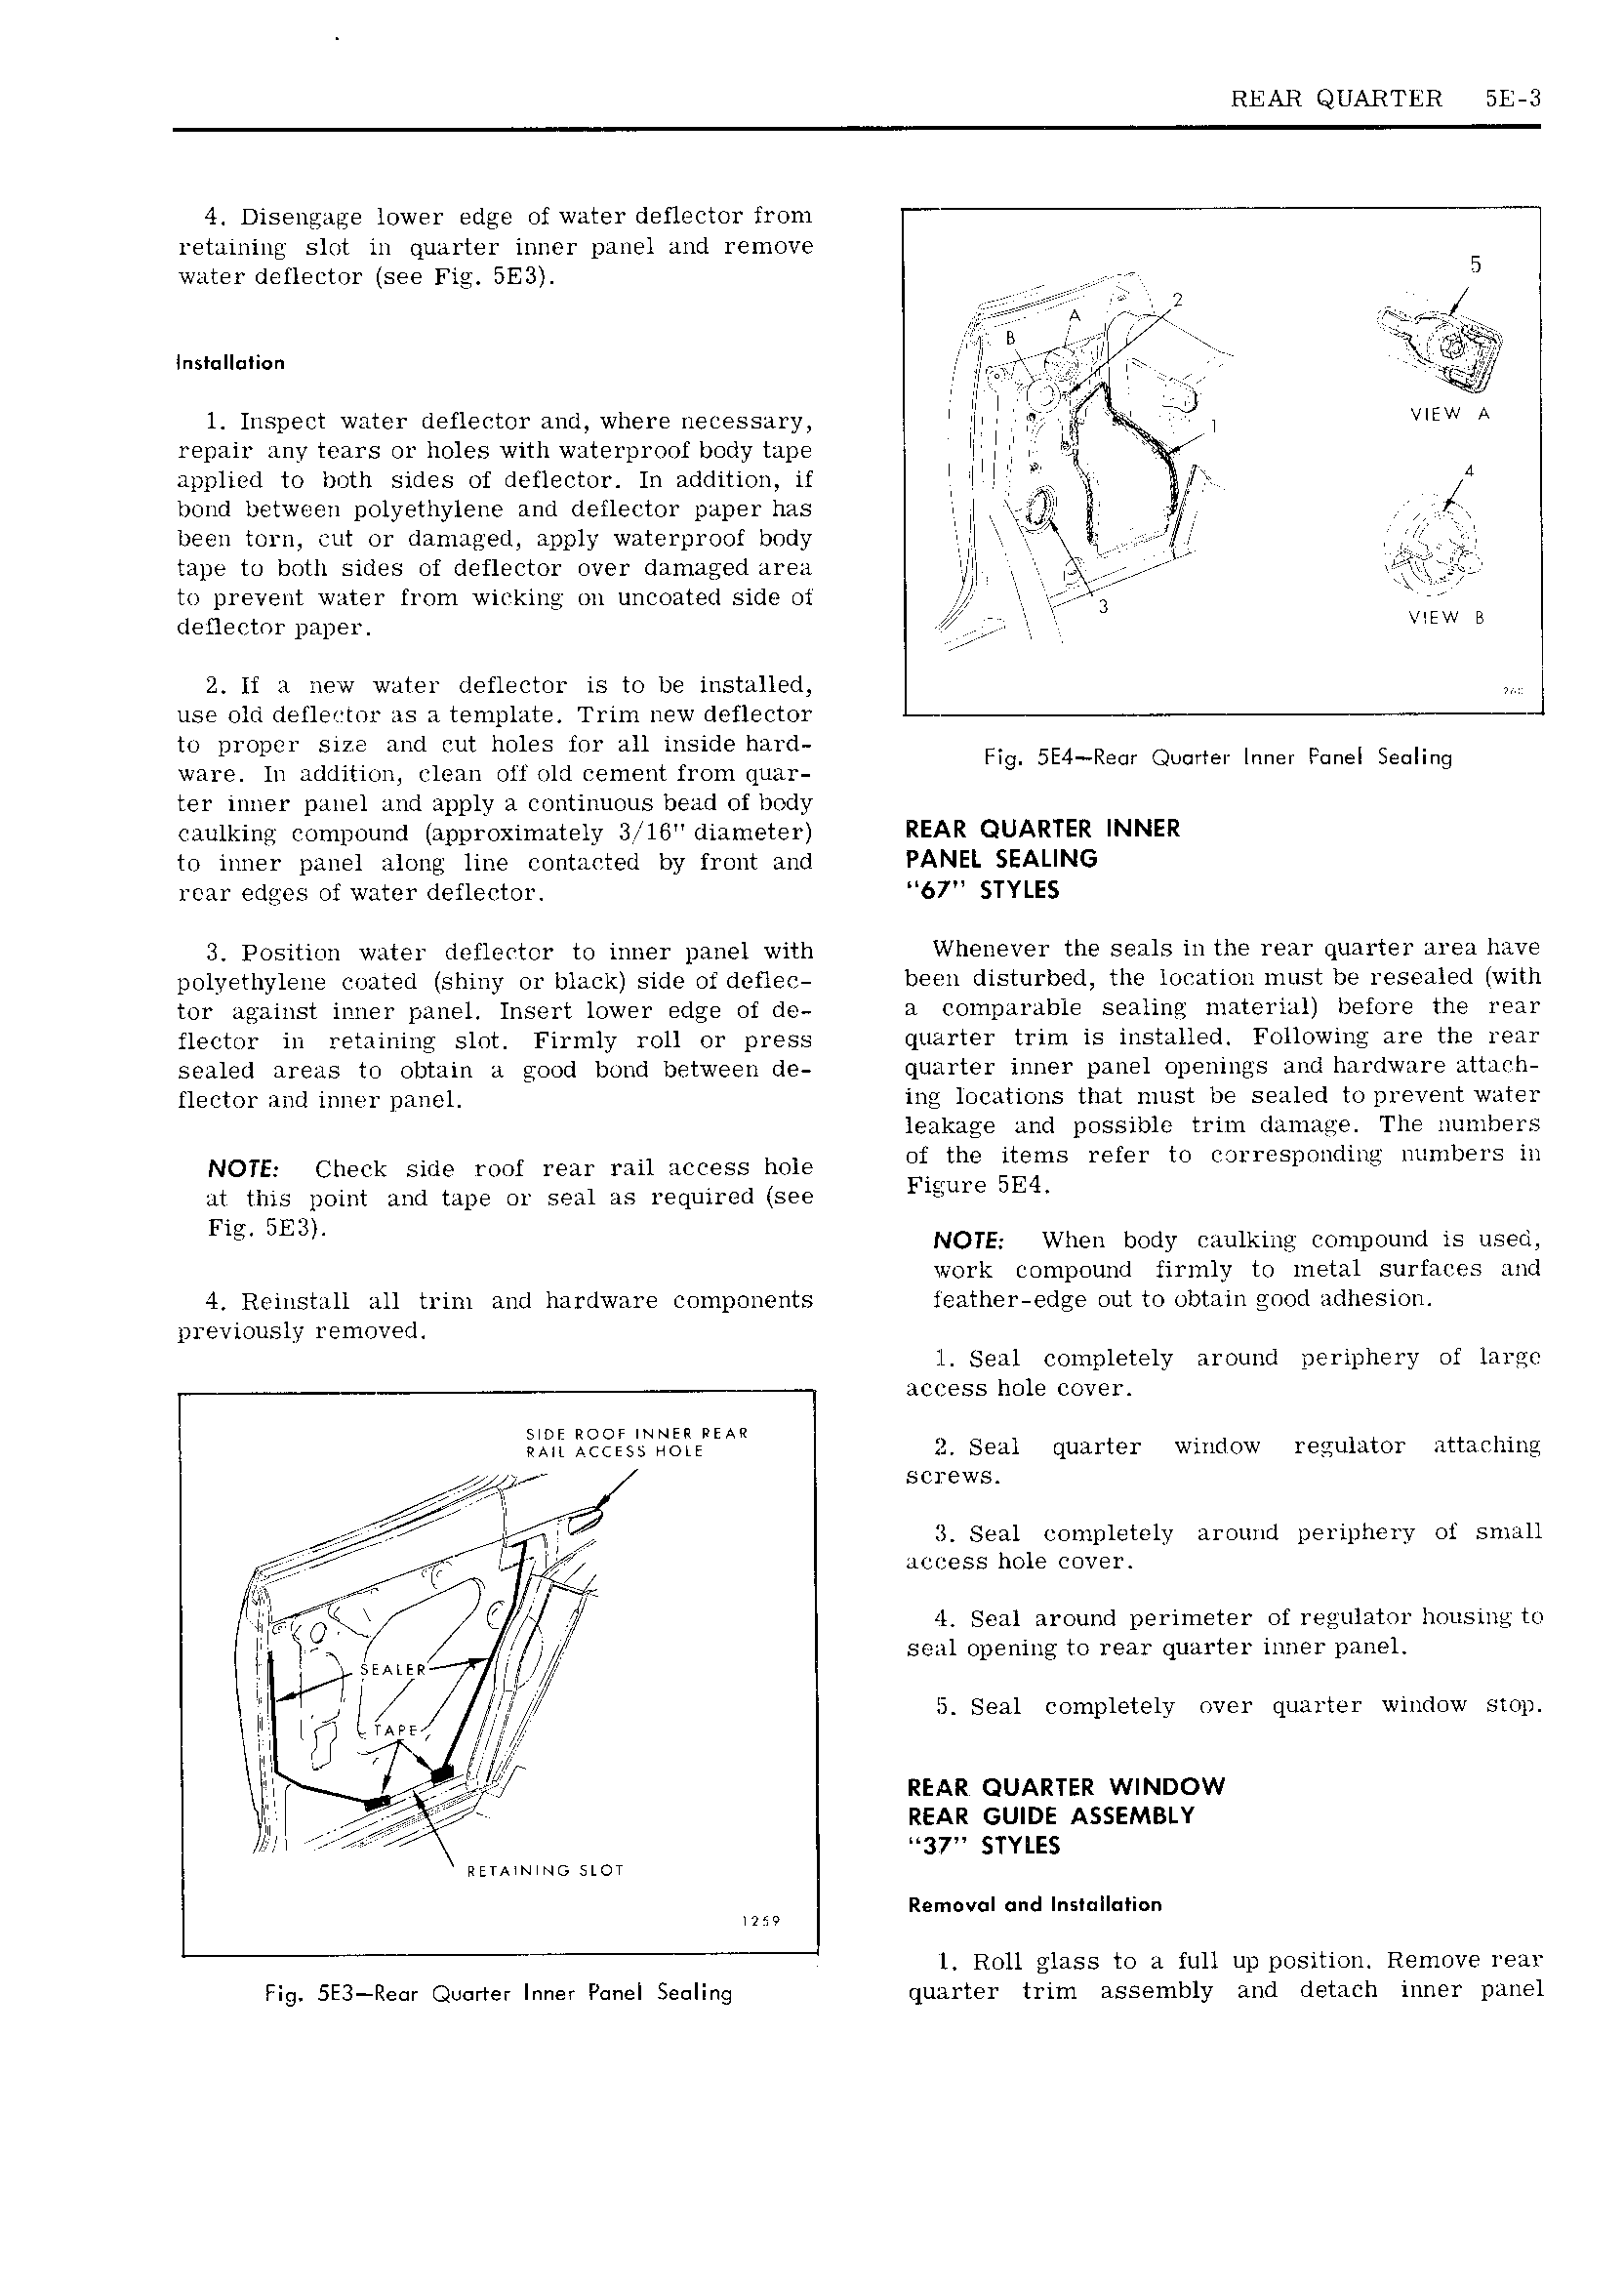
REAR QUARTER SE 3 4 Disengage lower edge of water defleetor from retaining slot in quarter inner panel and remove water deflector see 5E3 V 5 Alll Q I A II I s u a n xiii V 0 iprv I w 1 Inspect water defleetor and where necessary I III W i I TJ VIEW A repair any tears or holes with waterproof body tape II I I I tt applied to both sides of deflector In addition if I II I fist if V 7 I i N 1 bond between polyethylene and deileetor paper has I jJI I gf been torn out or damaged apply waterproof body I r II g tape to both sides of defleetor over damaged area I I I T i Q ii to prevent water from wicking on uncoated side ot 7 r I dellector paper 7 J VIEW B 2 It Ll new water deflector is to be installed ij use old deflev tor as a template Trim new deflector to proper size and rut holes for all inside hard ware In addition clean off old eement from quar FIg 5E4 R QUOTE Inner Fungi Seulmg ter inner panel and apply a continuous bead of body Caulking compound approximately 3 l6 diameter REAR QUARTER INNER to inner panel along line eontaeted by front and PANEL SEALING rear edges of water deflector 67 STYLES 3 Position water deflector to inner panel with Whenever the seals in the rear quarter area have polyethylene coated shiny or black side of deflee been disturbed the loeation must be resealed with tor against inner panel Insert lower edge oi de a Comparable sealing material before the rear flector in retaining slot Firmly roll or press quarter trim is installed Following are the rear sealed areas to obtain a good bond between de quarter inner panel openings and hardware attaeh fleetor and inner panel ing locations that must be sealed to prevent water leakage and possible trim damage The numbers NOTE Check SME mmf rear Yau access hole the items refer to on responding numbers in at this point and tape or seal as required see Flgure 5E4 Fig SE3 NOTE When body eaulking compound is useo work compound firmly to metal surfaees and 4 Reinstall all trim and hardware components ieather edge out to obtain good adhesion previously removed II Seal completely around periphery of large access hole cover SIDE ROOFINNER PEAR mn Access More 2 Seal quarter window regulator attaehing 2 V screws o rr V I2 II Seal completely around periphery of small bij ig I M a ess hole cover ICA A I tie i 4 Seal around perimeter of regulator housing to I II gy 1MH M I seal opening to rear quarter inner panel NI gji PE En Seal completely over quarter window stop I2 il ef IW f 3 w REAR QUARTER wmnow I REAR Gurus ASSEMBLY II I 37 STYLES RETAtNIr IG SLOT ww Removal und InsI Il Ii n l Roll glass to a full up position Remove rear Fig 5E3 Re r Quarter Inner Panel Sealing quarter trim assembly and detach inner panel

 Next
Next