Jeep Parts Wiki | Ford Parts Wiki
Home | Search | Browse | Marketplace | Messages | FAQ | Guest
|
Body Service Manual August 1964 |
|
Prev

 Next
Next
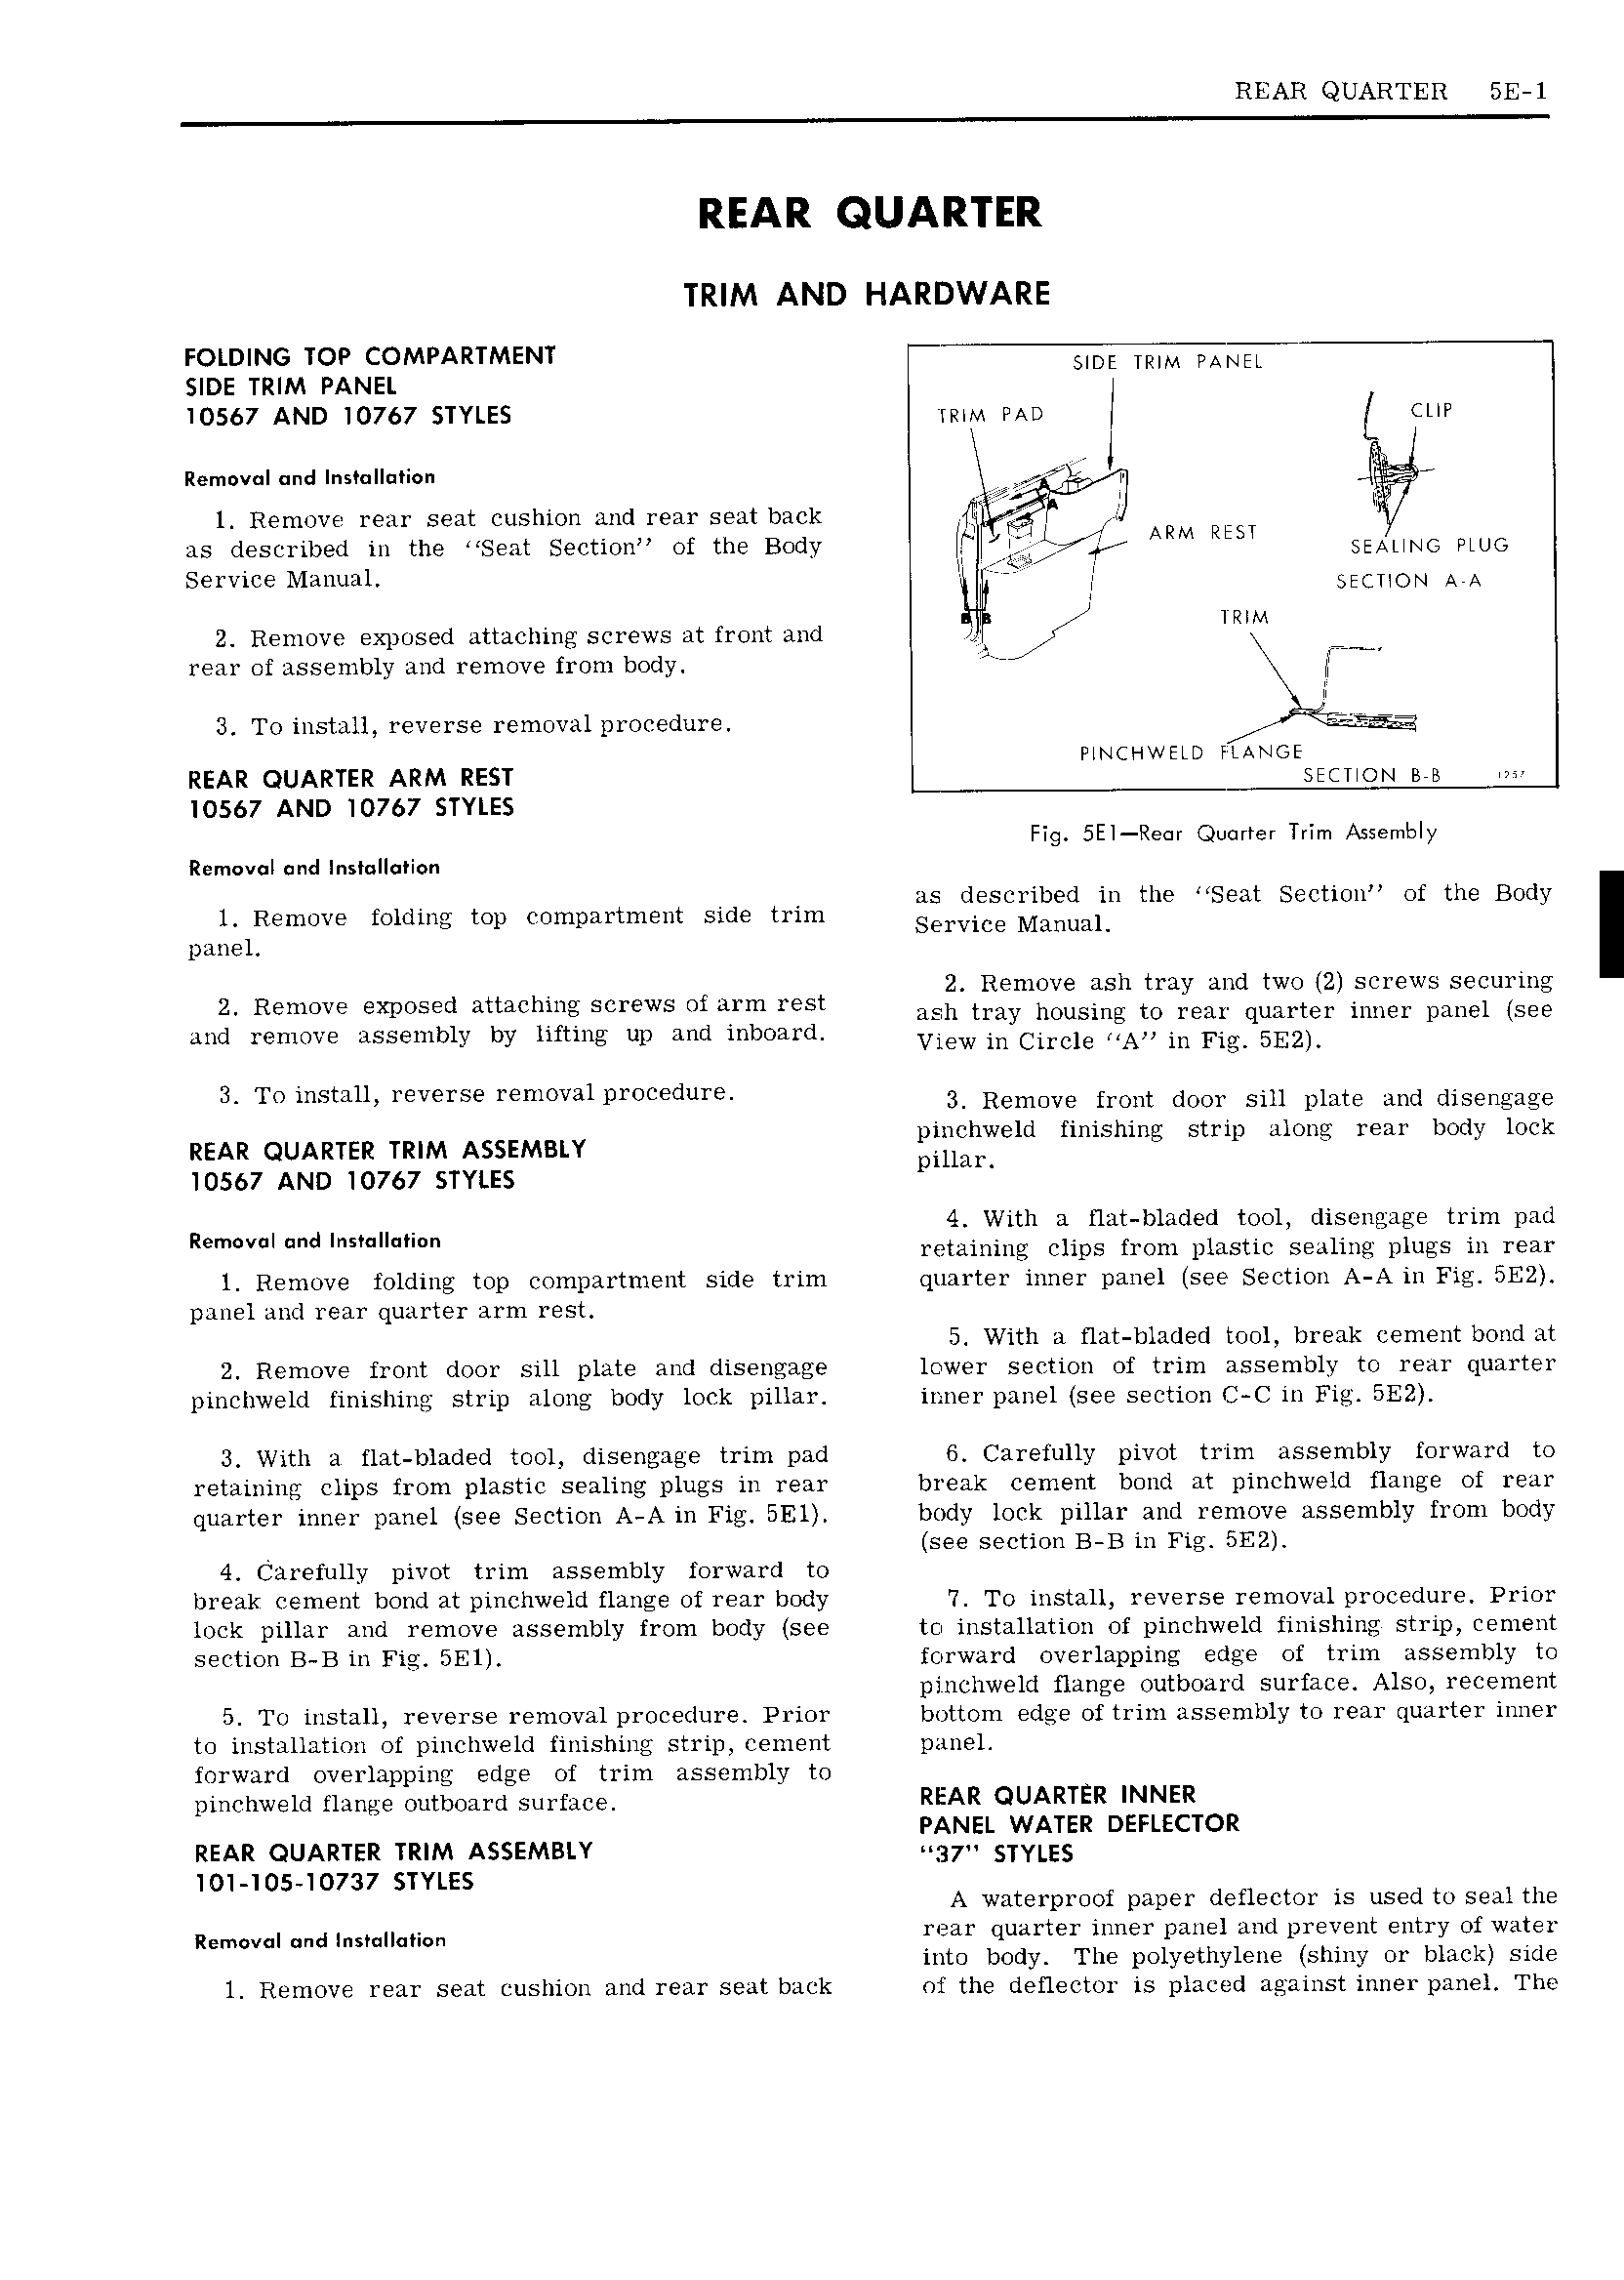
REAR QUARTER 5E 1 REAR QUARTER TRIM AND HARDWARE FOLDING TOP COMPARTMENT SIDE TRIM PANEL 10567 AND 10767 STYLES mm Mo l cine Removal and Installation ly 44 1 Remove rear seat cushion and rear seat back ji ll as described in the Seat Section of the Body li l jil V ARM Rig SEAUNG moo Service Manual RJ SECUON AVA lRlM 2 Remove exposed attaching screws at front and v A Z rear of assembly and remove from body Arr l i 3 To install reverse removal procedure PTNCHWELD FGNGE REAR QUARTER ARM REST section sea I0567 AND I0767 STYLES Fig 5El Rear Quarter Trim Assembly Removal and Installation as described in the Seat Section of the Body 1 Remove folding top compartment side trim Service MMUHL panel 2 Remove ash tray and two 2 screws securing 2 Remow P S9 Mmchtug Screws Oi emu rest ash tray housing to rear quarter inner panel see and remove assembly by lifting up and inboard View in Circle NAM in SED 3 TO mSmu reverse removal procedure 3 Remove front door sill plate and disengage REAR QUARTER TRIM ASSEMBLY piplihwelcl finishing strip along rear body lock I0567 AND IO767 STYLES 1 L Rem v ndlns l i n 4 With a flat bladed tool disongage trim pad retaining clips from plastic sealing plugs in rear l Remove folding top compartment side trim quarter inner panel see Section A A in Fig 5E2 panel and rear quarter arm rest 5 With a flat bladed tool break cement bond at 2 Remove front door sill plate and disengage lower section of trim assembly to rear quarter pinchweld finishing strip along body lock pillar inner panel see section C C in BE2 3 With a flat bladed tool disengage trim pad 6 Carefully pivot trim assembly forward to retaining clips from plastic sealing plugs in rear break cement bond at pinchweld flange of rear quarter inner panel see Section A A in Fig 5El body lock pillar and remove assembly from body g see section B B in Fig SE2 4 Carefully pivot trim assembly forward to break cement bond at pinchweld flange of rear body 7 To install reverse removal procedure Prior lock pillar and remove assembly from body see to installation of pinchweld finishing strip cement section B B in 5El forward overlapping edge of trim assembly to pinchweld flange outboard surface Also recenient 5 To install reverse removal procedure Prior bottom edge of trim assembly to rear quarter inner to installation of pinchweld finishing strip cement panel forward overlapping edge of trim assembly to pinchweld flange outboard surface REAR QUARTER INNER PANEL WATER DEFLECTOR REAR QUARTER TRIM ASSEMBLY Mgyv STYLES I0 IO5 O737 STYLES A waterproof paper deflector is used to seal the Removal and lnsmllanon rear quarter inner panel and prevent entry of water into body The polyethylene shiny or black side 1 Remove rear seat cushion and rear seat back of the deflector is placed against inner panel The

 Next
Next